> ## Documentation Index
> Fetch the complete documentation index at: https://docs.boltz.bio/llms.txt
> Use this file to discover all available pages before exploring further.
# Creating Targets
> Define protein targets for binder design
## Overview
Targets are the protein structures you want to design binders against. You can define targets by entering sequences or uploading existing structure files.
## Creating a New Target
1. From your project dashboard, click **"+ Add target"** in the Targets section.
2. Enter a **Target Name** (required).
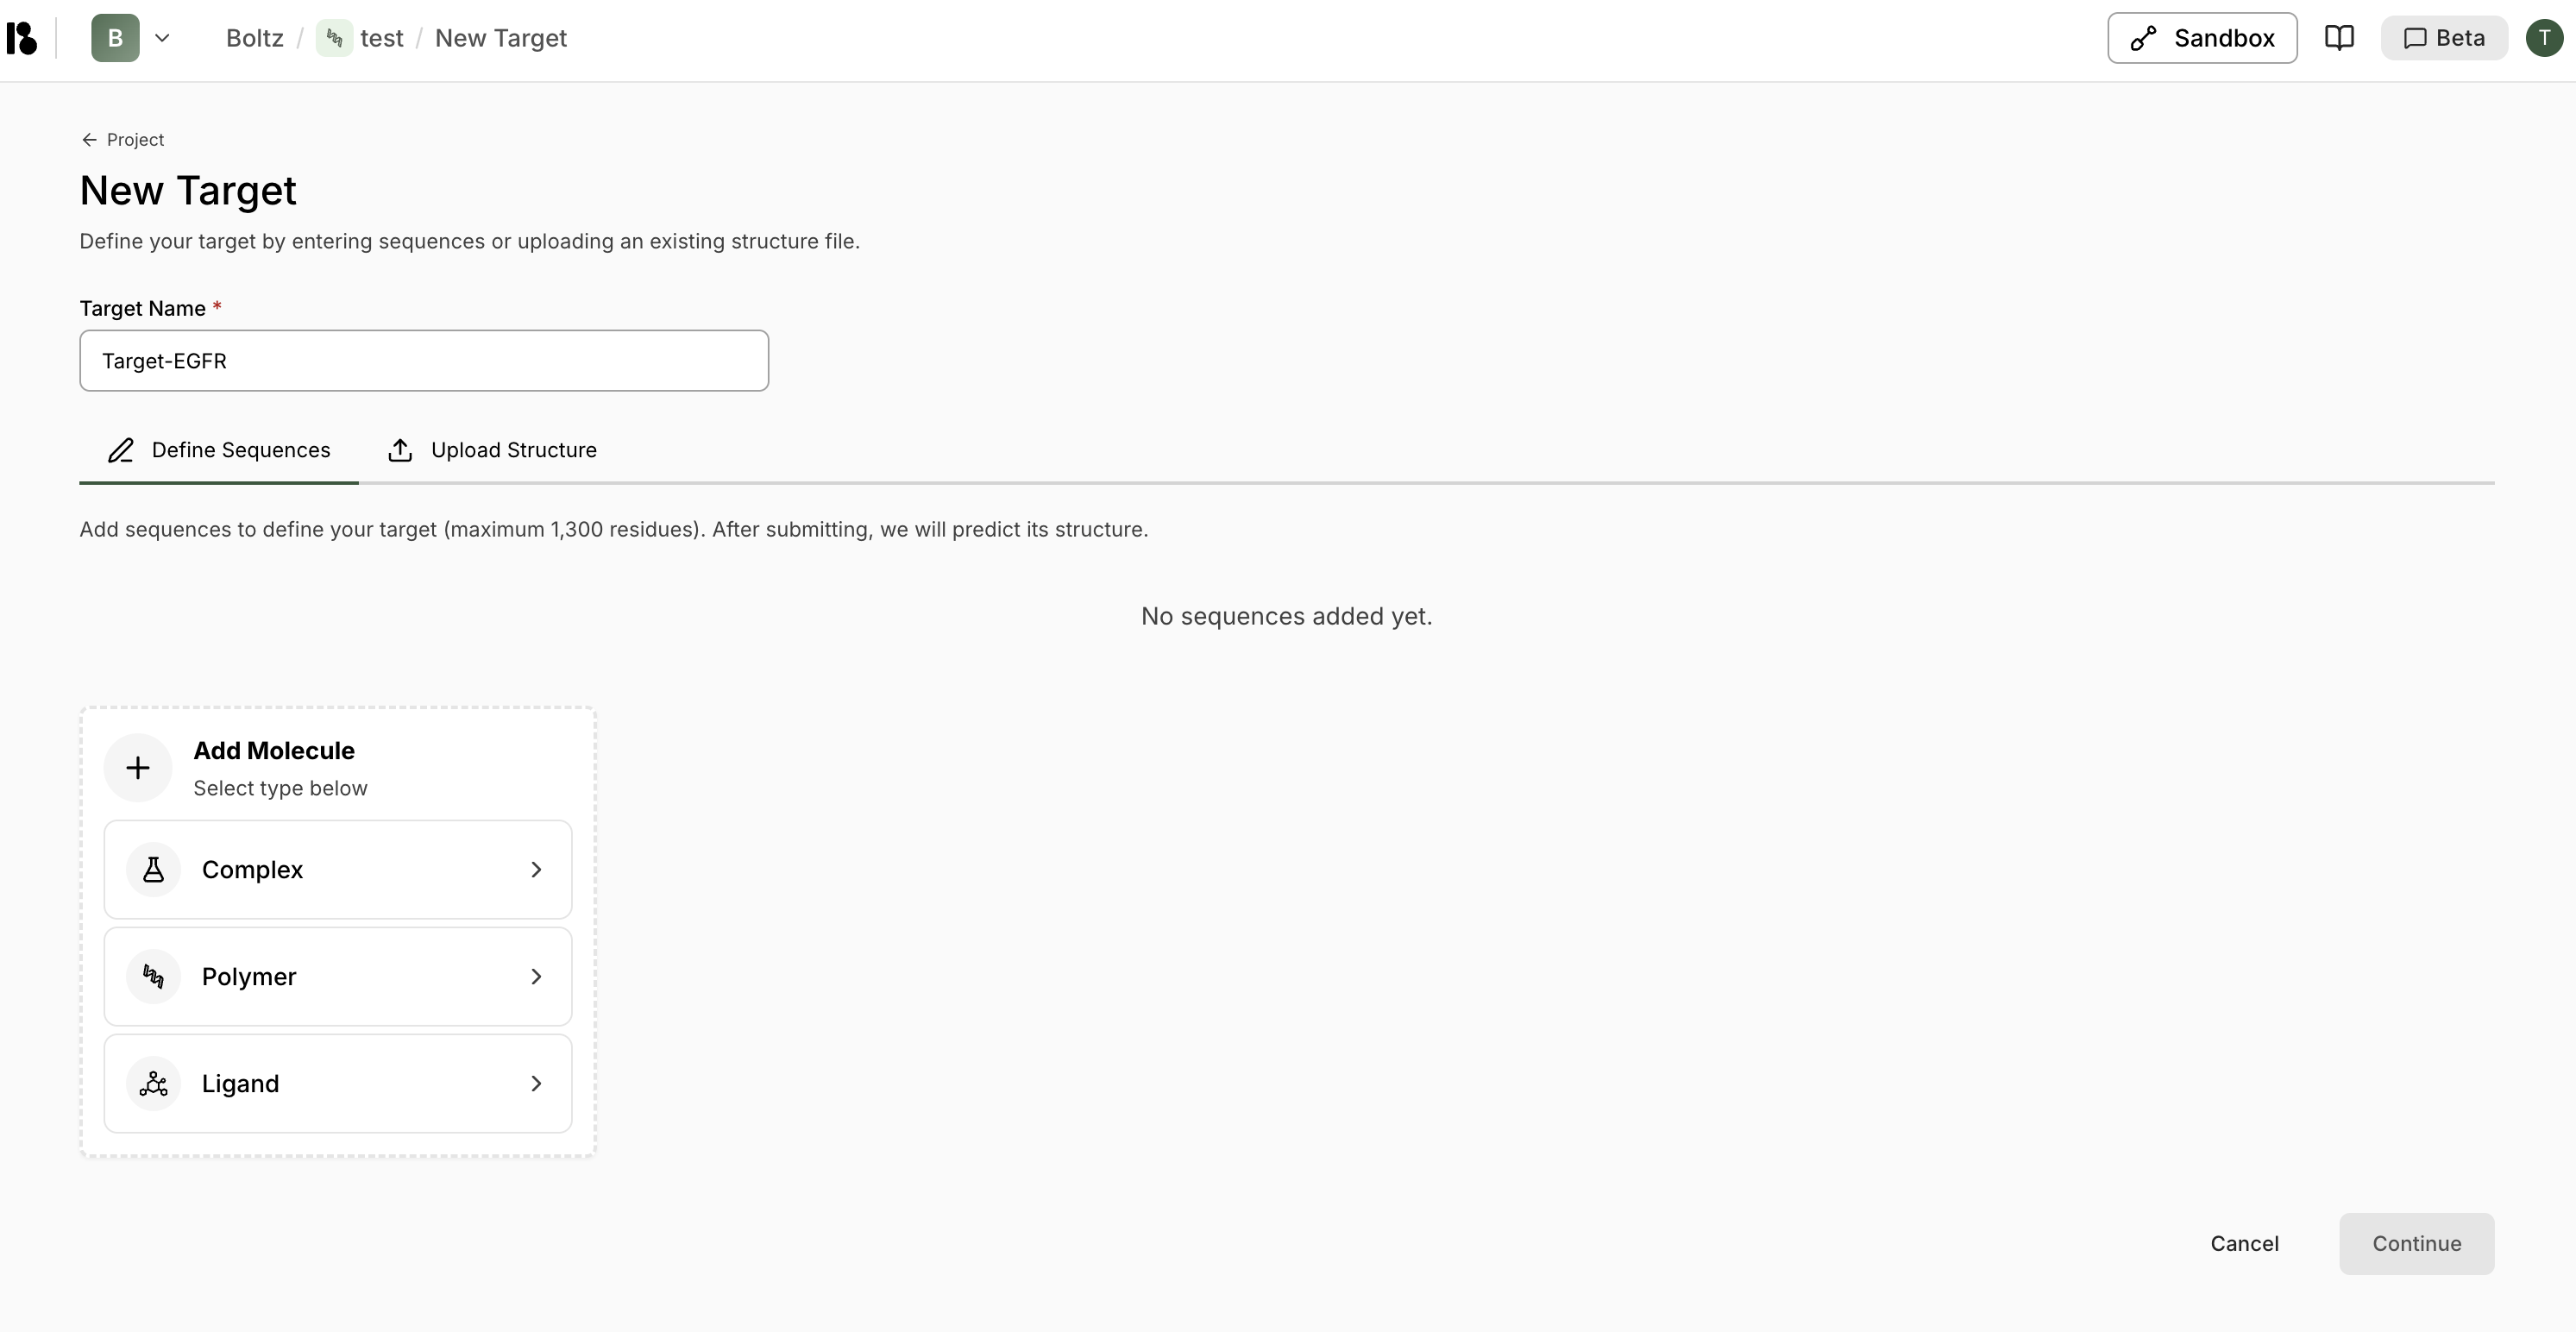 3. Choose how to define your target:
Click **"+ Polymer"** then **"Protein from Sequence"**
Paste or enter your protein sequence (maximum 1,300 residues)
Click **"Import"**
After submitting, Boltz will predict the structure automatically
Upload a structure file (.cif, .cif.gz, etc.)
Structure prediction step is skipped
4. Click **"Continue"** to proceed to target initialization.
## Target Initialization
After creating a target, you'll go through a 4-step initialization workflow:
### Step 1: Verify Unbound Structure
3. Choose how to define your target:
Click **"+ Polymer"** then **"Protein from Sequence"**
Paste or enter your protein sequence (maximum 1,300 residues)
Click **"Import"**
After submitting, Boltz will predict the structure automatically
Upload a structure file (.cif, .cif.gz, etc.)
Structure prediction step is skipped
4. Click **"Continue"** to proceed to target initialization.
## Target Initialization
After creating a target, you'll go through a 4-step initialization workflow:
### Step 1: Verify Unbound Structure
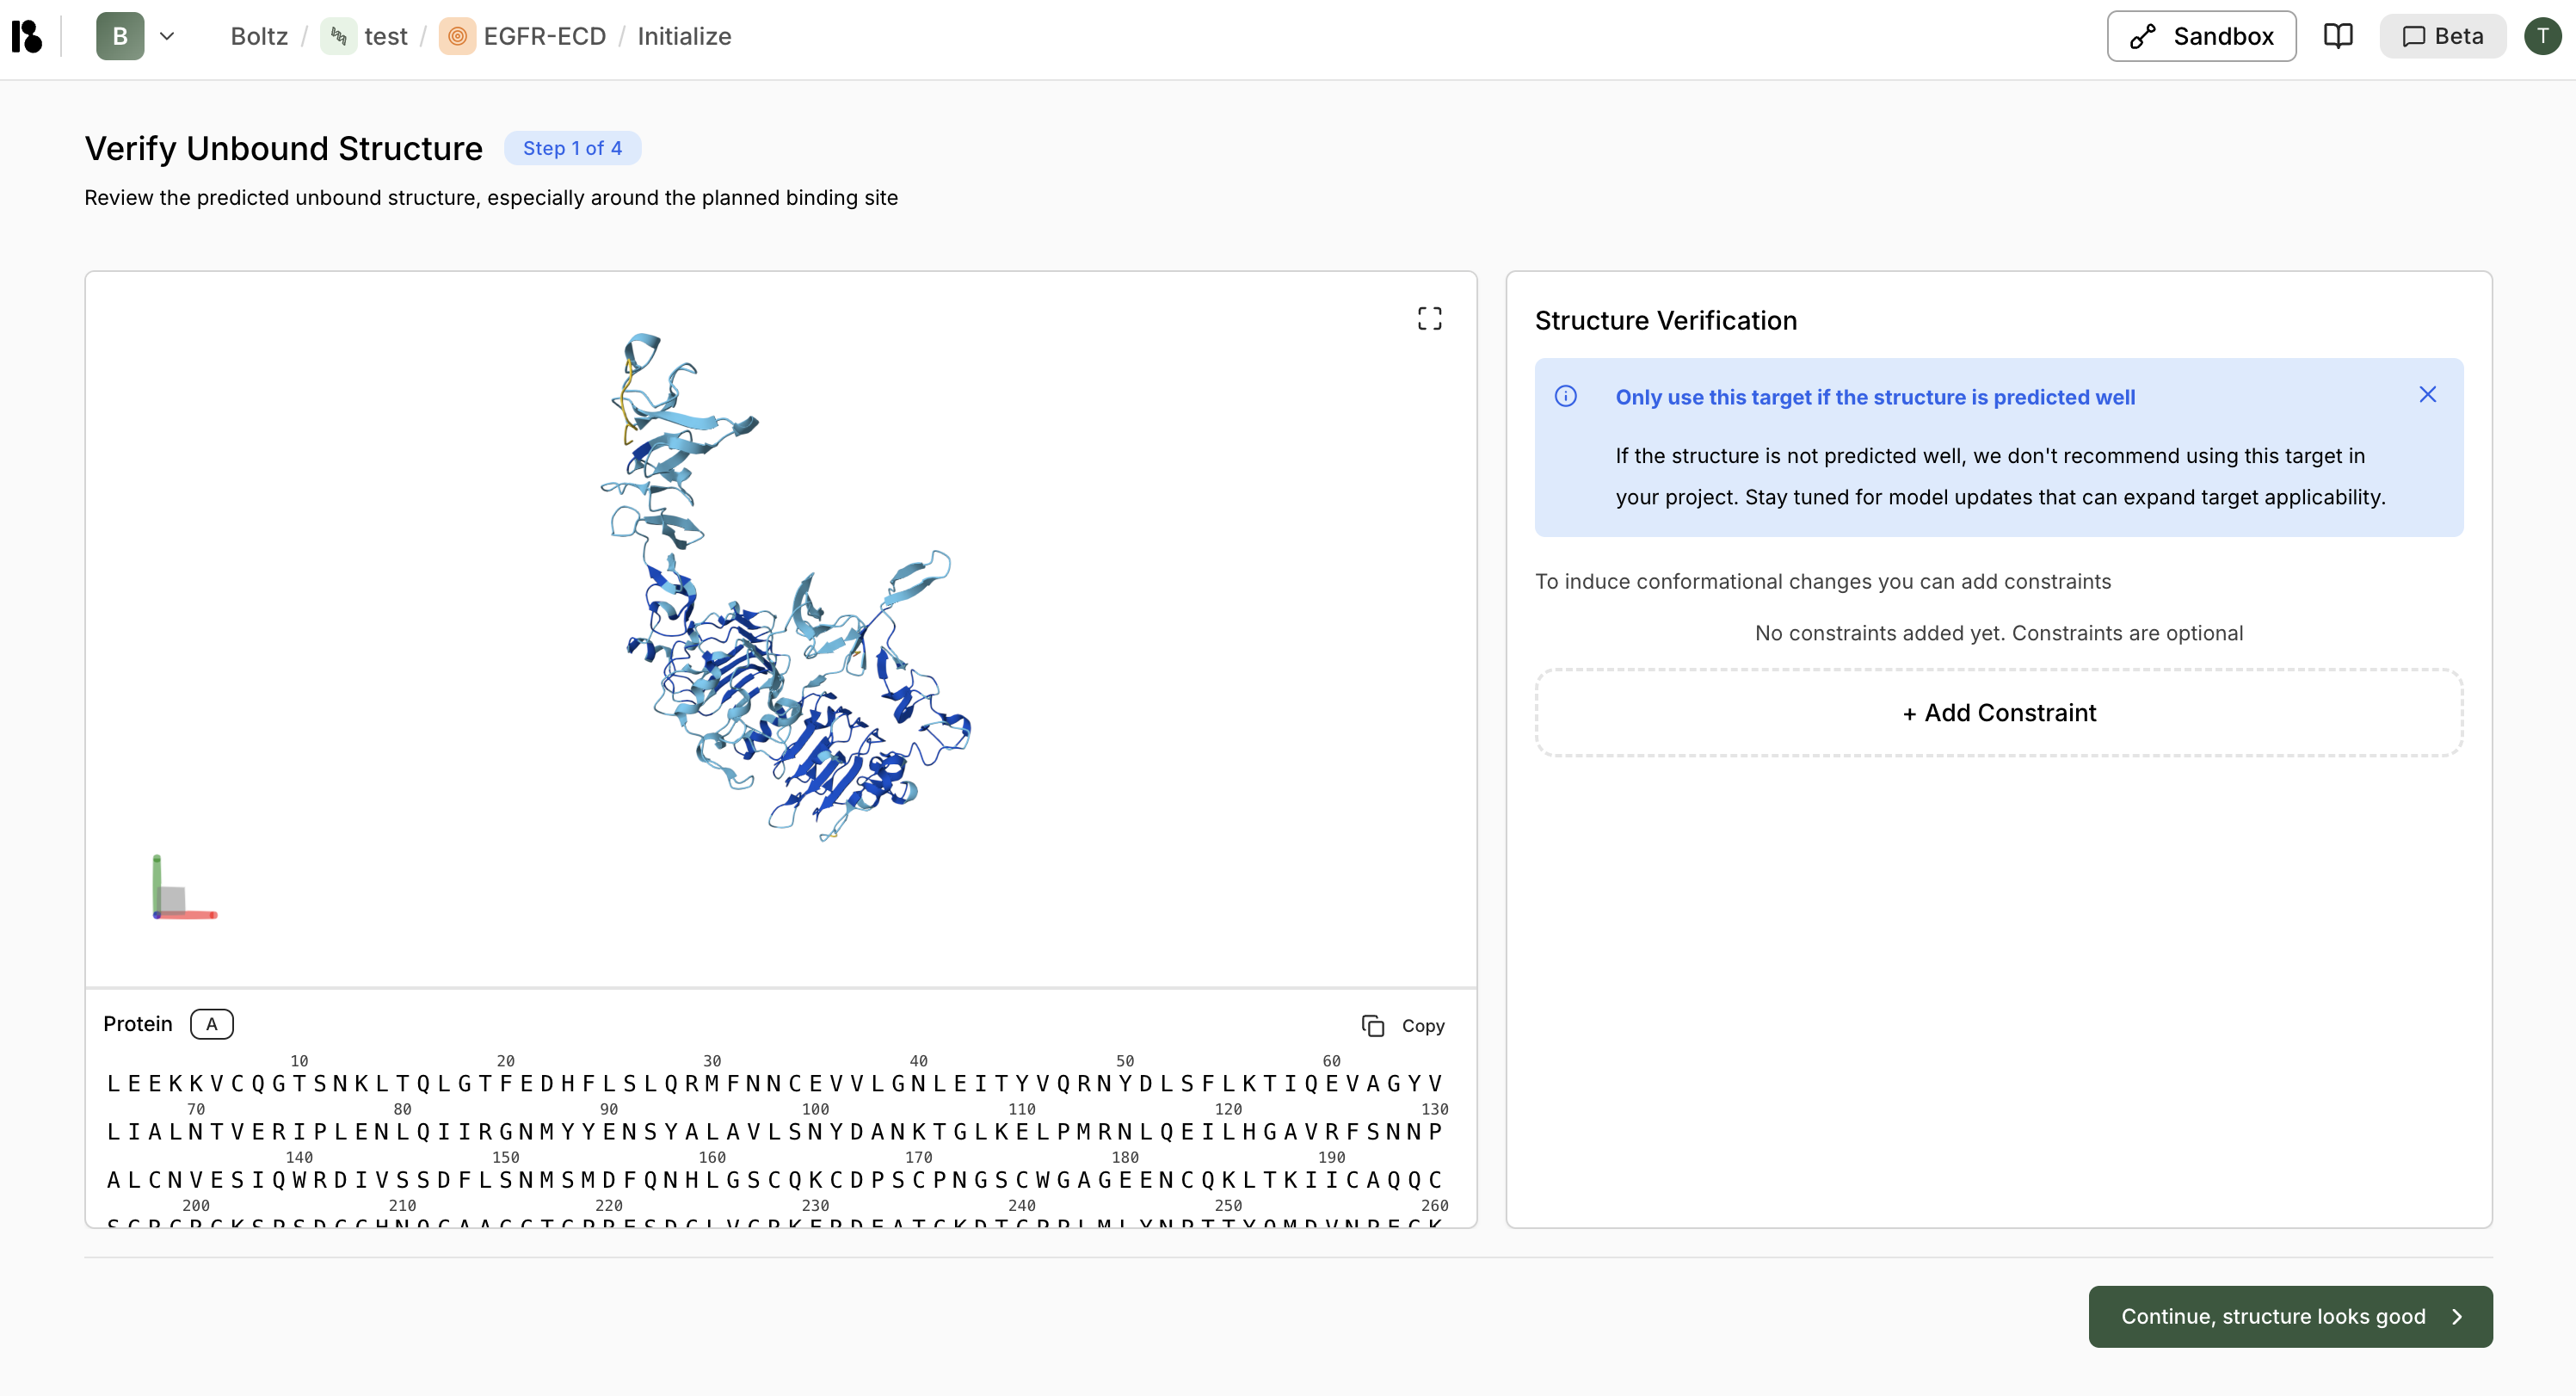 If you use sequence to define target, Boltz predicts the structure of the target. Review the predicted unbound structure, especially around the planned binding site. Only use targets with well-predicted structures.
**Optional:** Add constraints (Bond, Contact, Pocket) to induce conformational changes.
### Step 2: Select Crop
If you use sequence to define target, Boltz predicts the structure of the target. Review the predicted unbound structure, especially around the planned binding site. Only use targets with well-predicted structures.
**Optional:** Add constraints (Bond, Contact, Pocket) to induce conformational changes.
### Step 2: Select Crop
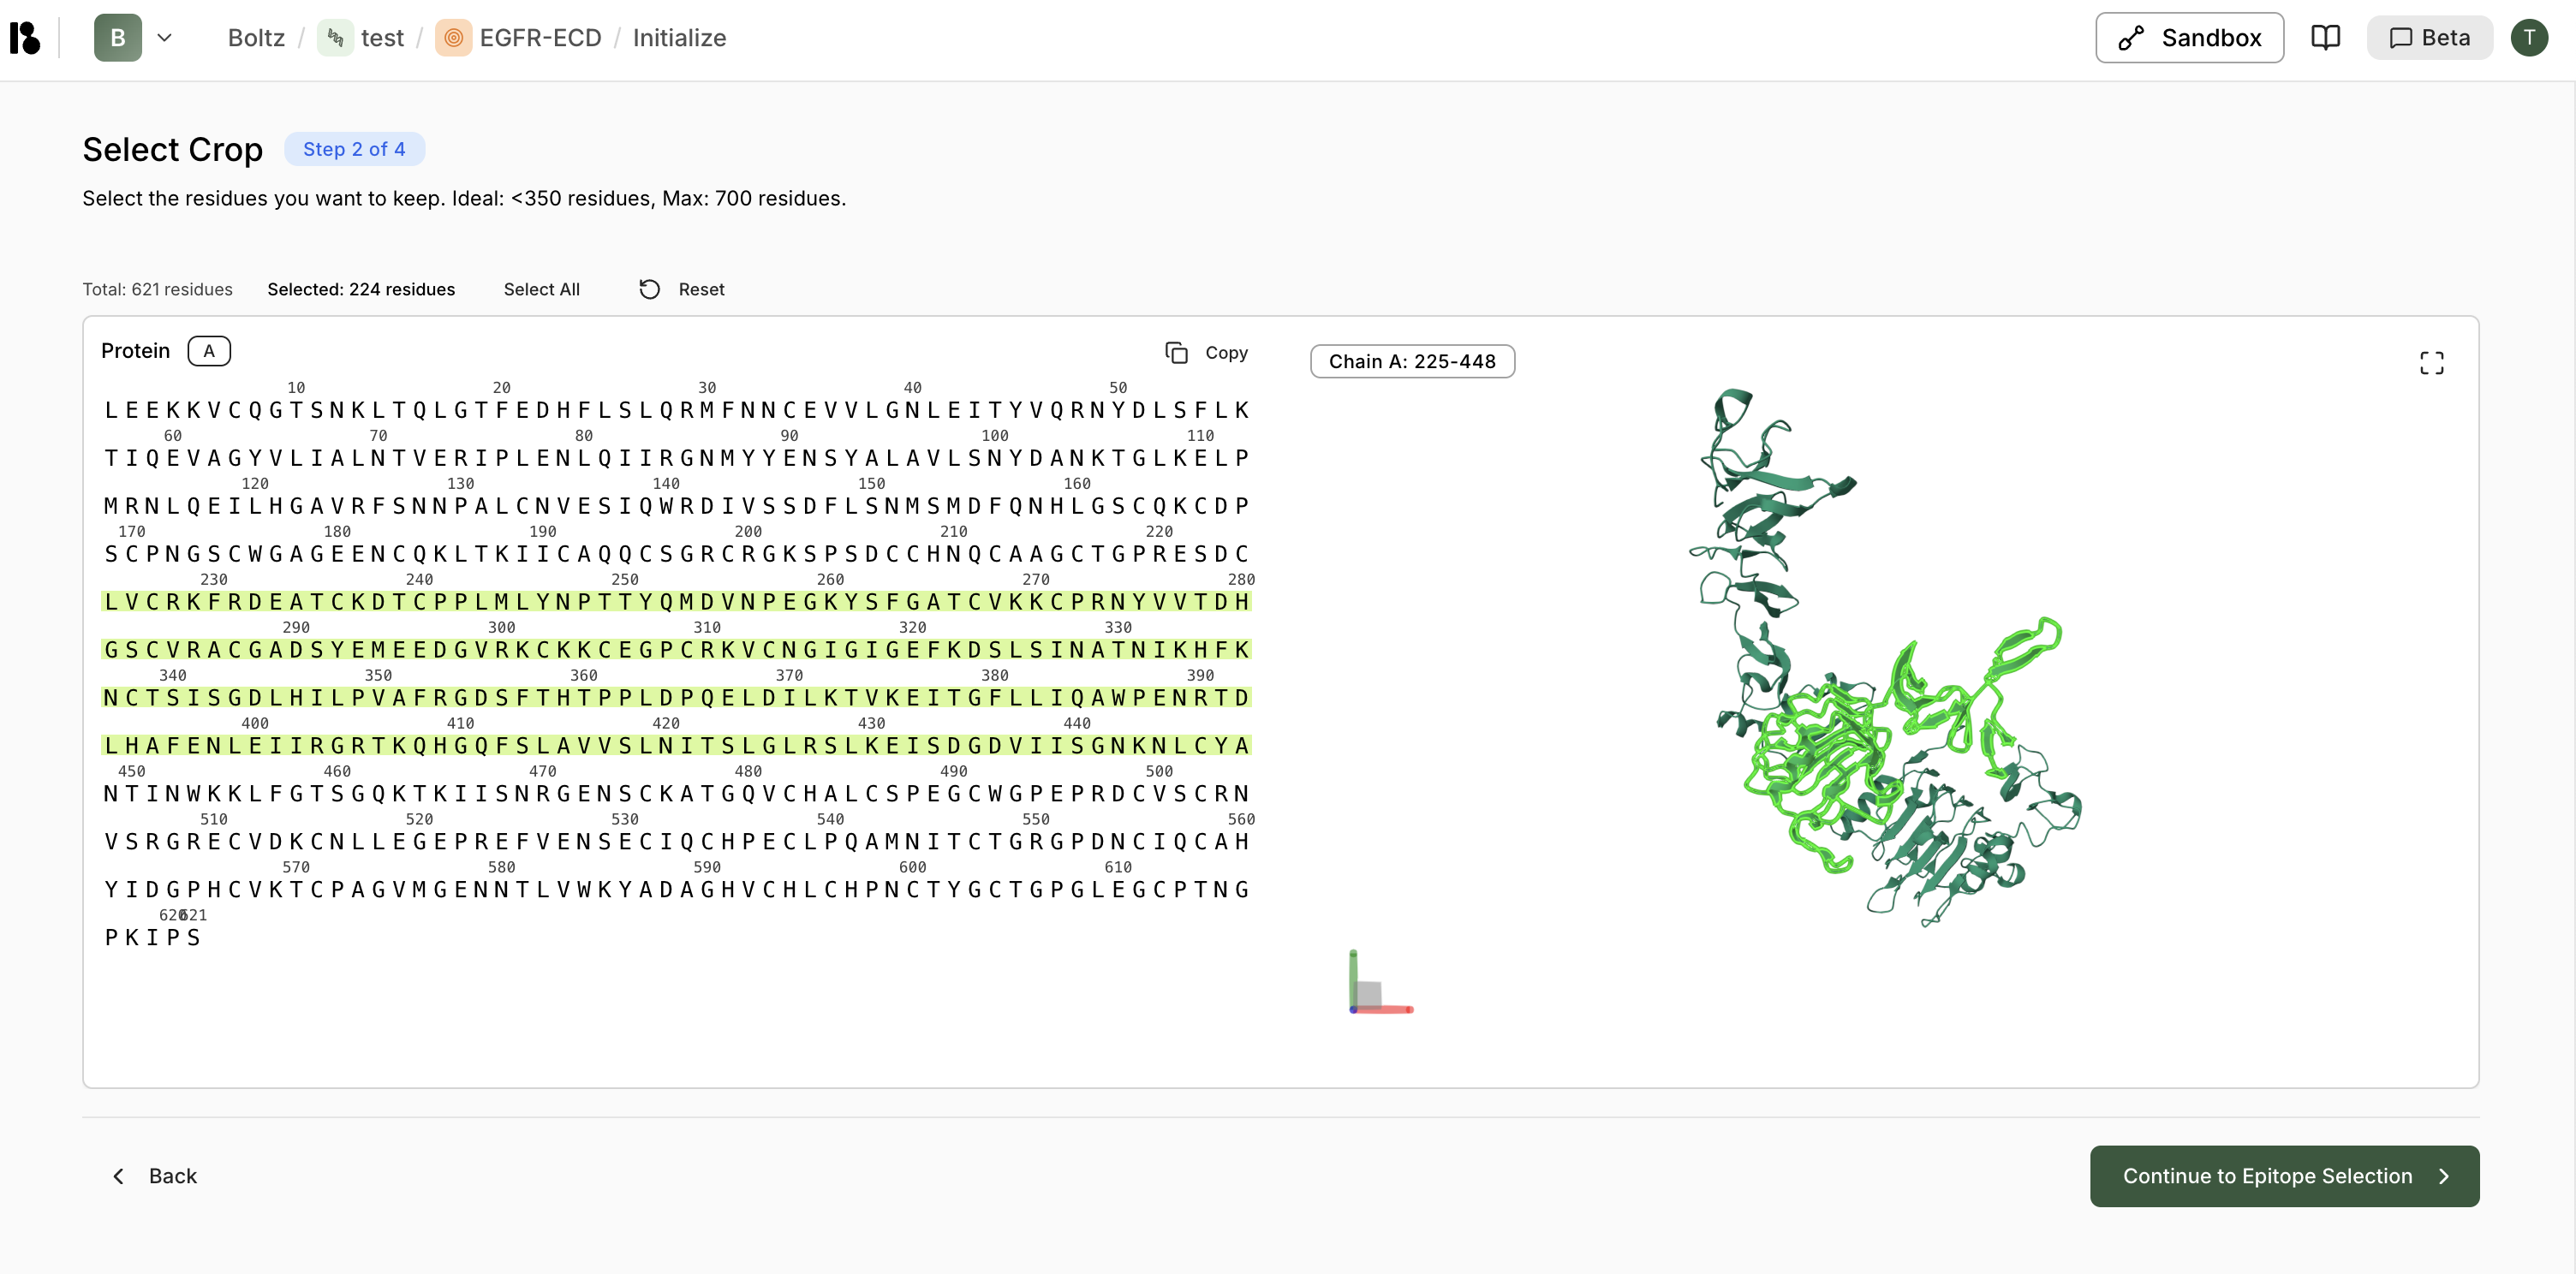 Select the residues you want to keep. Ideal crop size is **less than 350 residues** (maximum 700 residues).
* Use the sequence viewer to select residue ranges
* The 3D structure updates in real-time to show the cropped region
* Click **"Select All"** to include all residues, or manually select ranges
### Step 3: Select Epitope (Optional)
Select the residues you want to keep. Ideal crop size is **less than 350 residues** (maximum 700 residues).
* Use the sequence viewer to select residue ranges
* The 3D structure updates in real-time to show the cropped region
* Click **"Select All"** to include all residues, or manually select ranges
### Step 3: Select Epitope (Optional)
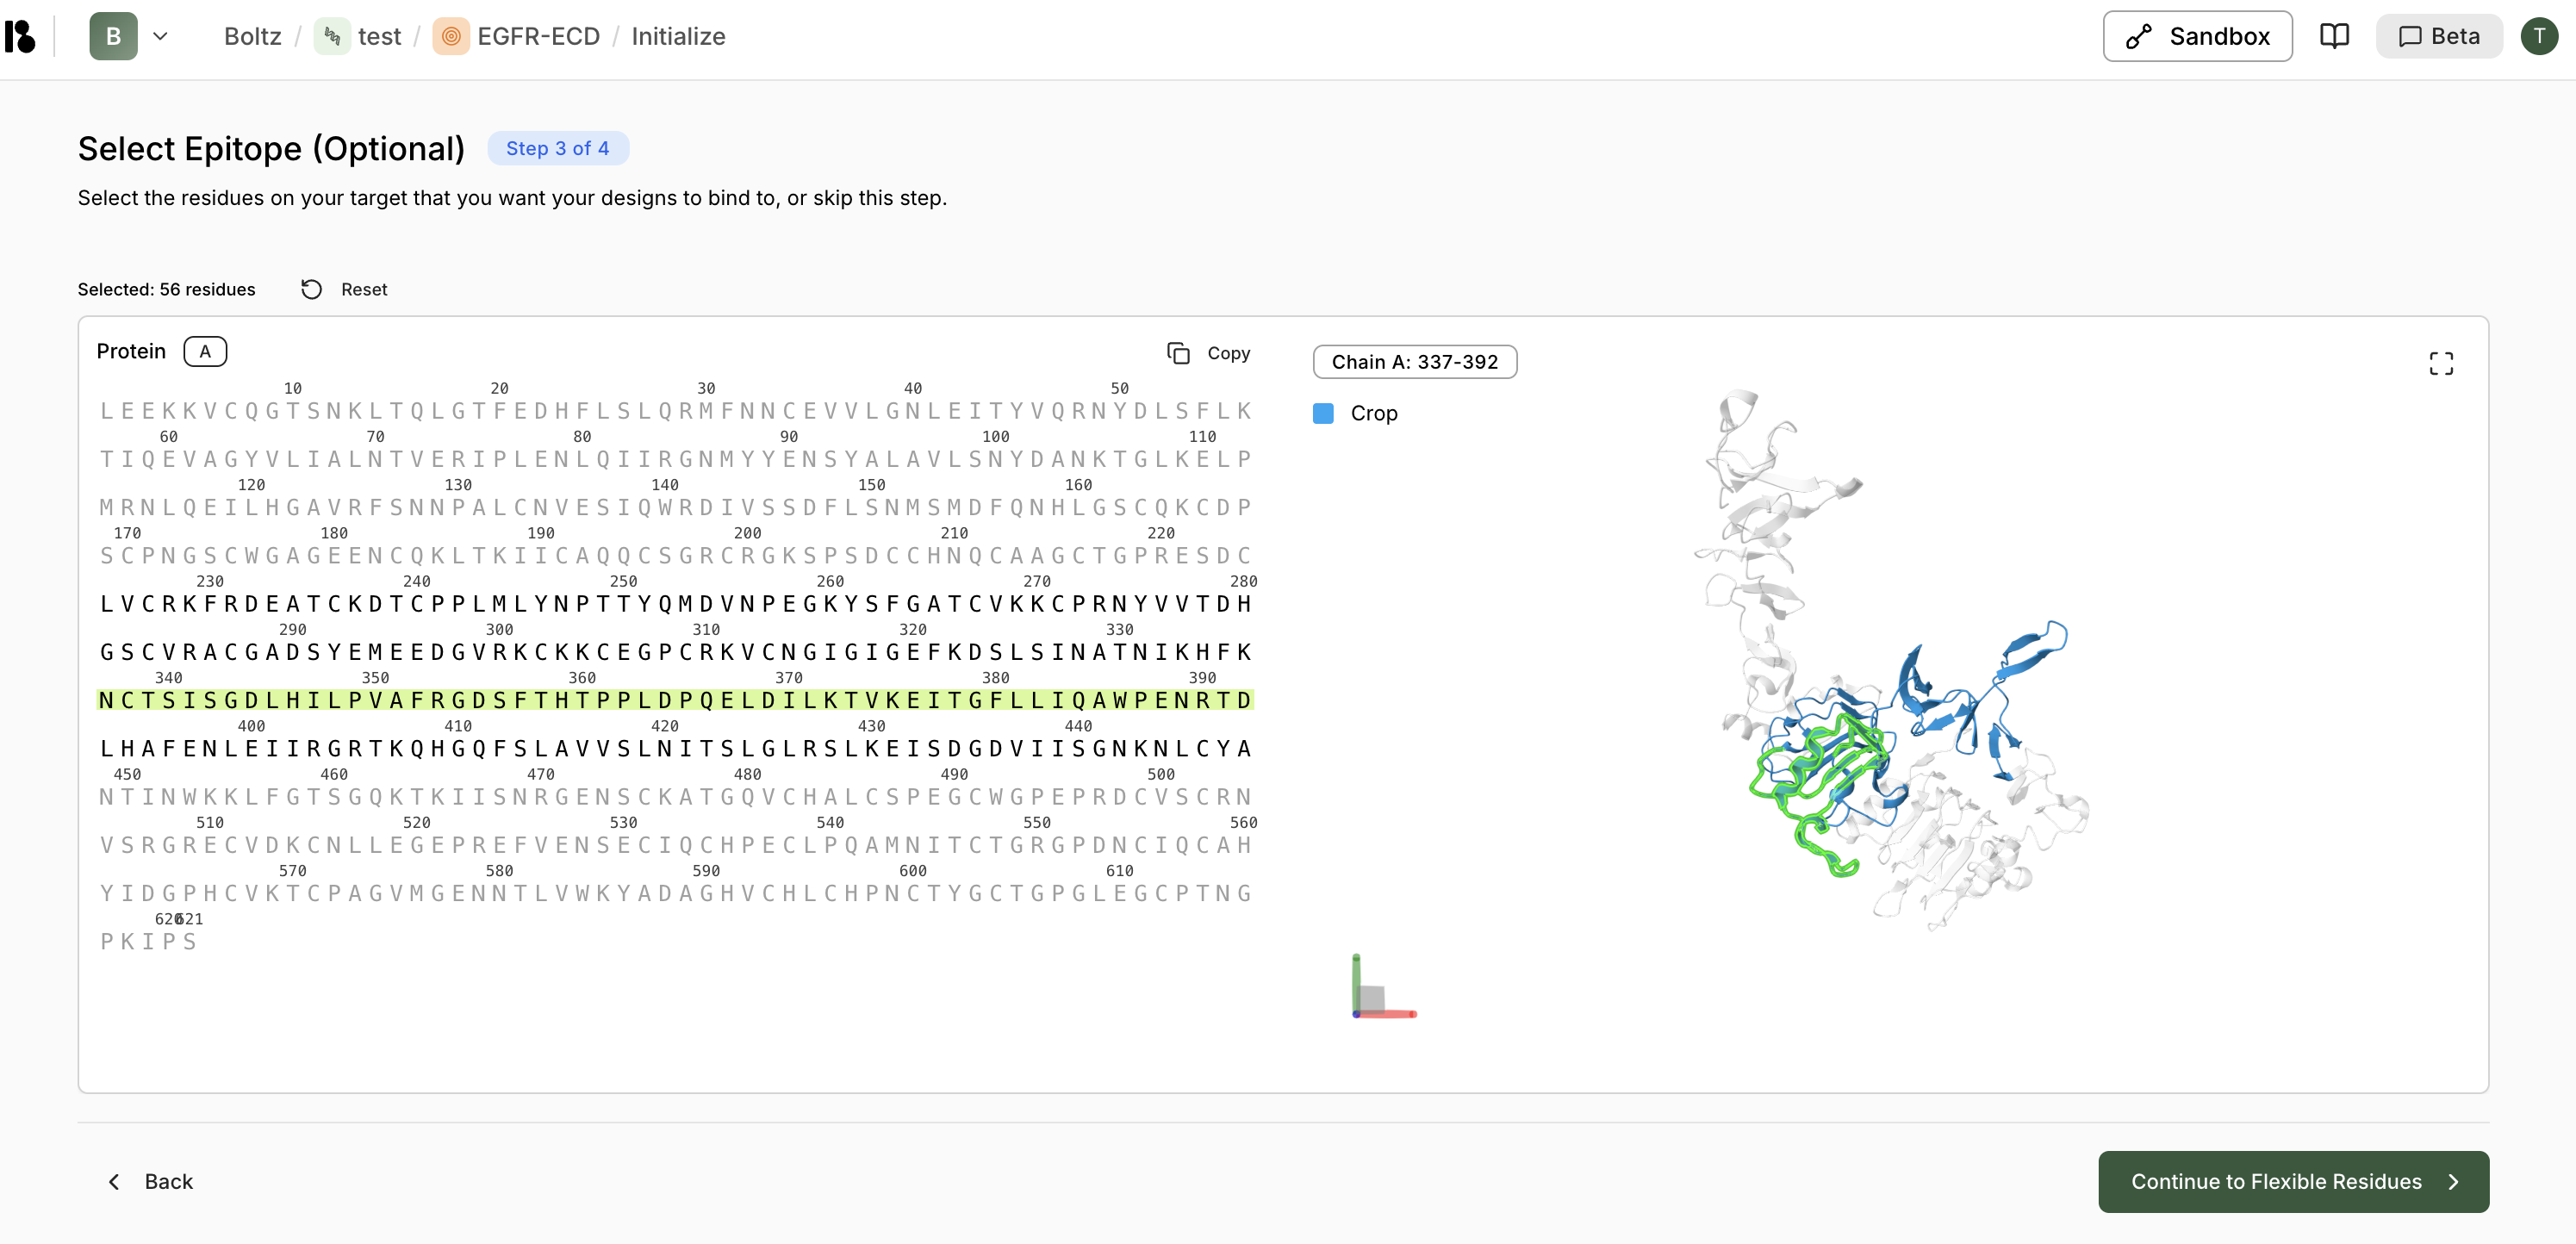 Select the residues on your target that you want your designs to bind to.
* This step is optional—skip if you don't want to specify an epitope
* Selected residues are highlighted in green in both sequence and 3D views
* Click **"Reset"** to clear selections
### Step 4: Select Flexible Residues (Optional)
Select the residues on your target that you want your designs to bind to.
* This step is optional—skip if you don't want to specify an epitope
* Selected residues are highlighted in green in both sequence and 3D views
* Click **"Reset"** to clear selections
### Step 4: Select Flexible Residues (Optional)
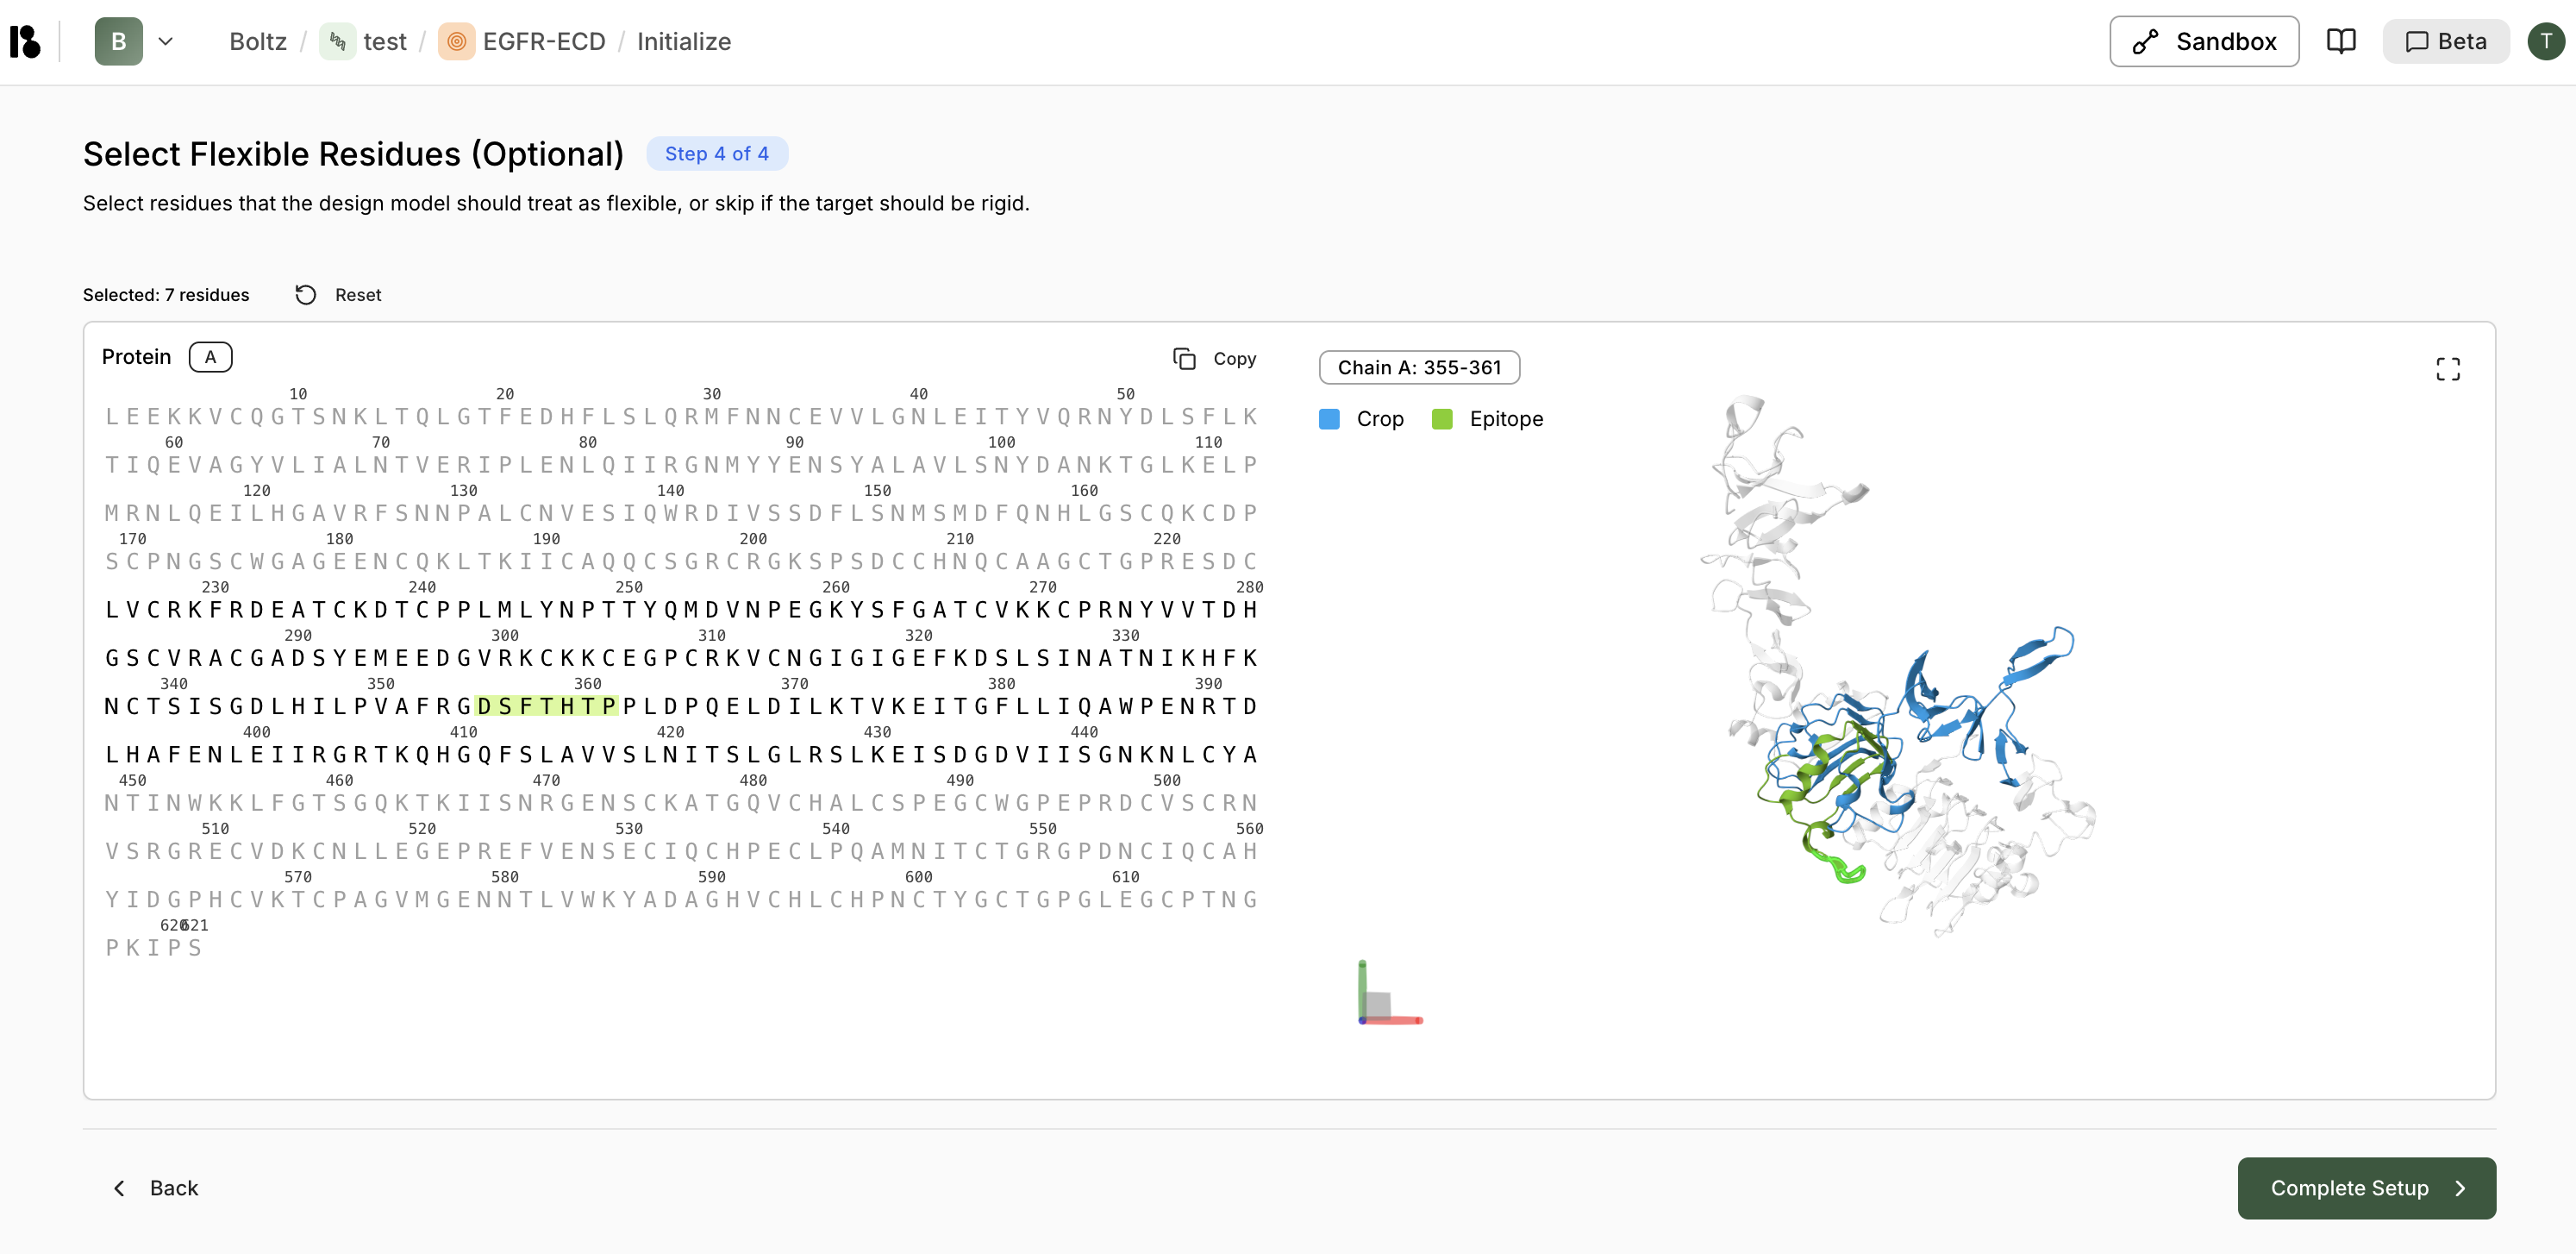 Select residues that the design model should treat as flexible during design.
* This step is optional—skip if the target should be treated as rigid
* Flexible residues allow for conformational changes during binding
* Selected residues are highlighted in green
Click **"Complete Setup"** to finish target initialization.
## After Target Creation
Once your target is created, you'll see options to:
* **Discover New Binders** - Create a binder specification for your virtual screen
* **Upload candidates from CSV** - Evaluate known candidates using AI
* **Skip for now** - Add the binder specification later
Select residues that the design model should treat as flexible during design.
* This step is optional—skip if the target should be treated as rigid
* Flexible residues allow for conformational changes during binding
* Selected residues are highlighted in green
Click **"Complete Setup"** to finish target initialization.
## After Target Creation
Once your target is created, you'll see options to:
* **Discover New Binders** - Create a binder specification for your virtual screen
* **Upload candidates from CSV** - Evaluate known candidates using AI
* **Skip for now** - Add the binder specification later