> ## Documentation Index
> Fetch the complete documentation index at: https://docs.boltz.bio/llms.txt
> Use this file to discover all available pages before exploring further.
# Quickstart: Protein Design Complete Workflow
> Step-by-step example of designing protein binders
This guide walks through creating a complete protein binder design project from scratch as a single workflow.
For further information and discussion on each step, please see the sectional breakdown within this documentation.
## Step 1: Create a New Project
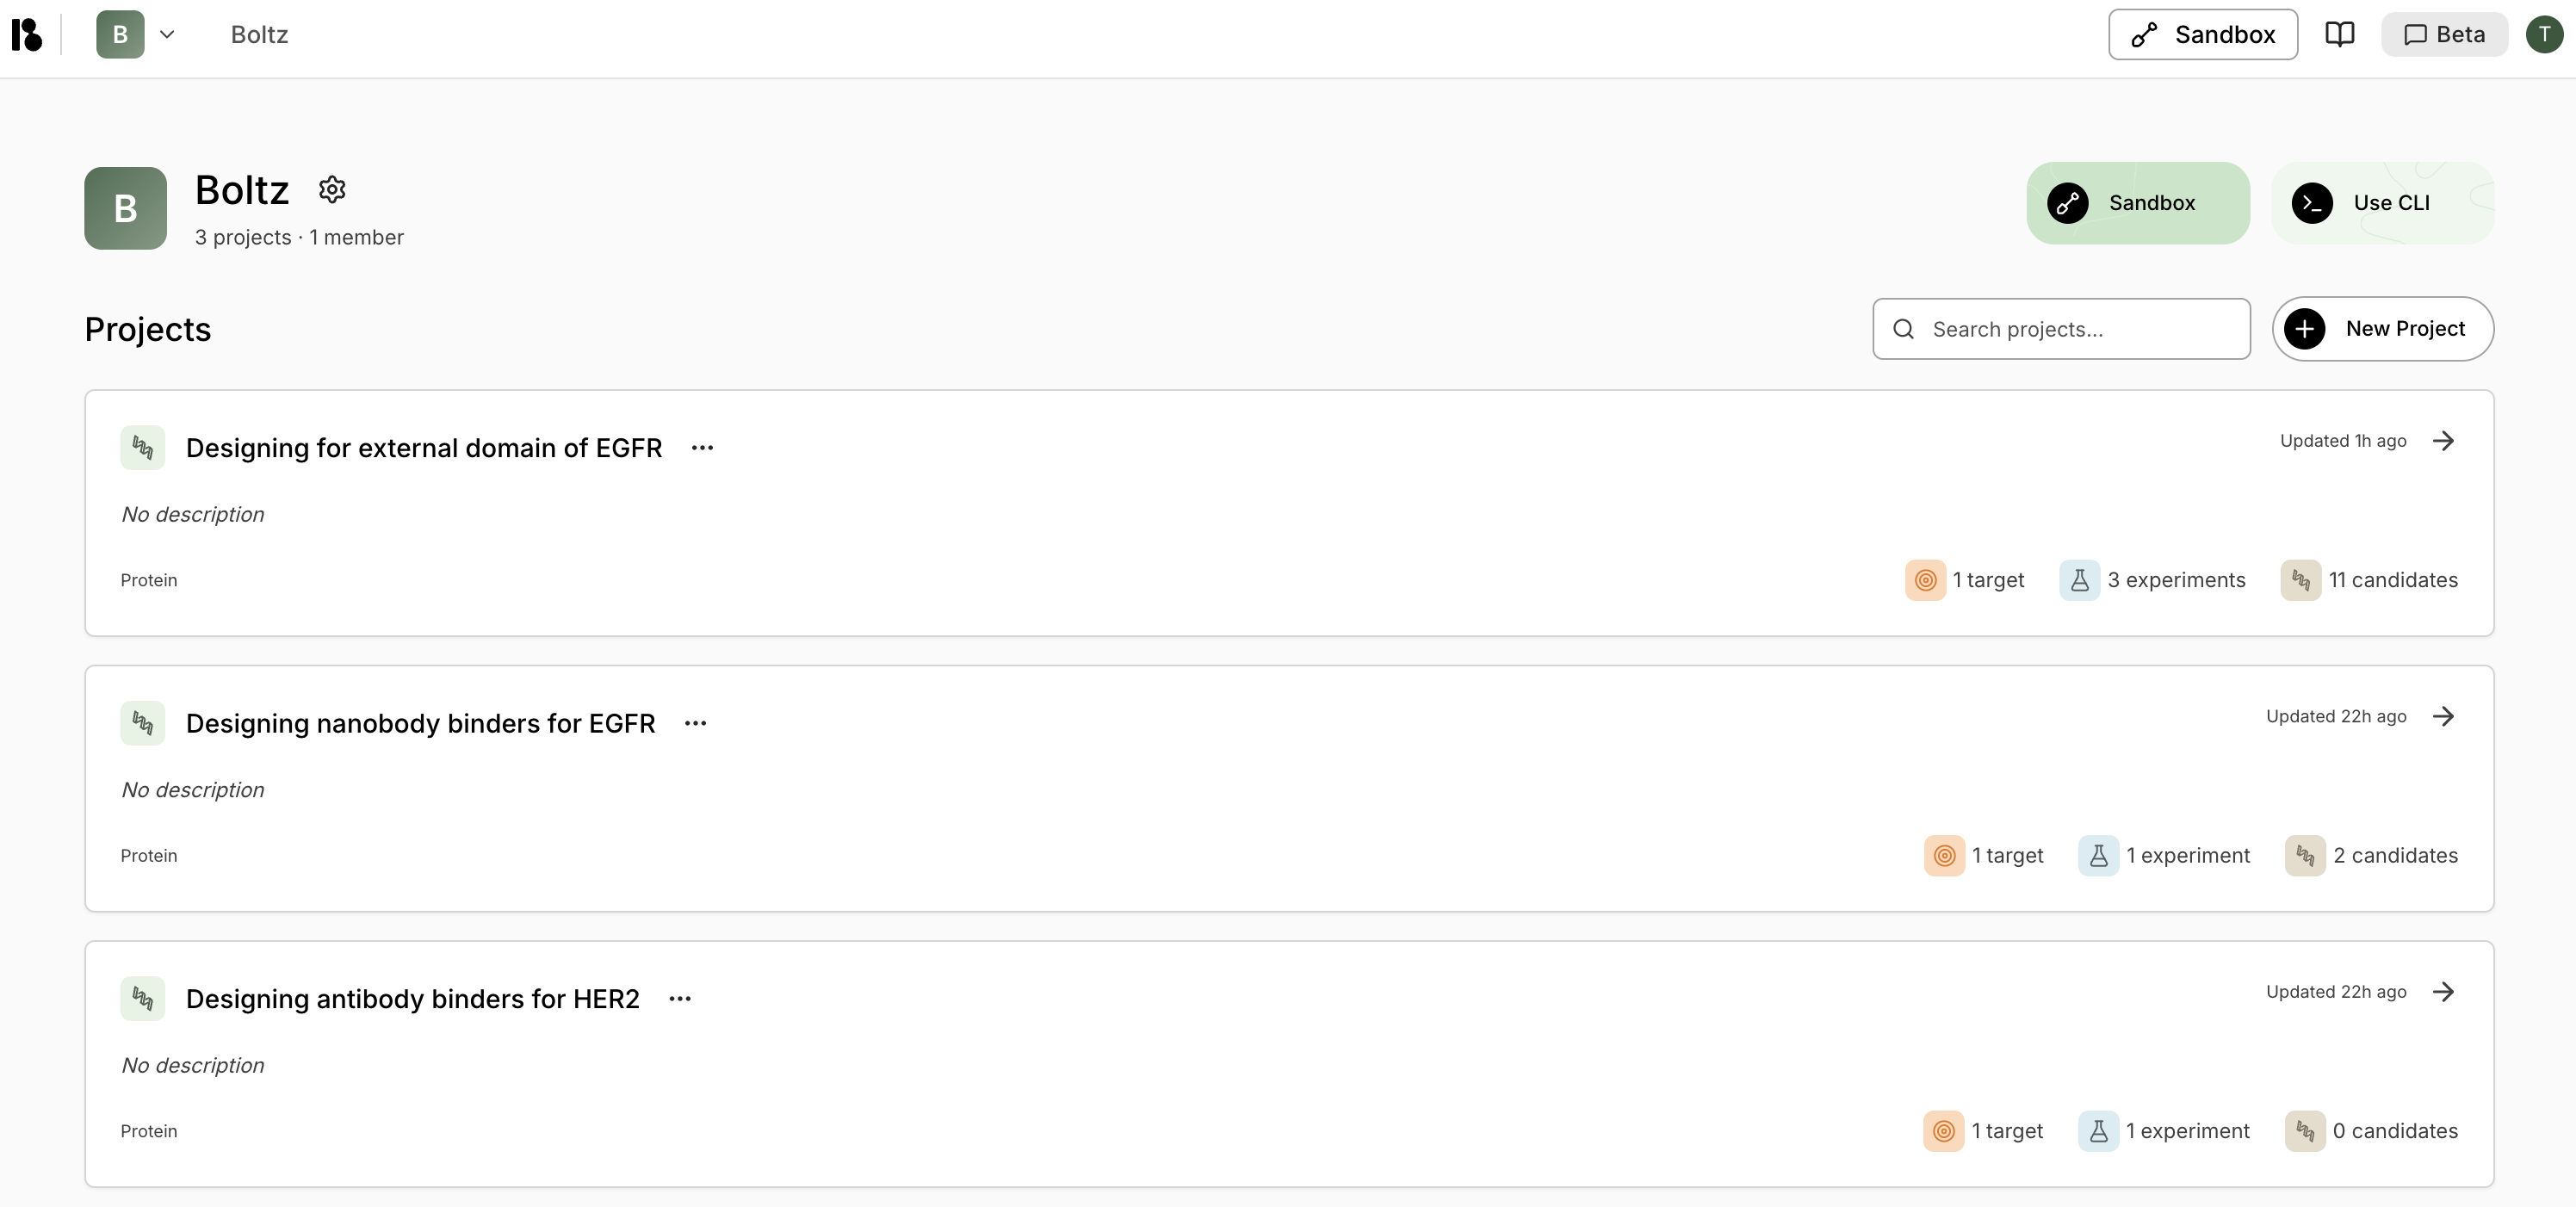 1. From the home page, click **"New Project"**
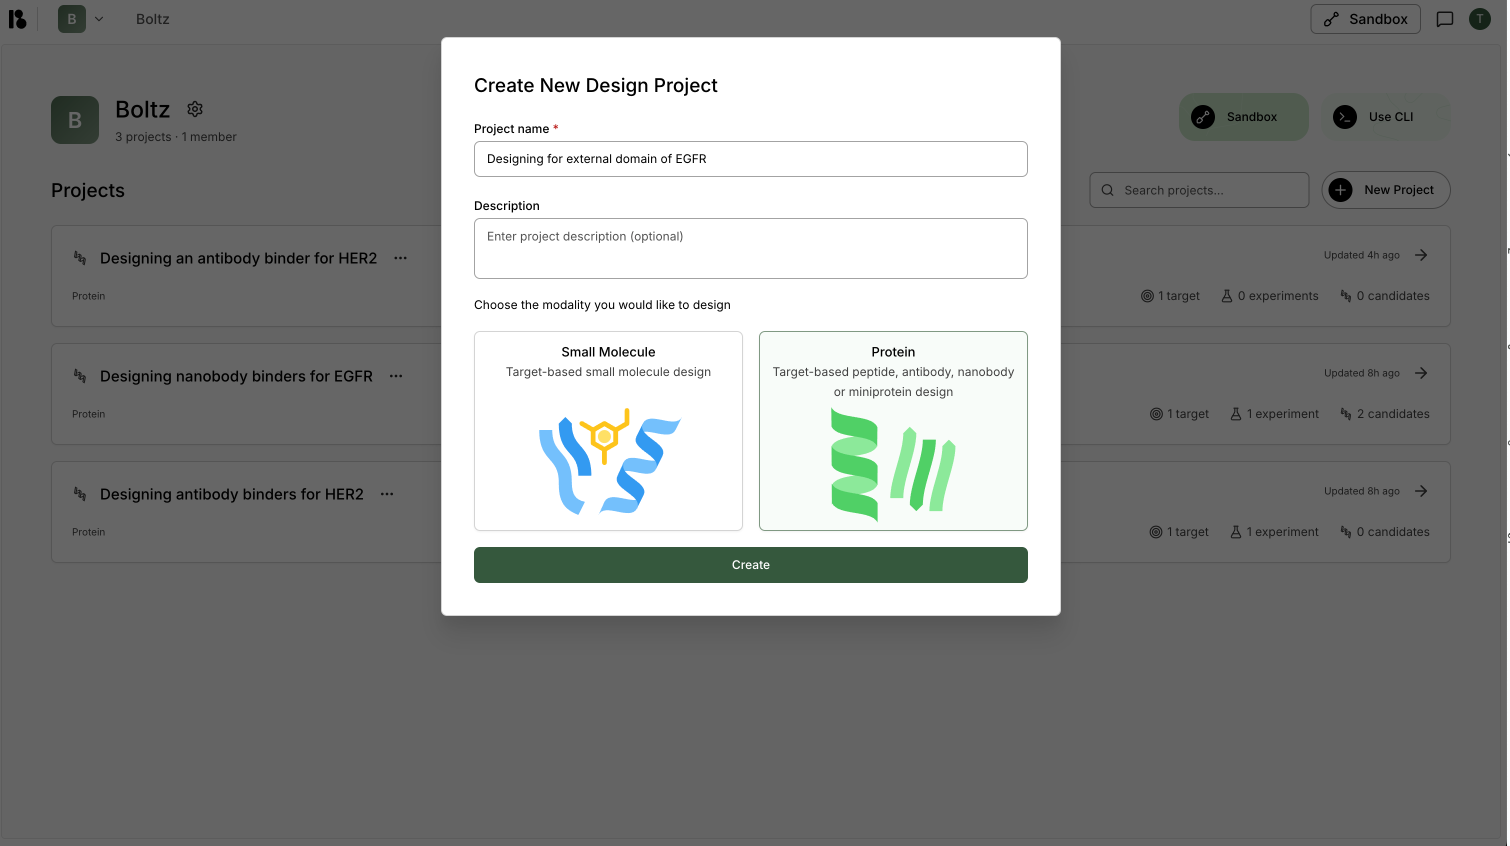
2. Enter a project name (e.g., "Designing for external domain of EGFR")
3. Select **"Protein"** modality
4. Click **"Create"**
1. From the home page, click **"New Project"**
2. Enter a project name (e.g., "Designing for external domain of EGFR")
3. Select **"Protein"** modality
4. Click **"Create"**
 ## Step 2: Add Your First Target
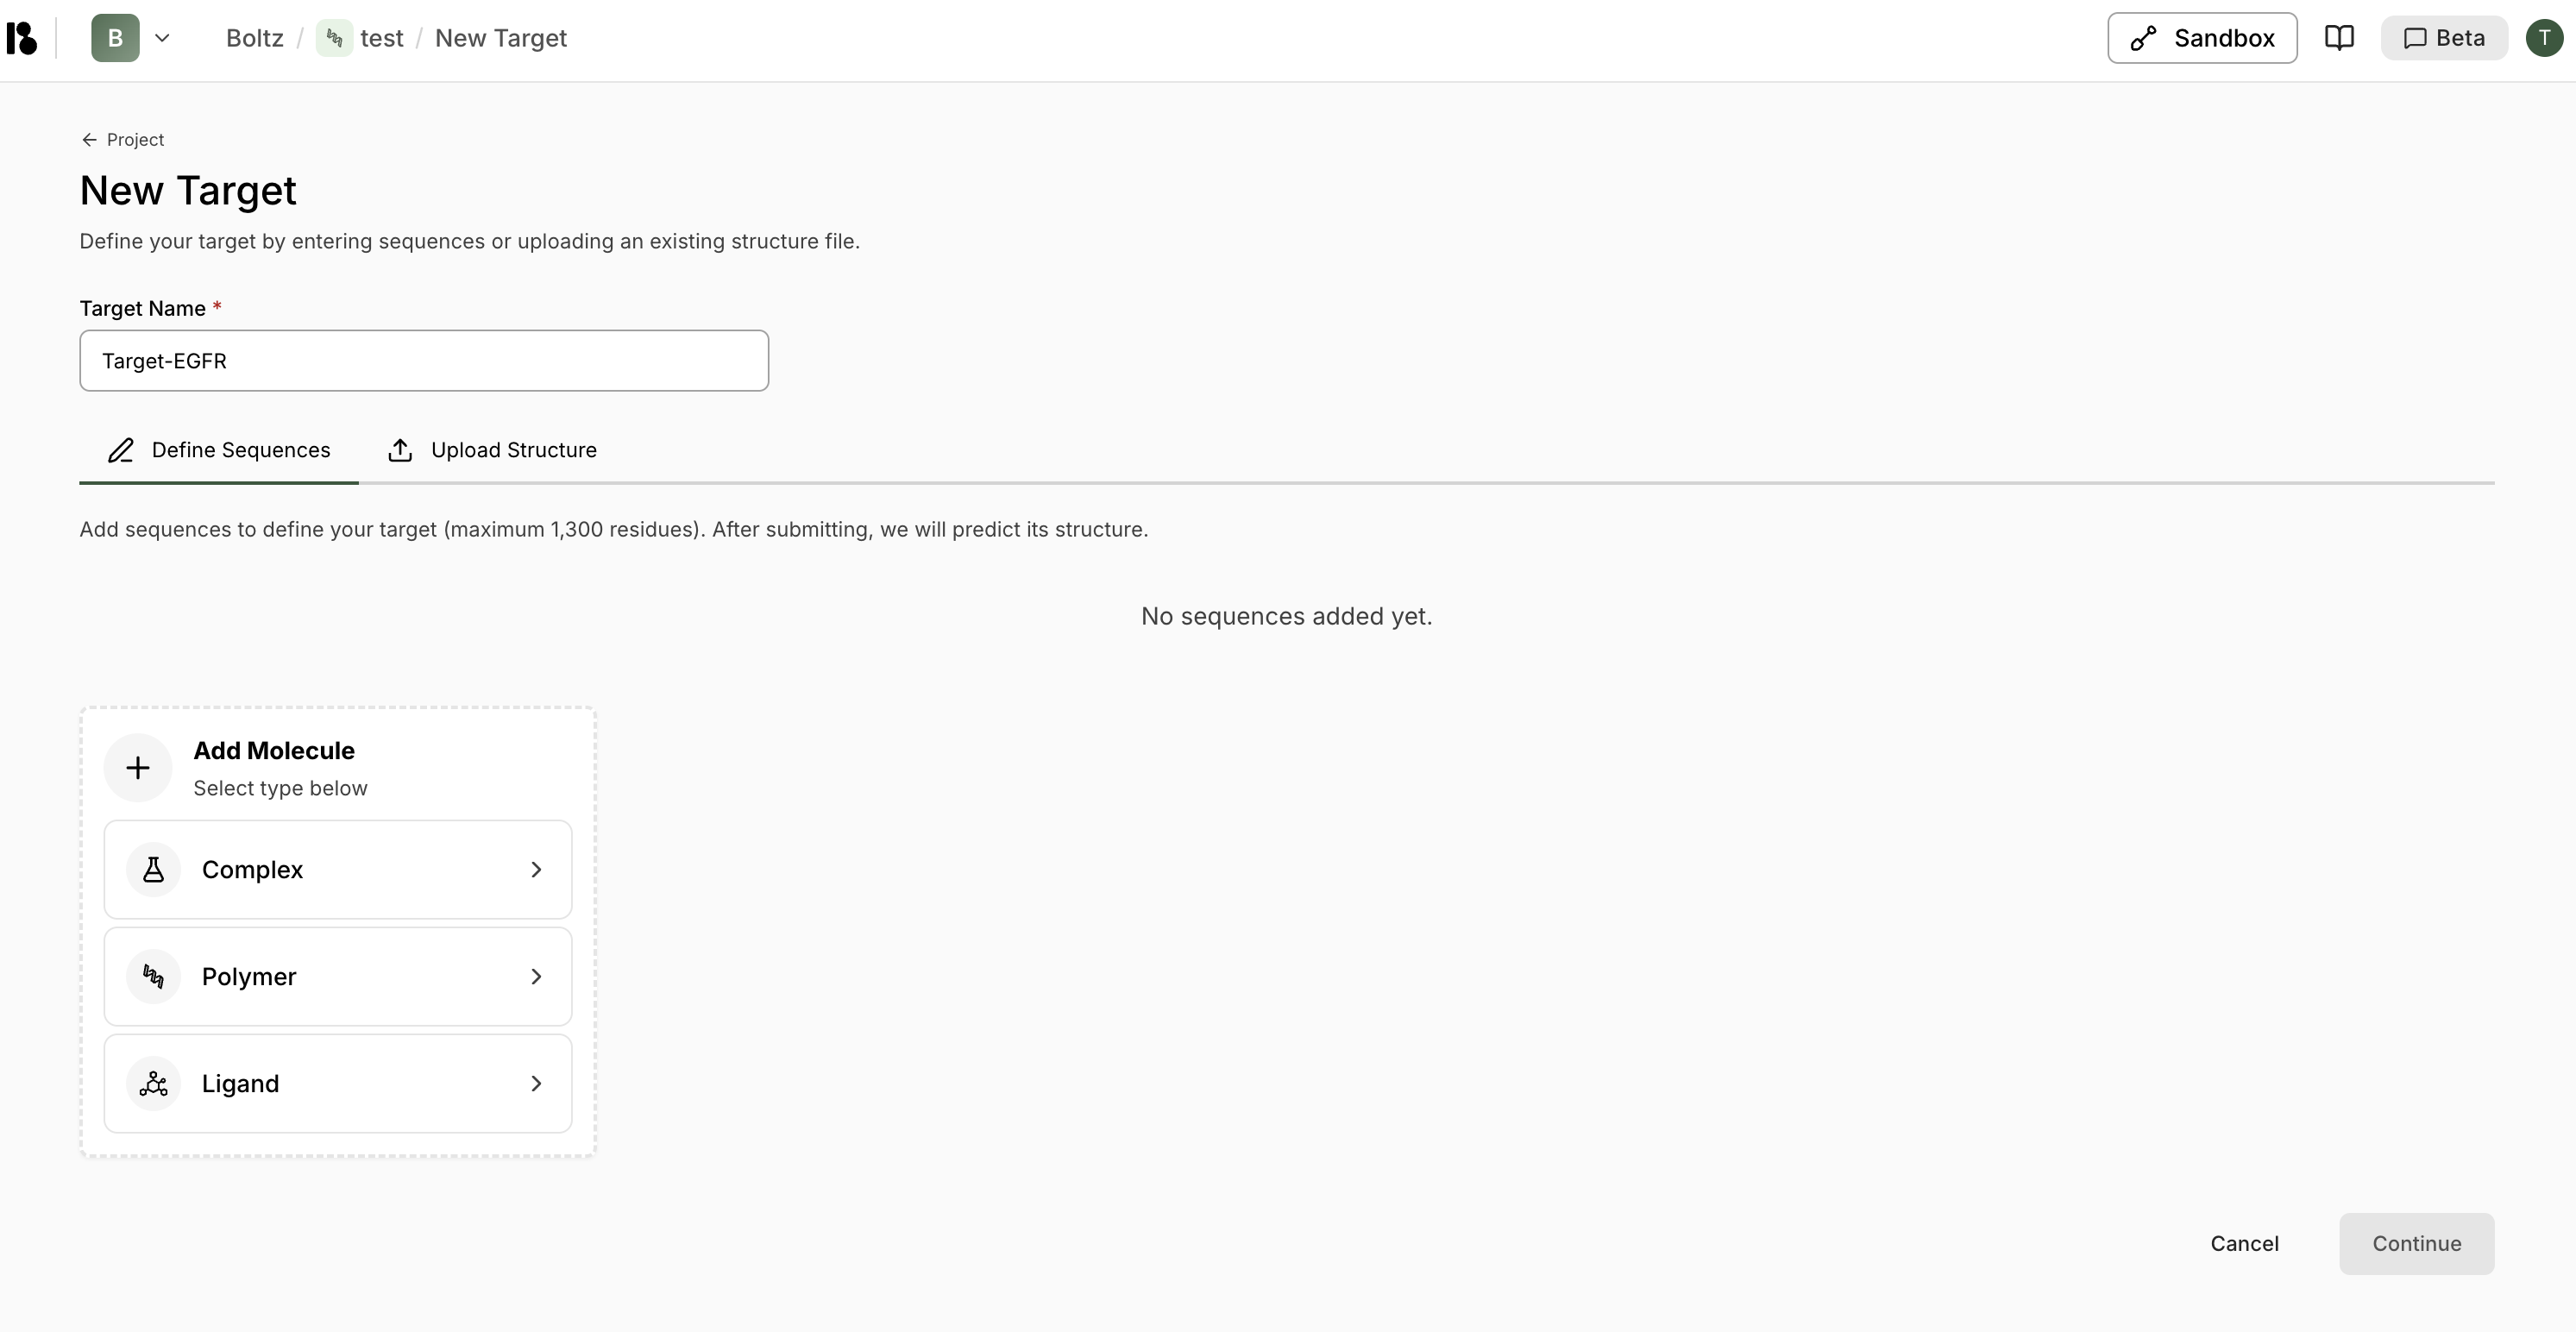 1. From the project dashboard, click **"+ Add target"** in the Targets section
2. Enter target name (e.g., "Target-EGFR")
3. Choose **"Define Sequences"** tab
4. Click **"+ Polymer"** then **"Protein from Sequence"**
5. Paste your protein sequence (or import from UniProt)
6. Click **"Import"** then **"Continue"**
### Initialize Target
Complete the 4-step initialization:
1. **Verify Unbound Structure** - Review the predicted structure
1. From the project dashboard, click **"+ Add target"** in the Targets section
2. Enter target name (e.g., "Target-EGFR")
3. Choose **"Define Sequences"** tab
4. Click **"+ Polymer"** then **"Protein from Sequence"**
5. Paste your protein sequence (or import from UniProt)
6. Click **"Import"** then **"Continue"**
### Initialize Target
Complete the 4-step initialization:
1. **Verify Unbound Structure** - Review the predicted structure
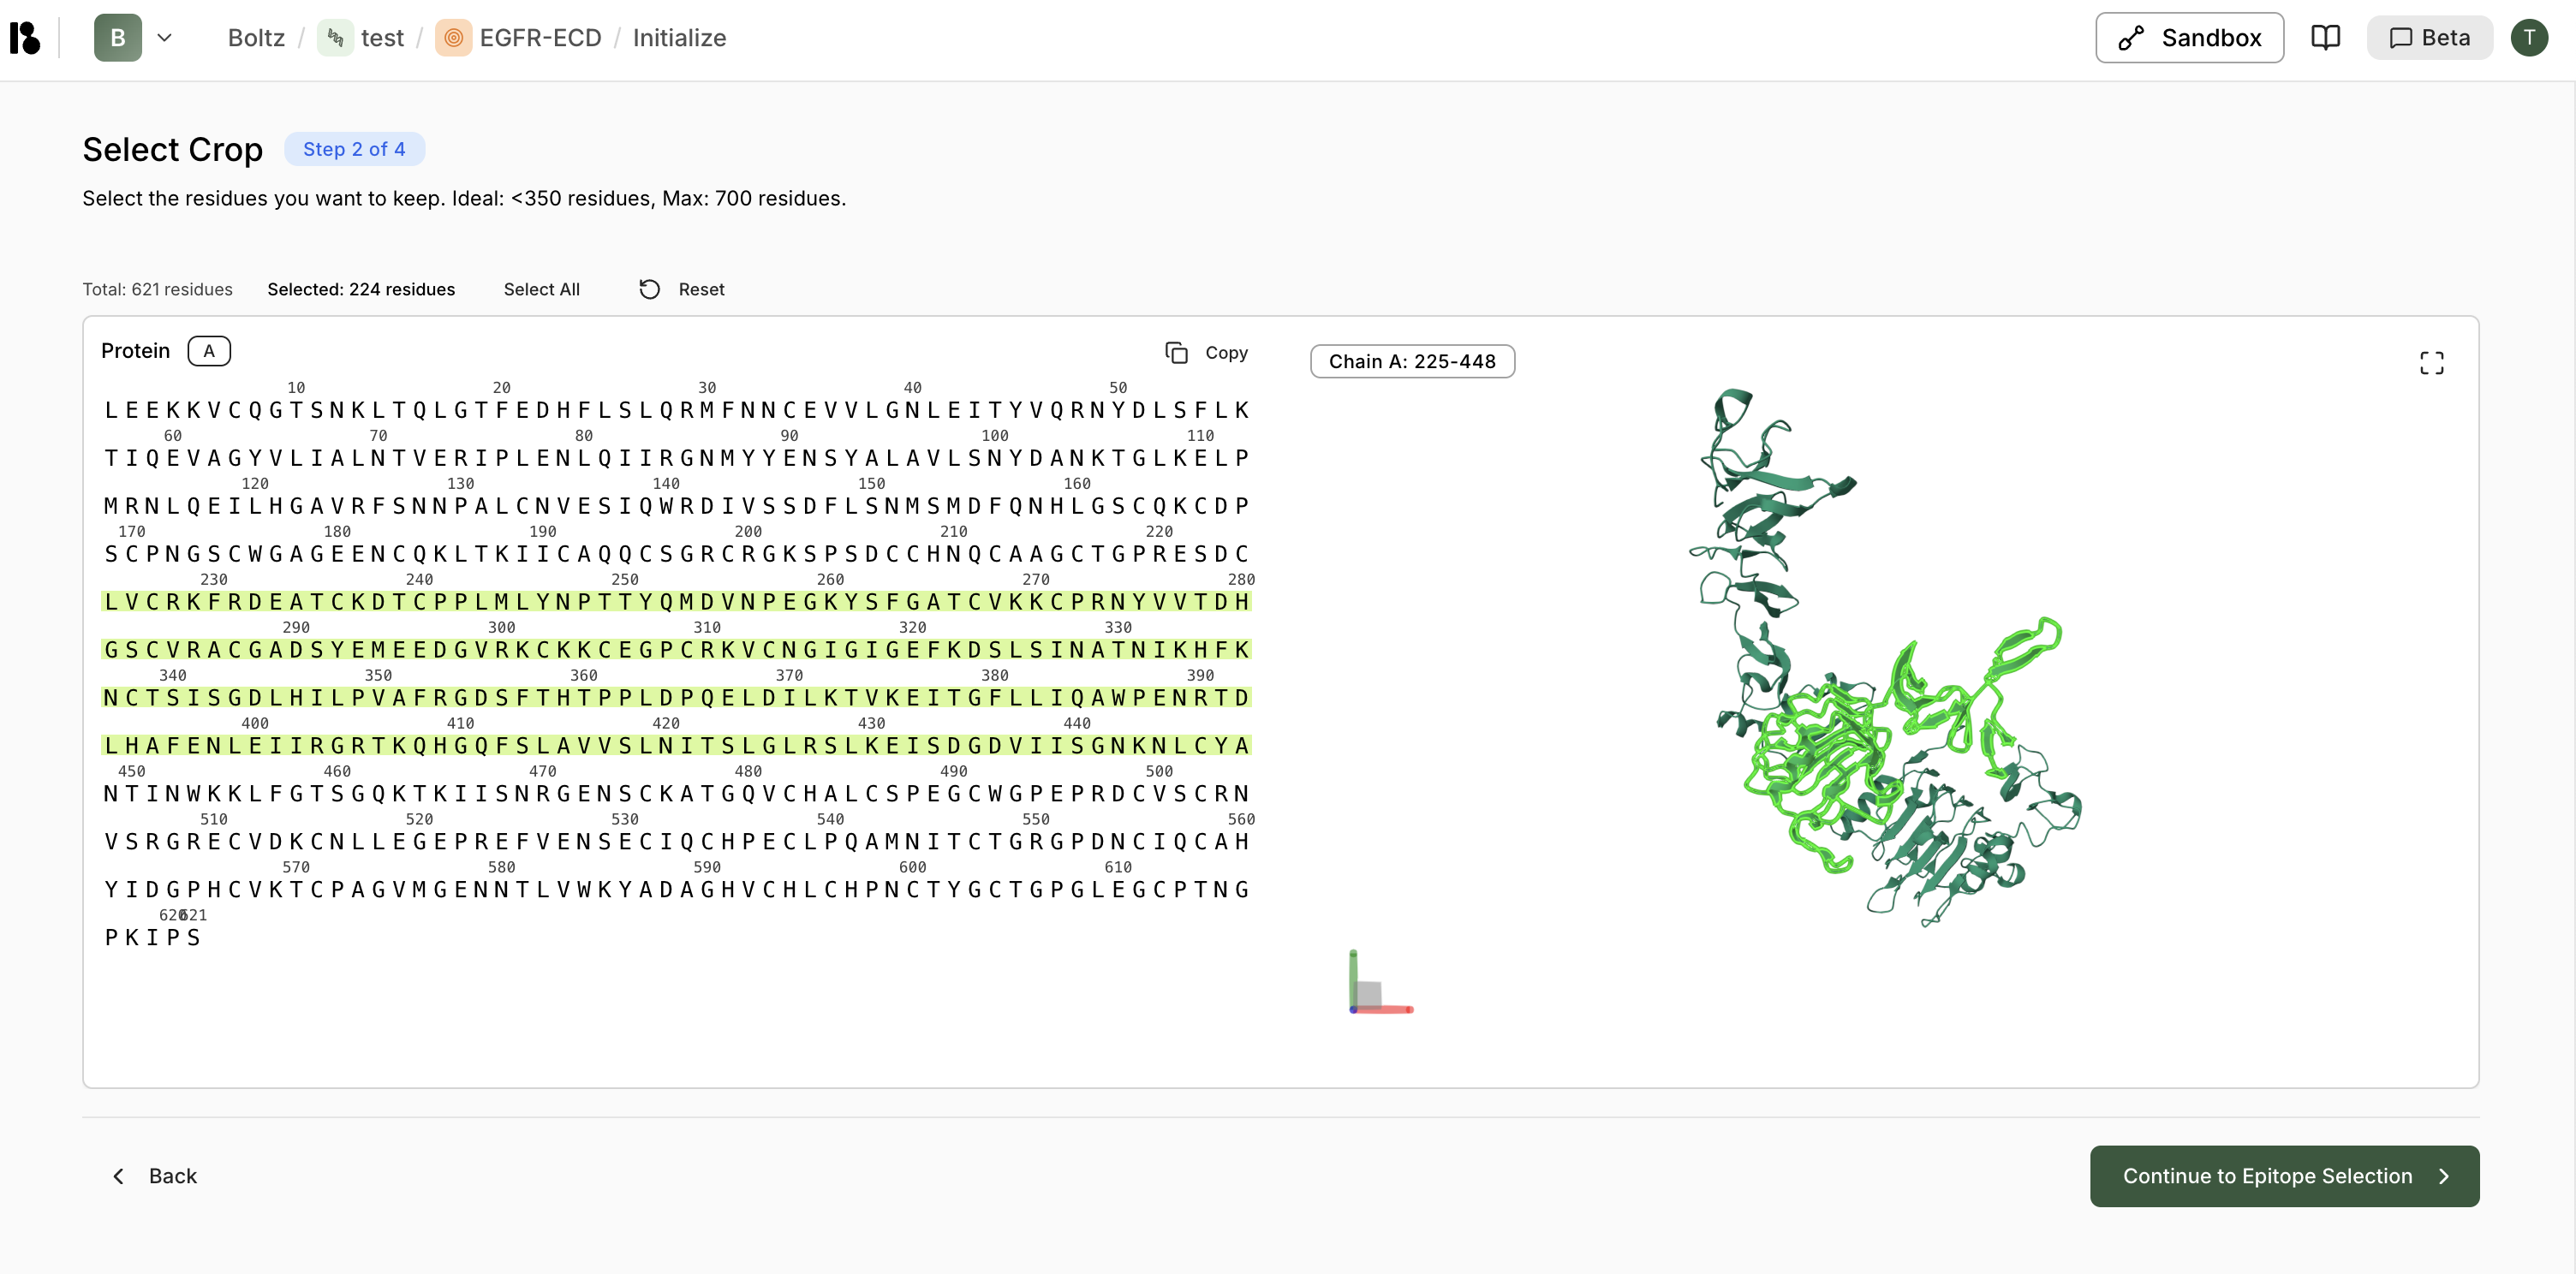
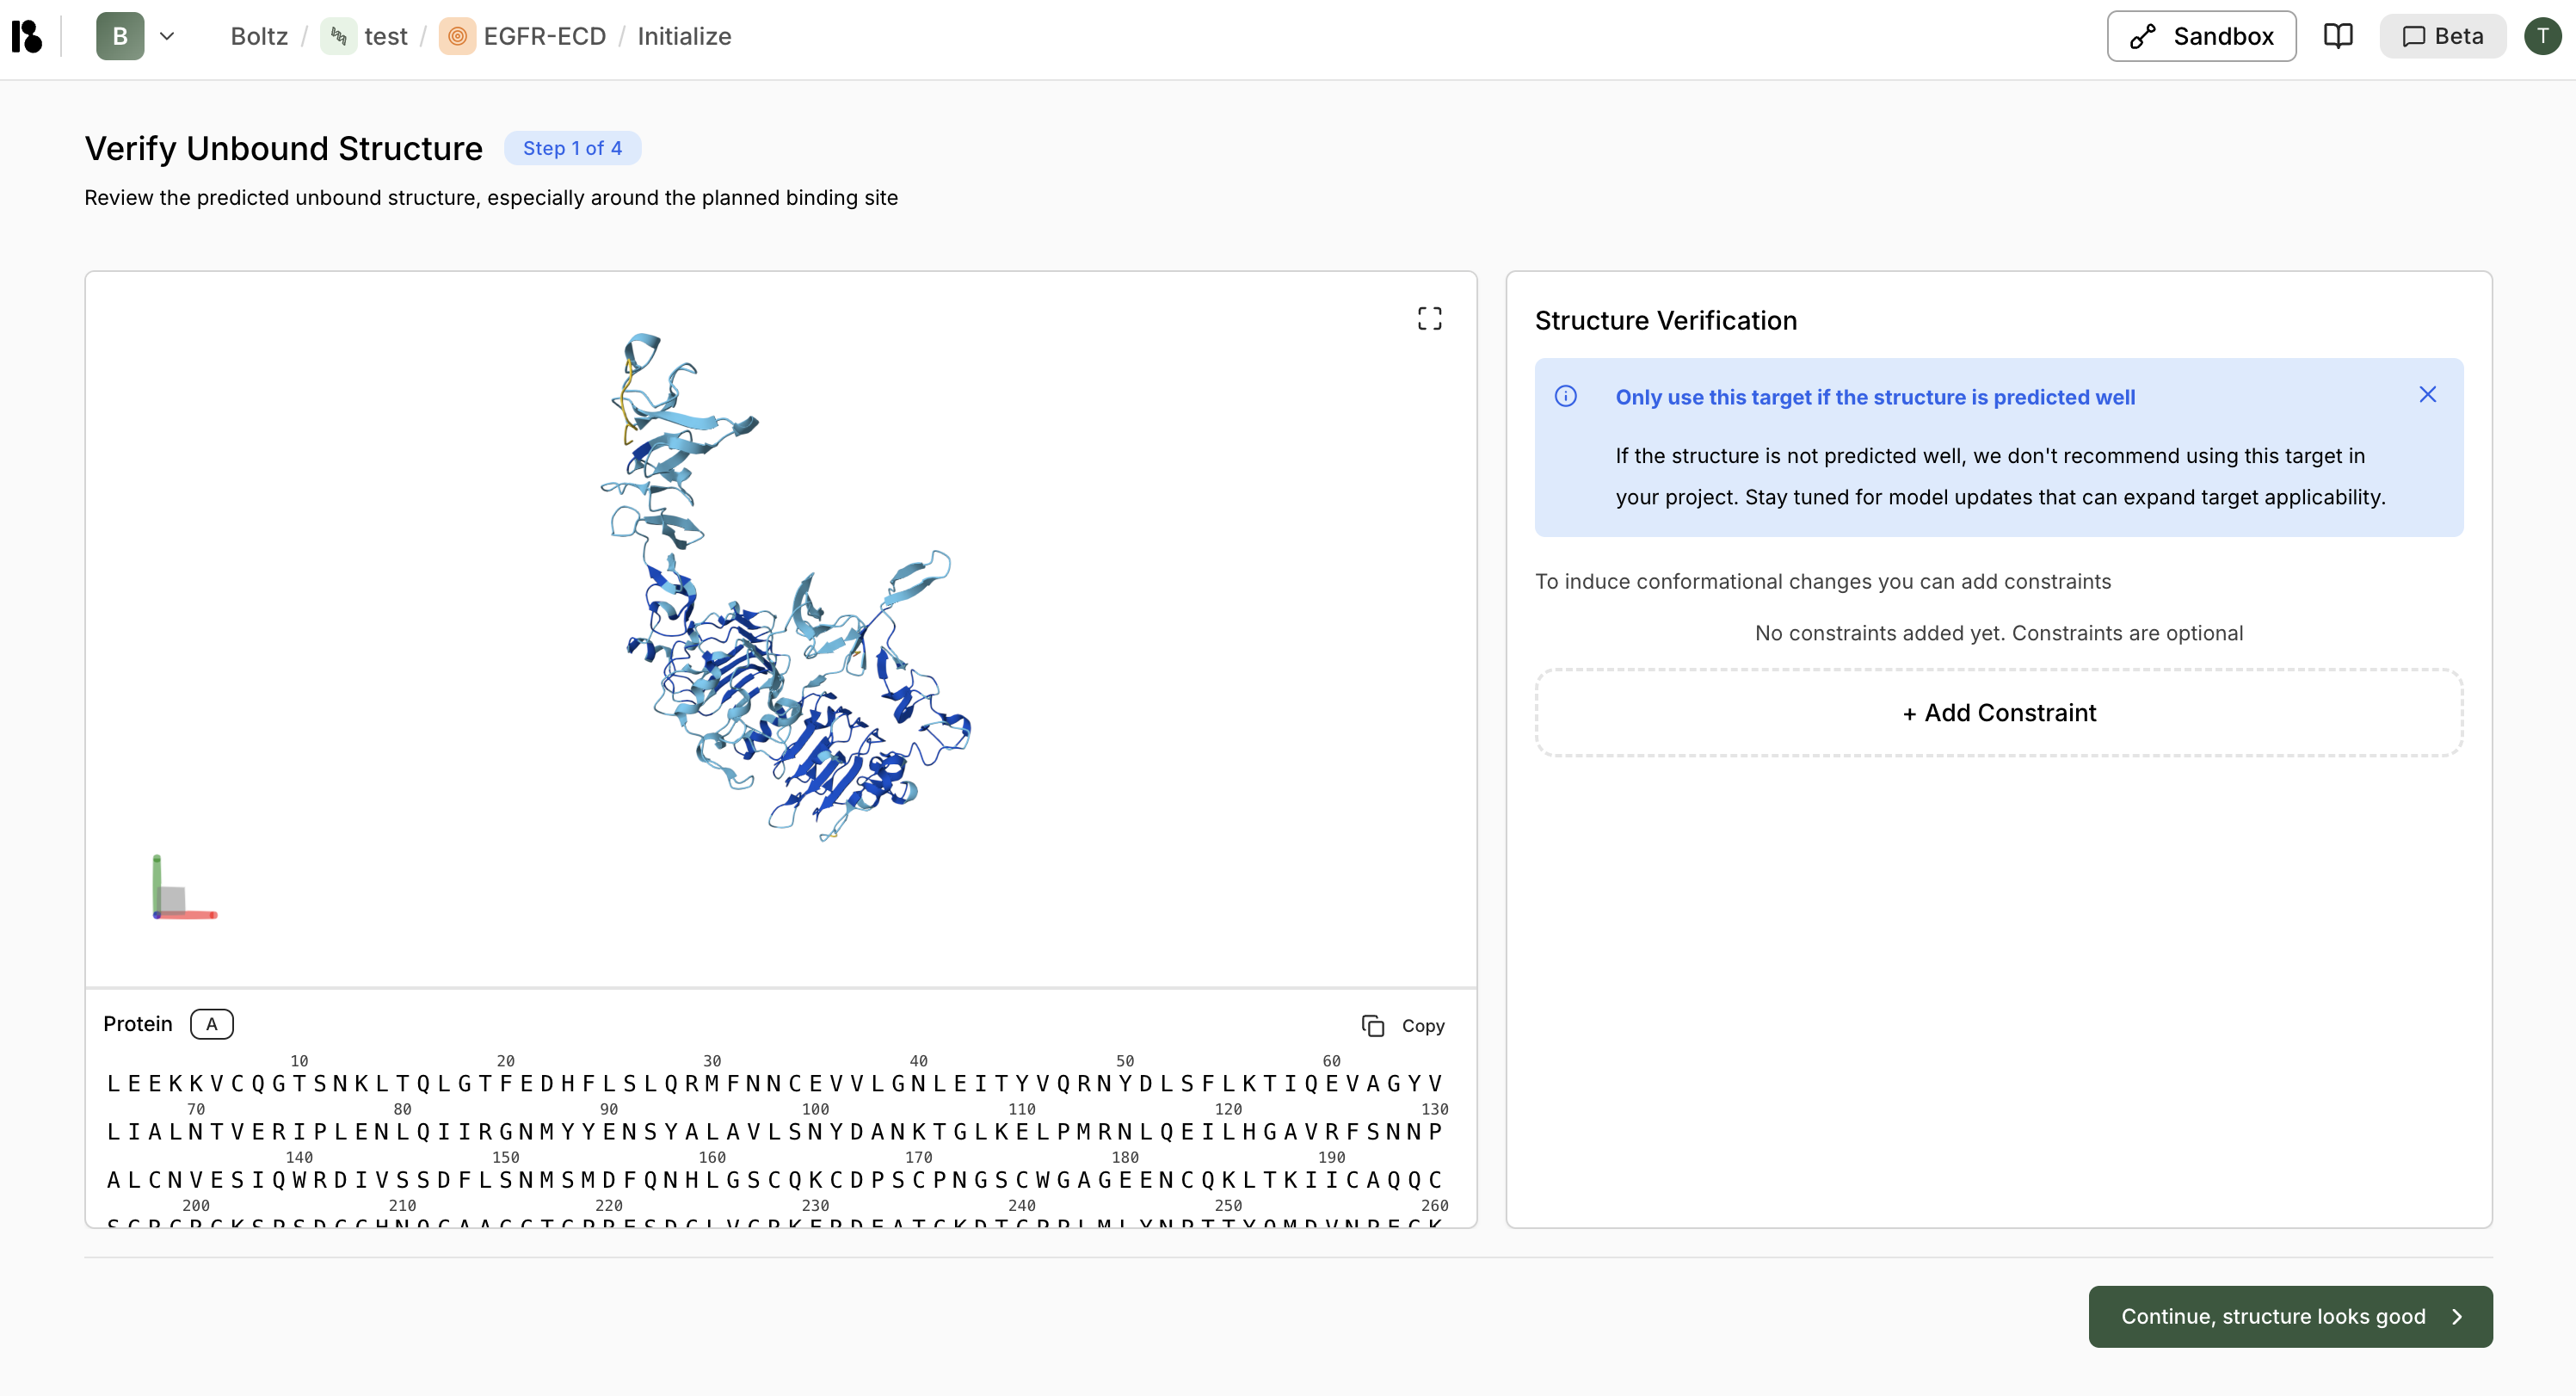 2. **Select Crop** - Choose region of interest (less than 350 residues ideal)
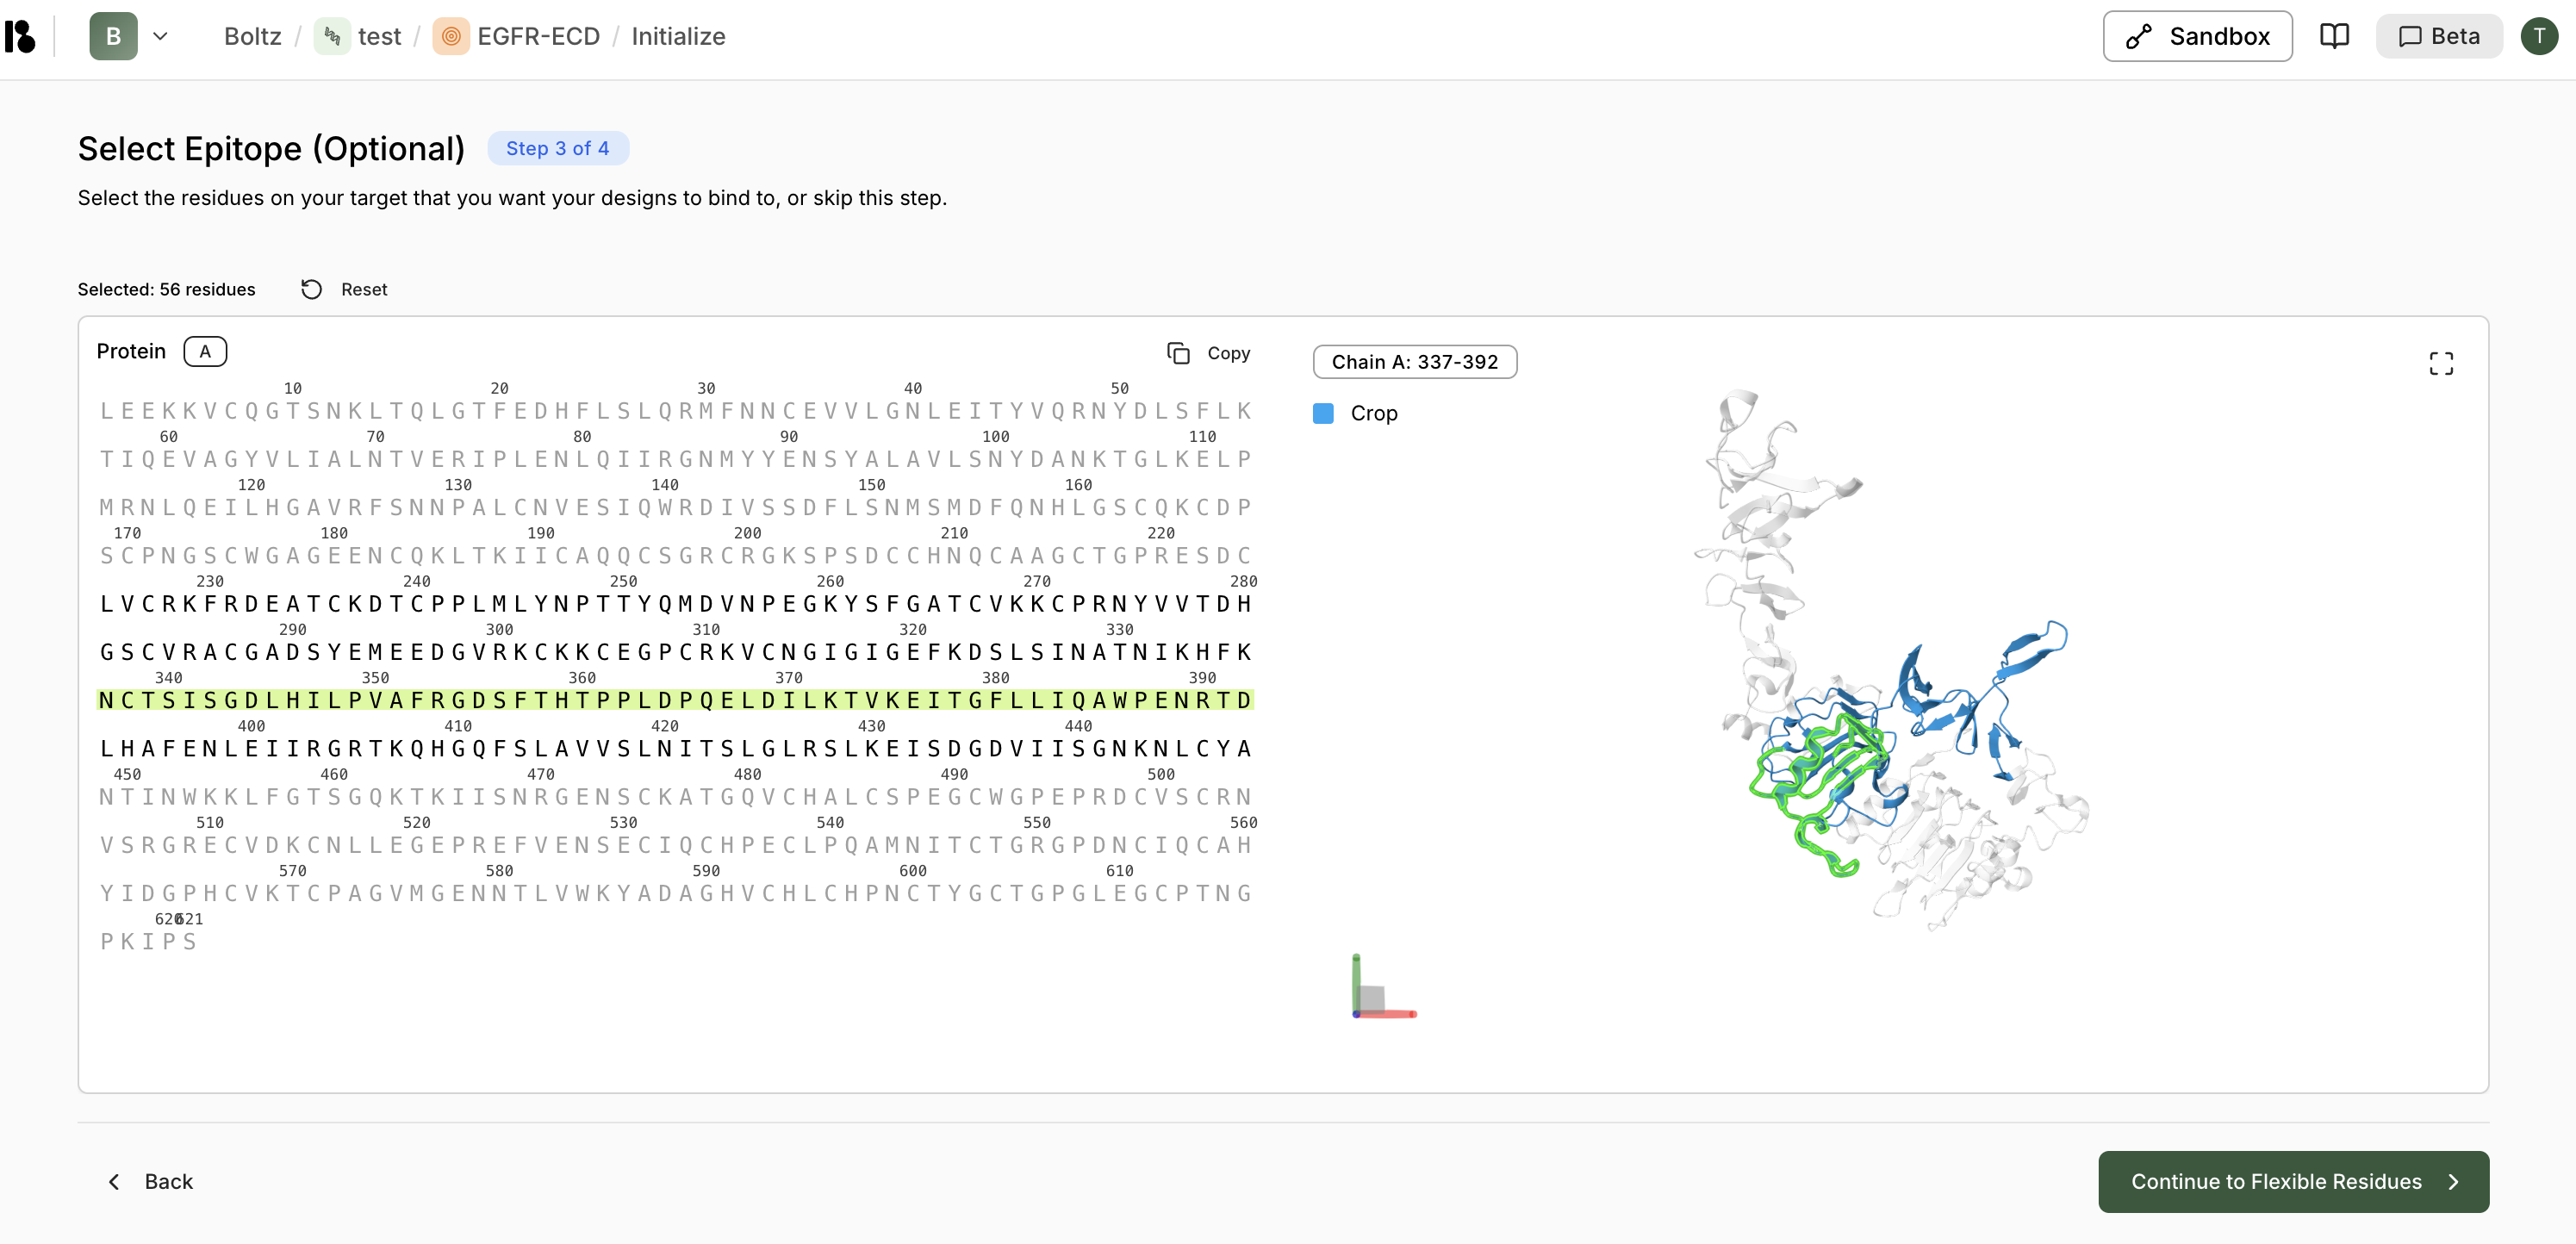
 3. **Select Epitope** (Optional) - Mark binding site residues
 4. **Select Flexible Residues** (Optional) - Mark flexible regions
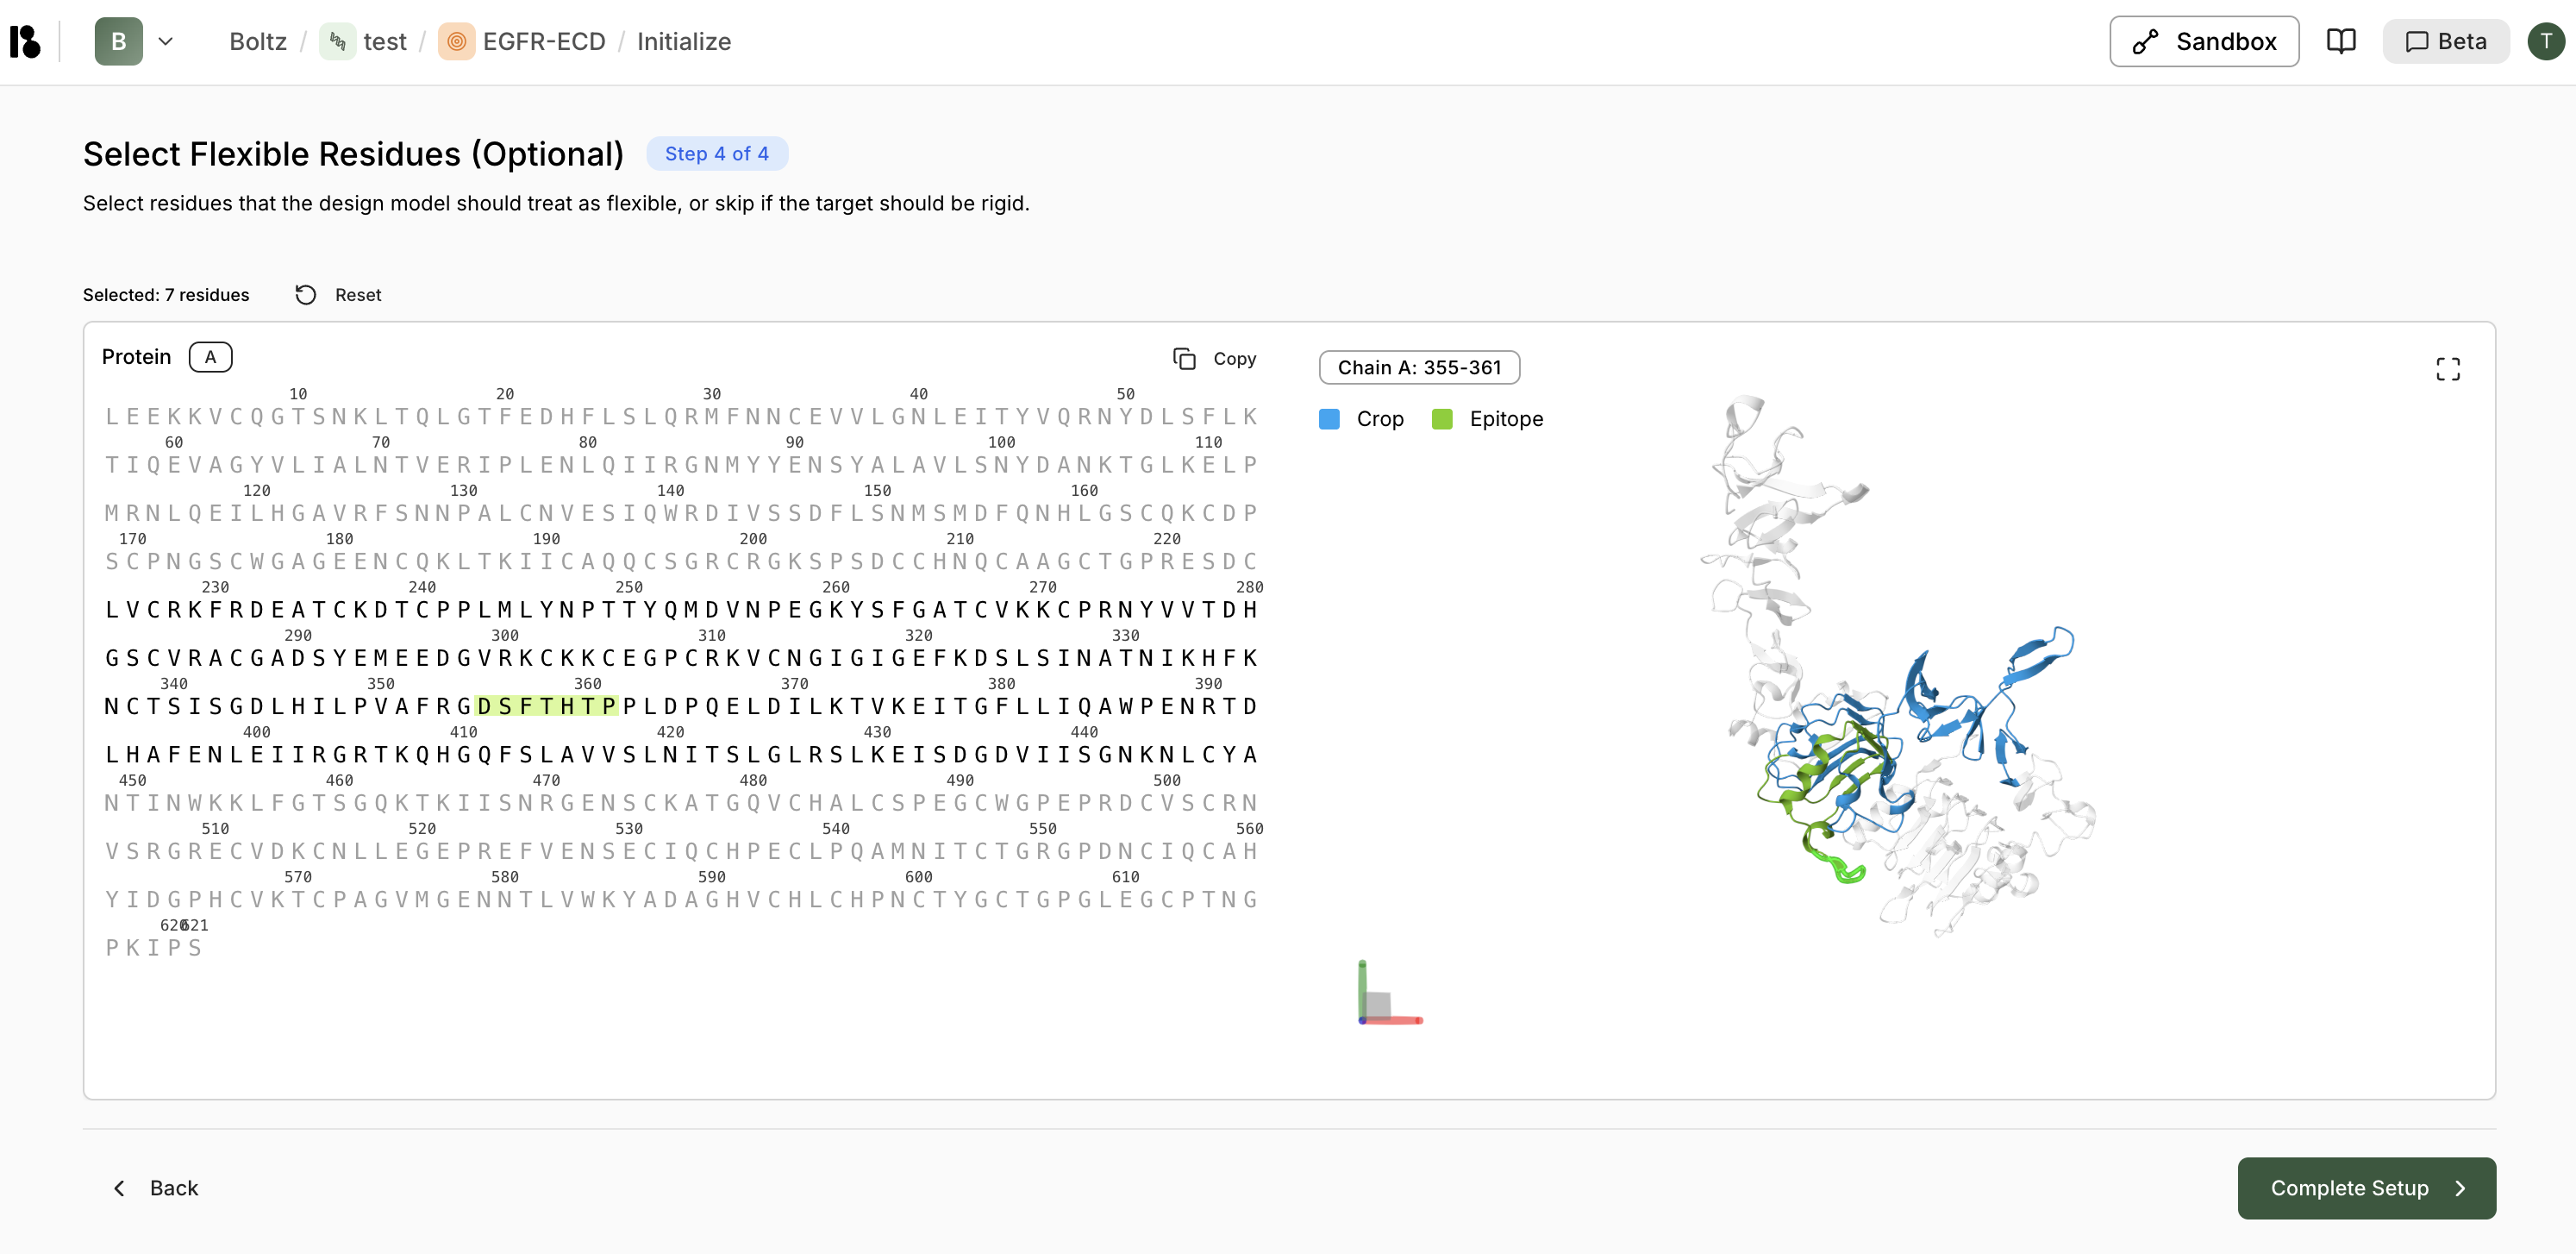 Click **"Complete Setup"** when done.
## Step 3: Create a Binder Specification
Click **"Complete Setup"** when done.
## Step 3: Create a Binder Specification
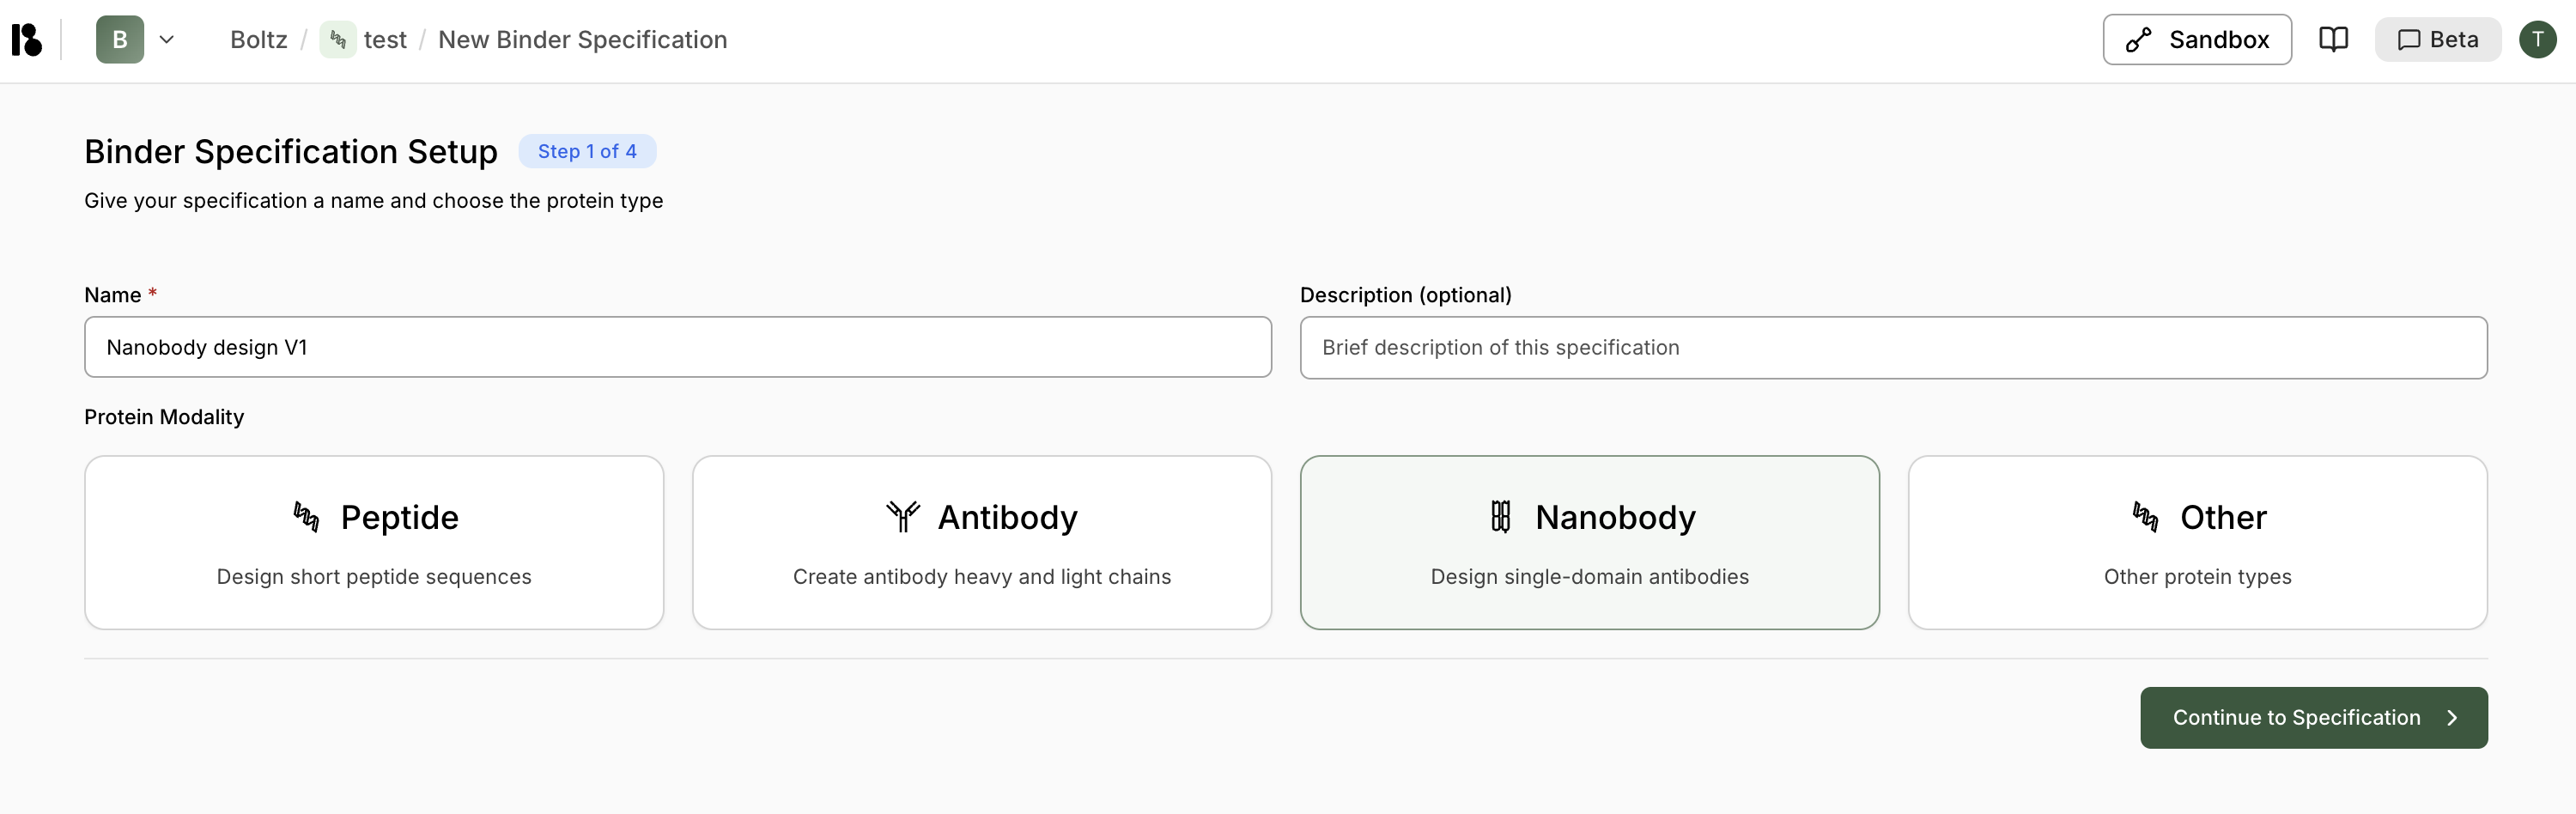 1. Click **"+ Add"** in the Binder Specifications section
2. Enter binder specification name (e.g., "Nanobody design V1")
3. Select **"Nanobody"** modality
4. Click **"> Continue to Specification"**
### Specify Structure
1. Click **"+ Add"** in the Binder Specifications section
2. Enter binder specification name (e.g., "Nanobody design V1")
3. Select **"Nanobody"** modality
4. Click **"> Continue to Specification"**
### Specify Structure
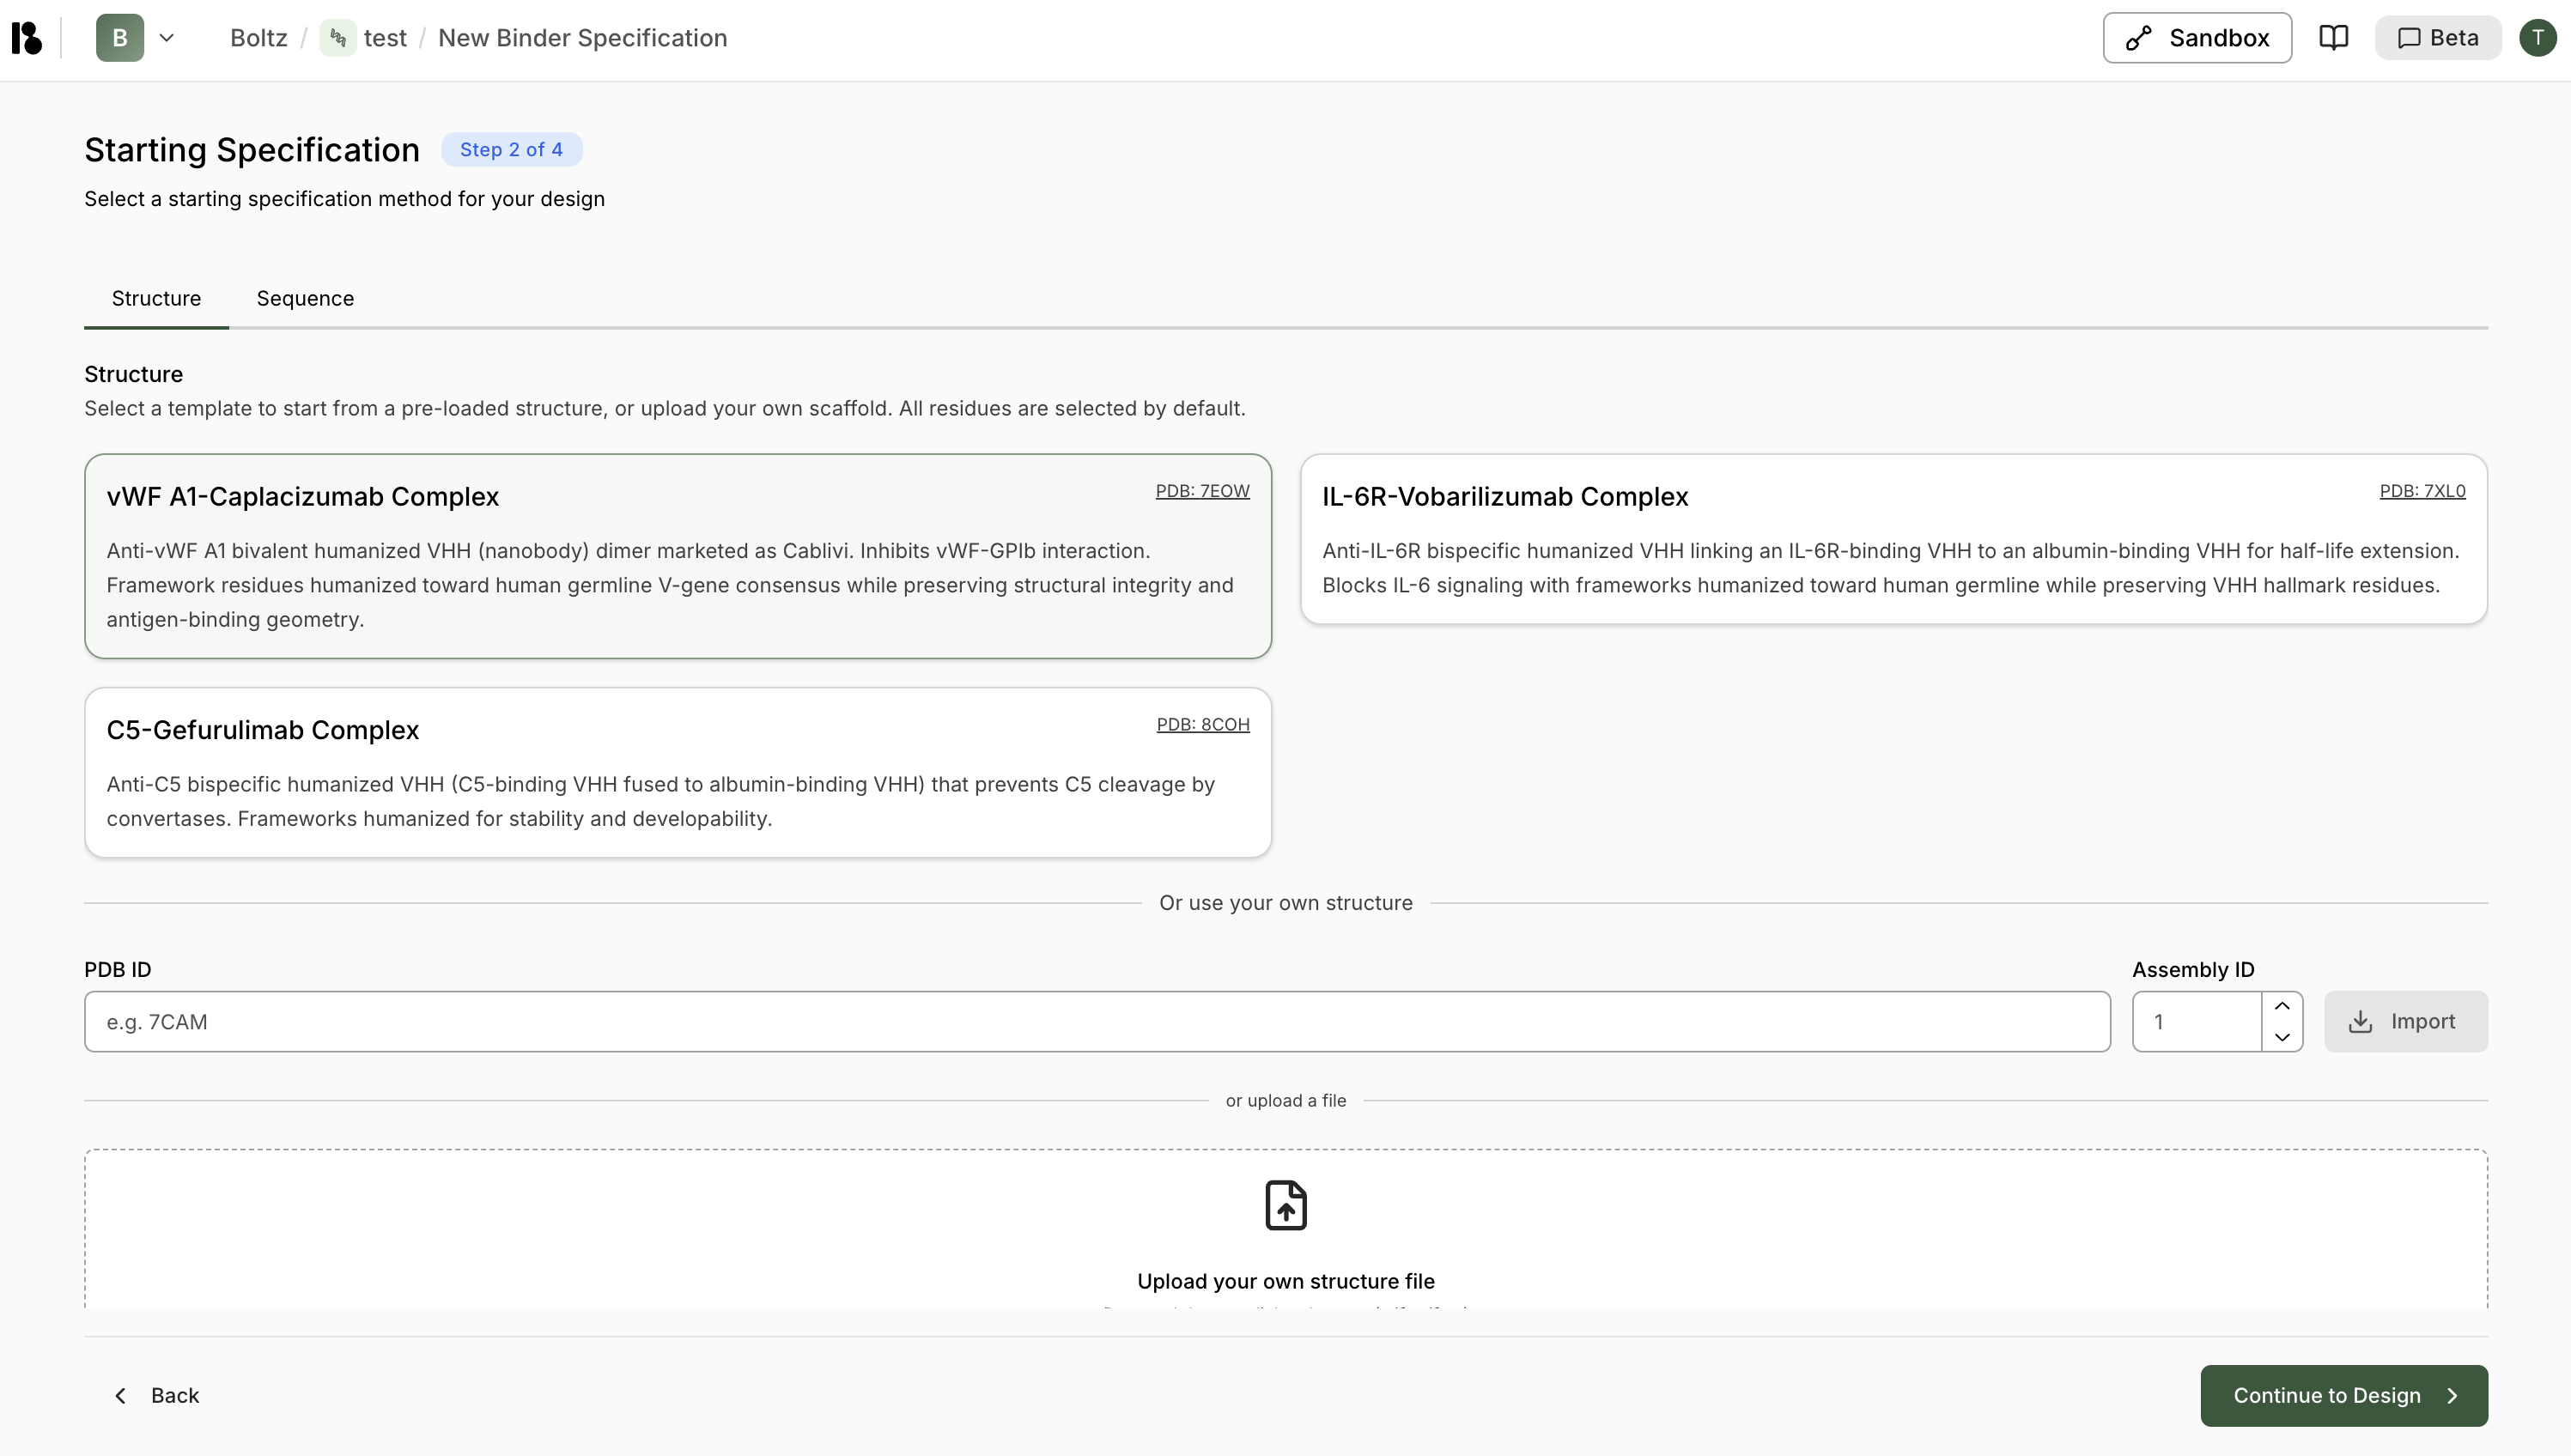 Choose one:
* **Pre-loaded template** - Select from provided structures e.g., vWF A1-Camplacizumab Complex
* **PDB ID** - Import via PDB ID (e.g., 7EOW)
* **Upload file** - Upload your own structure
### Select Residues
Choose one:
* **Pre-loaded template** - Select from provided structures e.g., vWF A1-Camplacizumab Complex
* **PDB ID** - Import via PDB ID (e.g., 7EOW)
* **Upload file** - Upload your own structure
### Select Residues
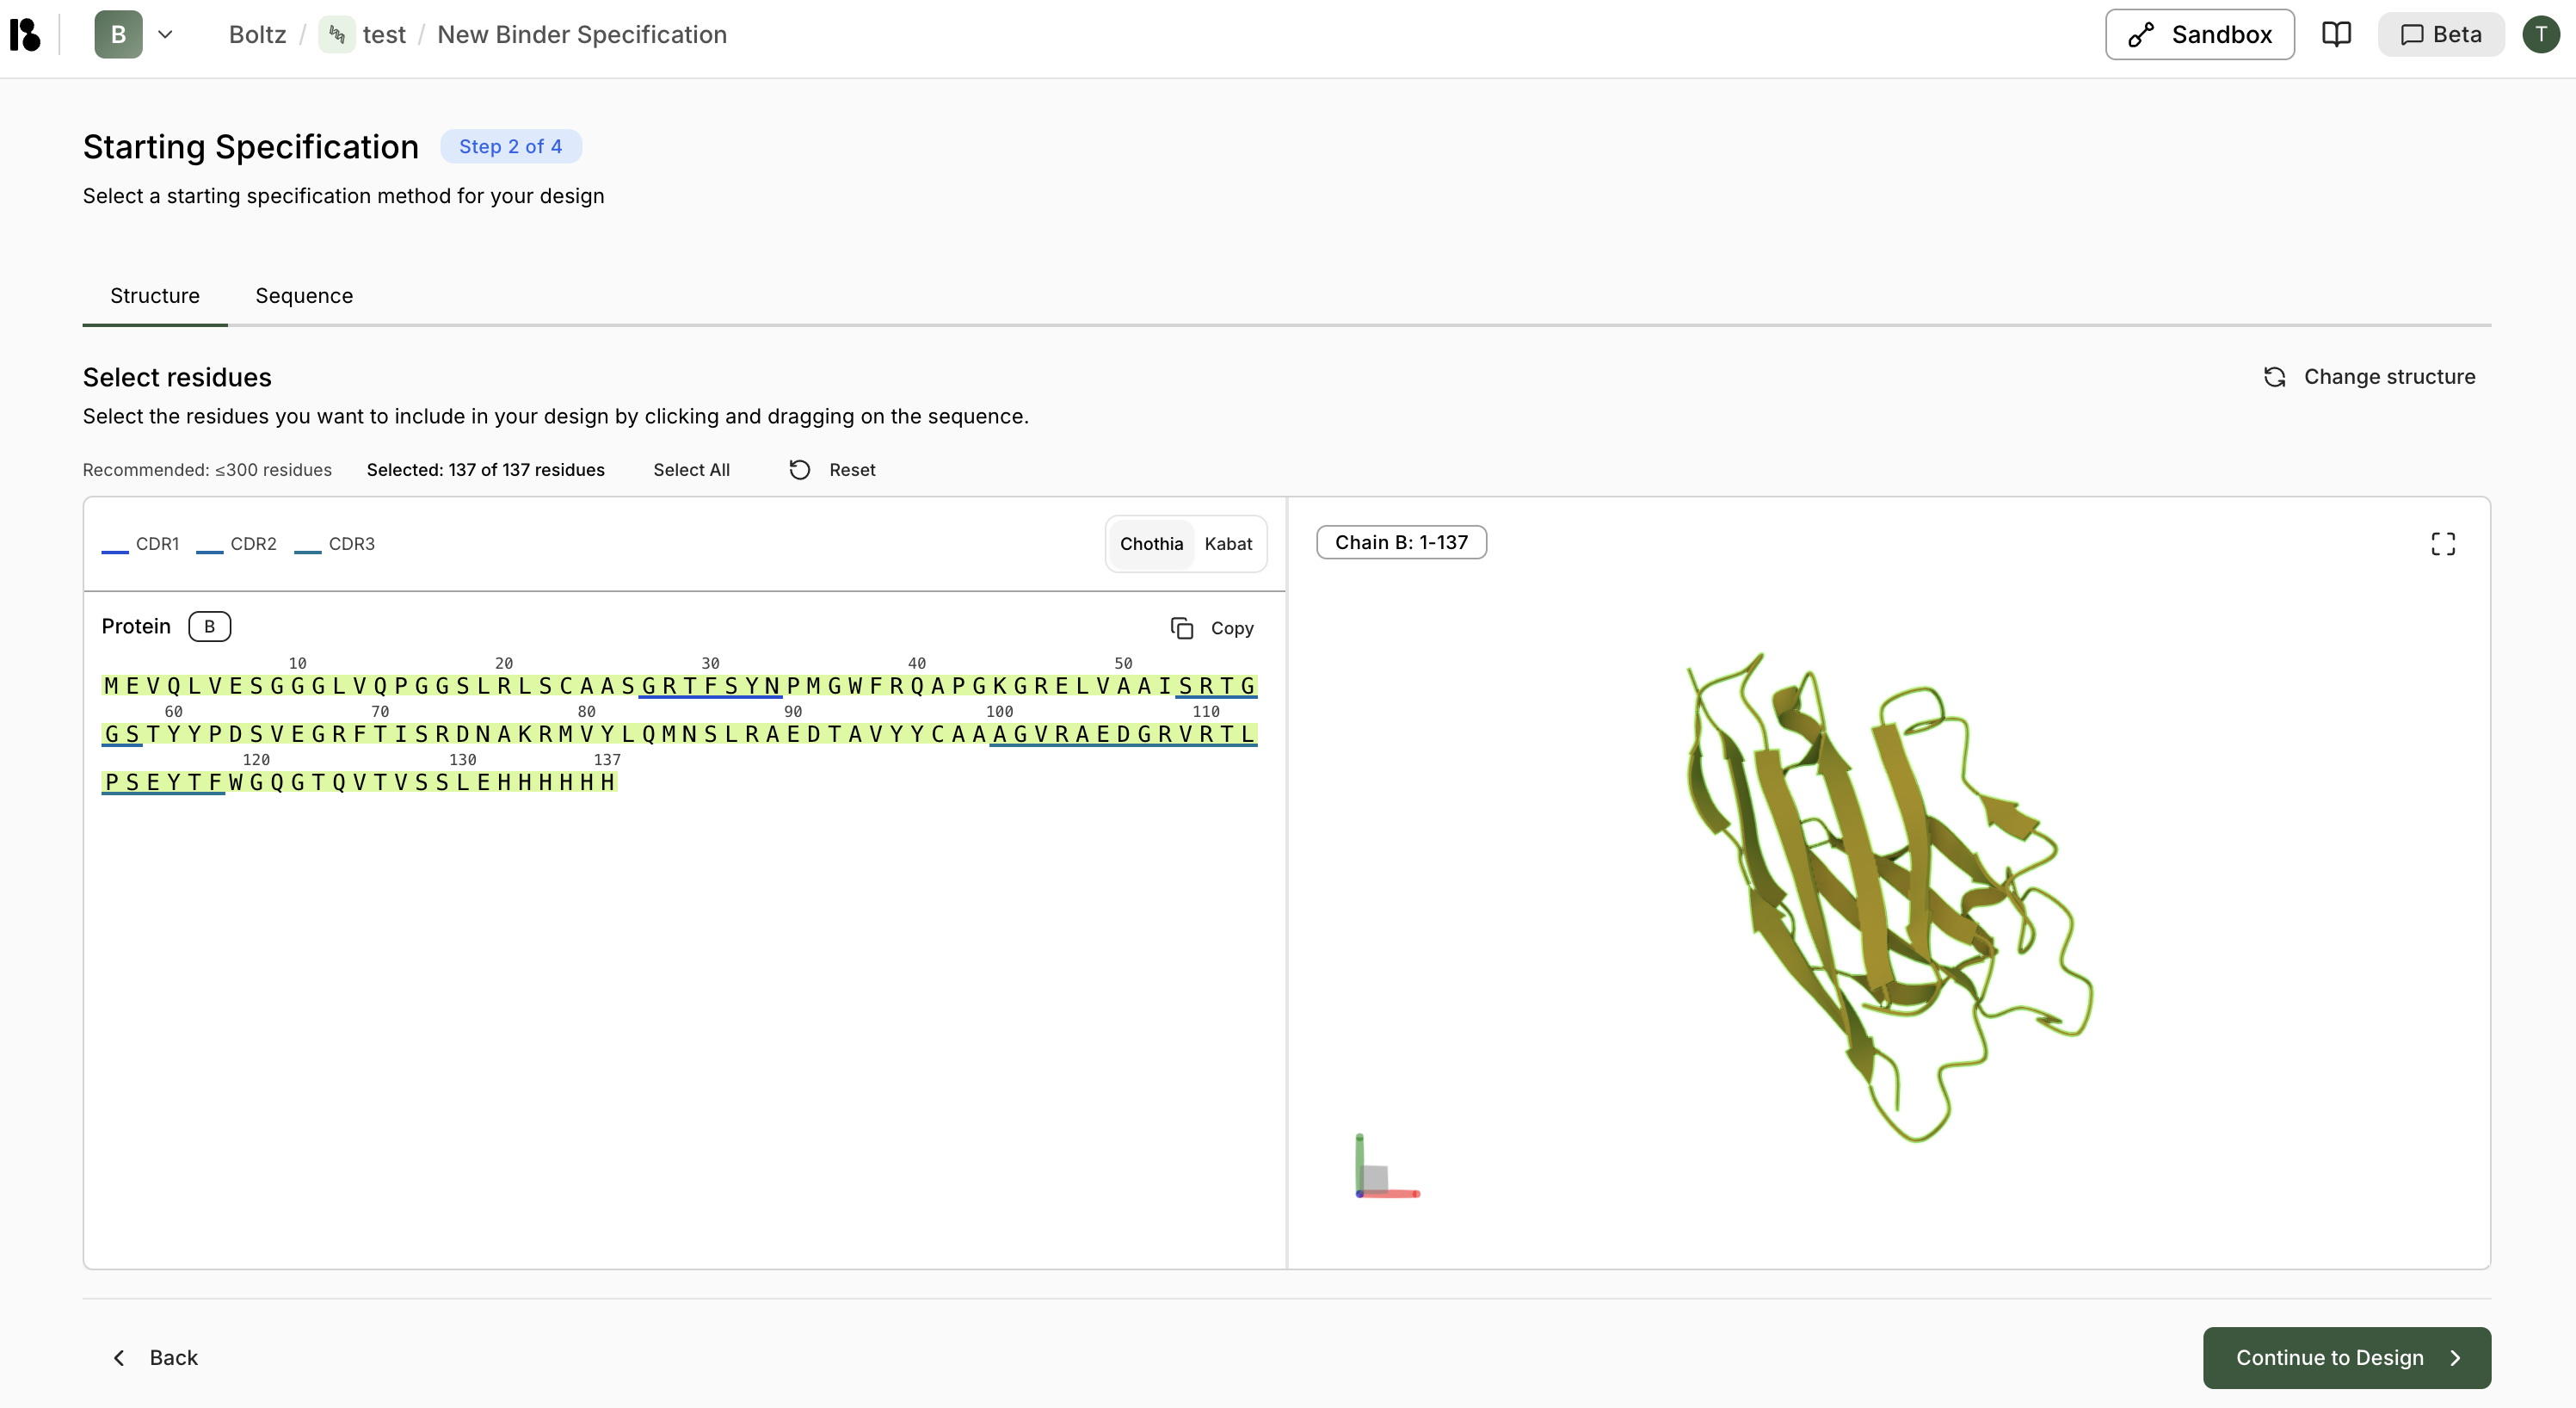 * All residues are selected by default.
* You can also manually select residues by clicking/dragging
* Recommended: ≤300 residues
### Configure Design
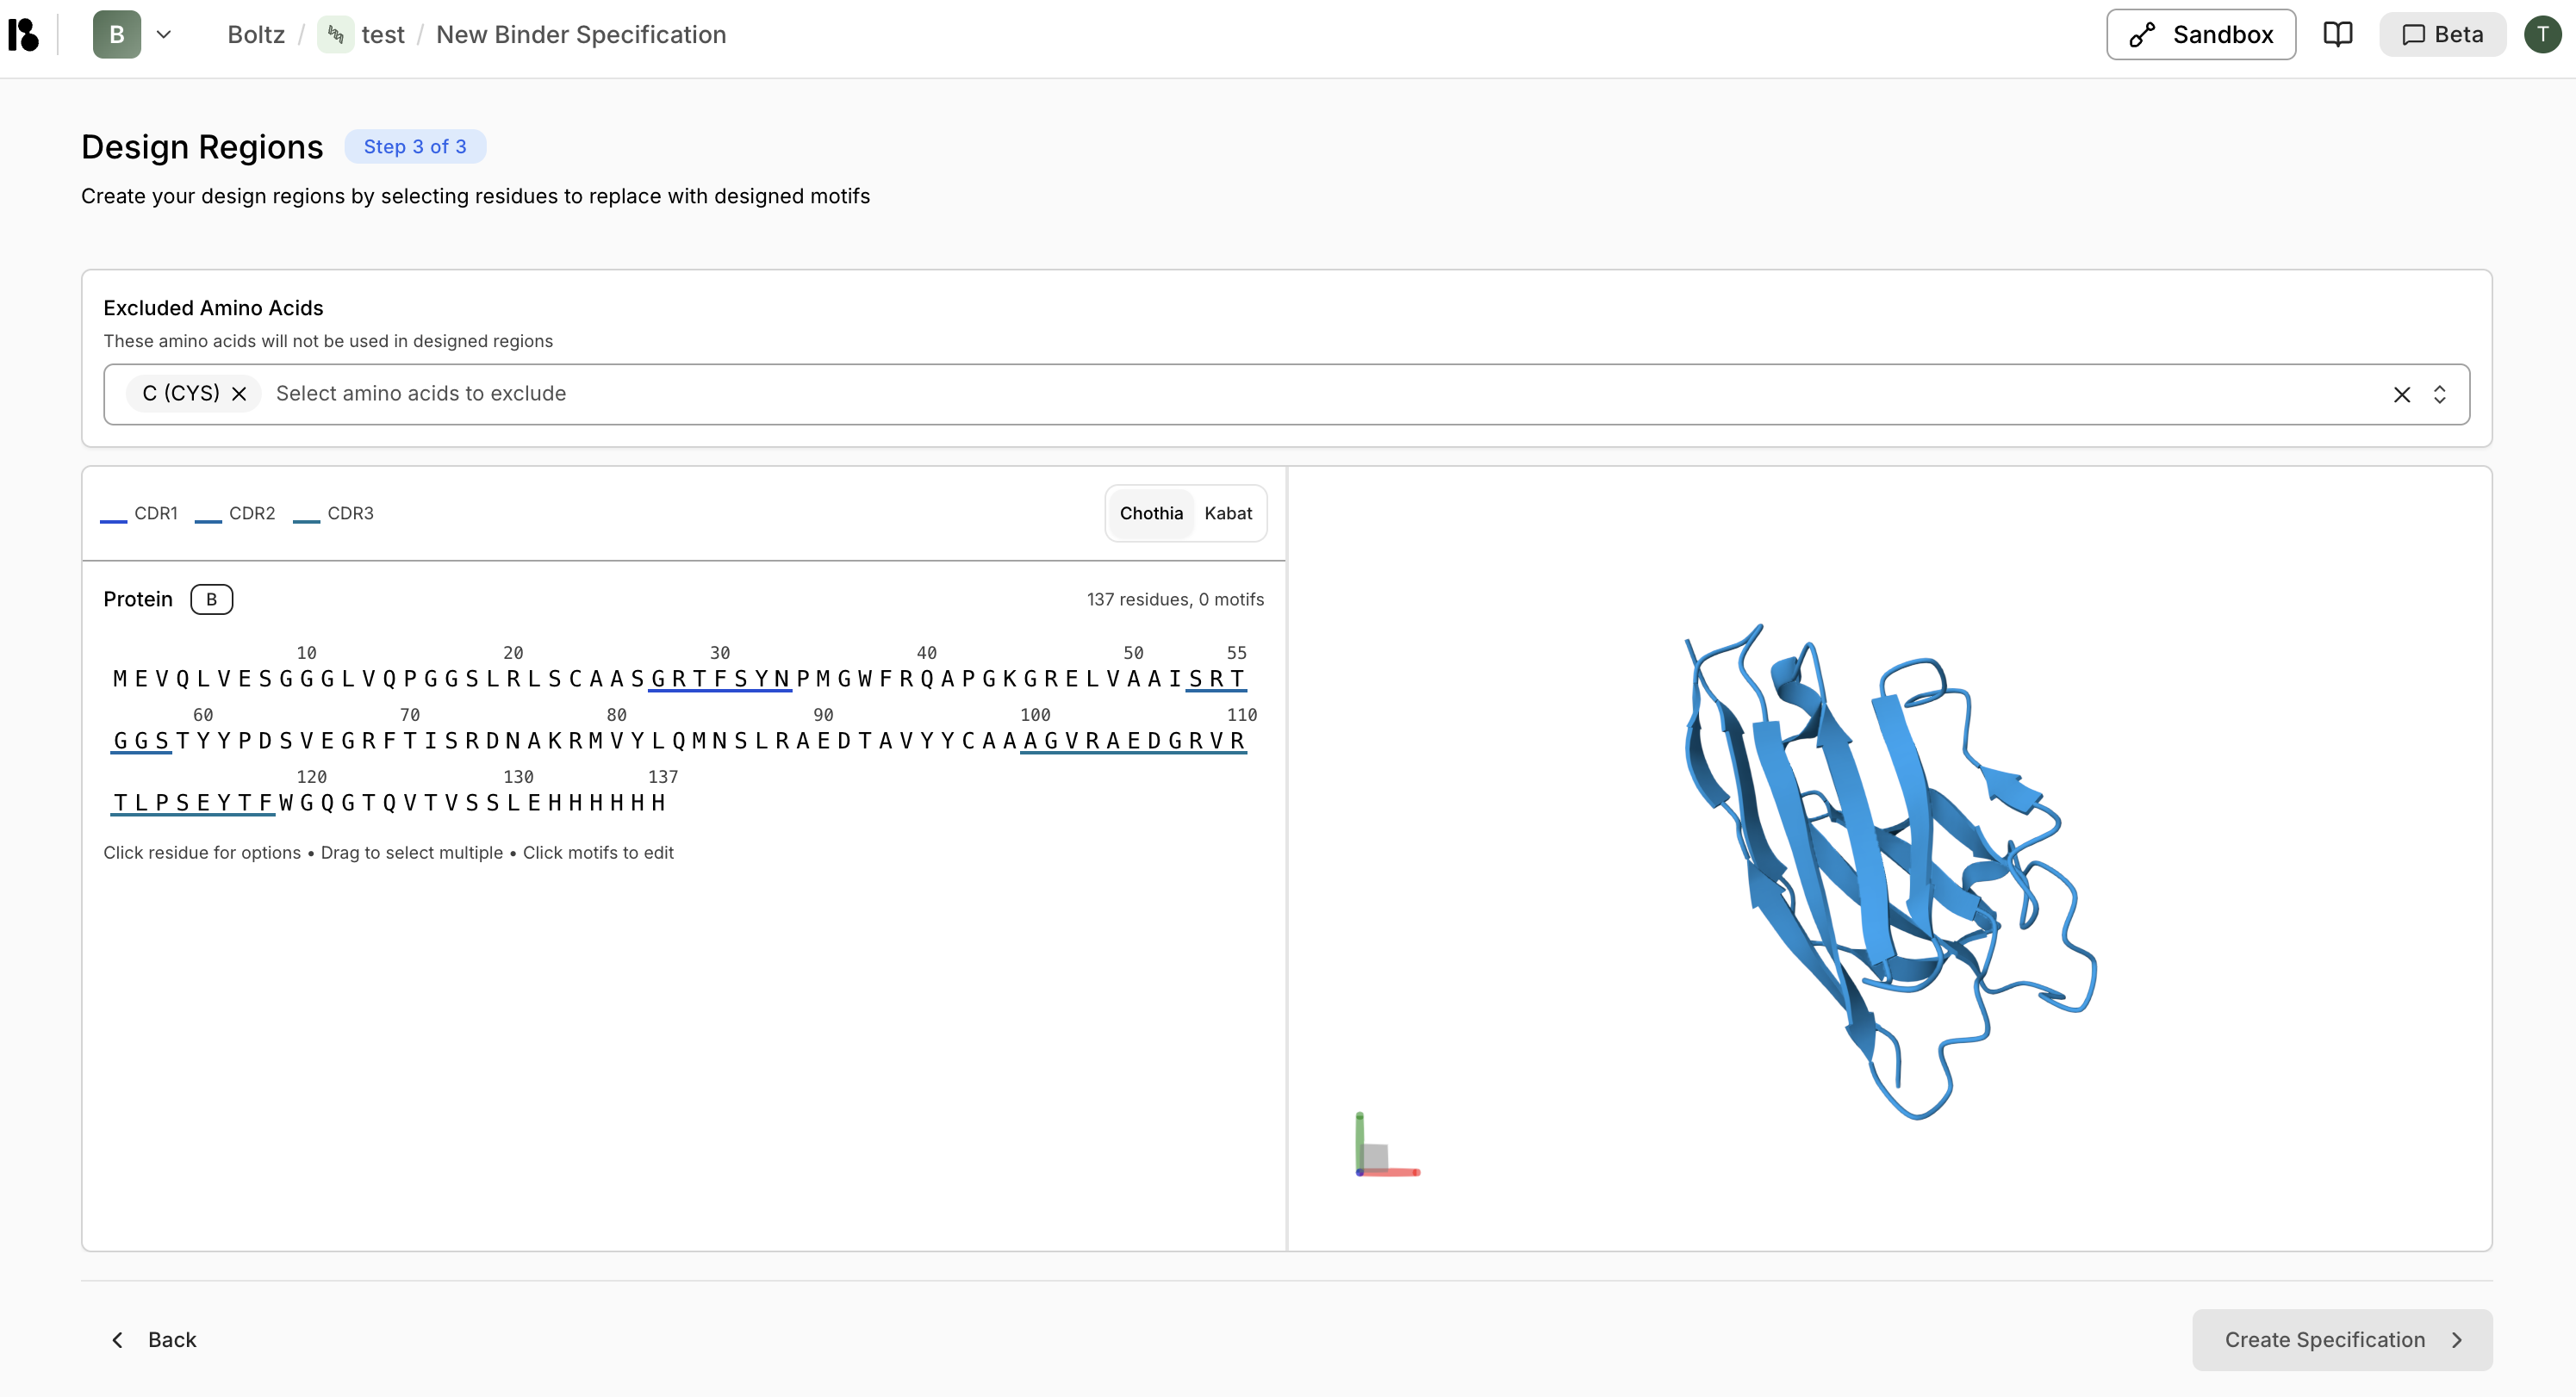
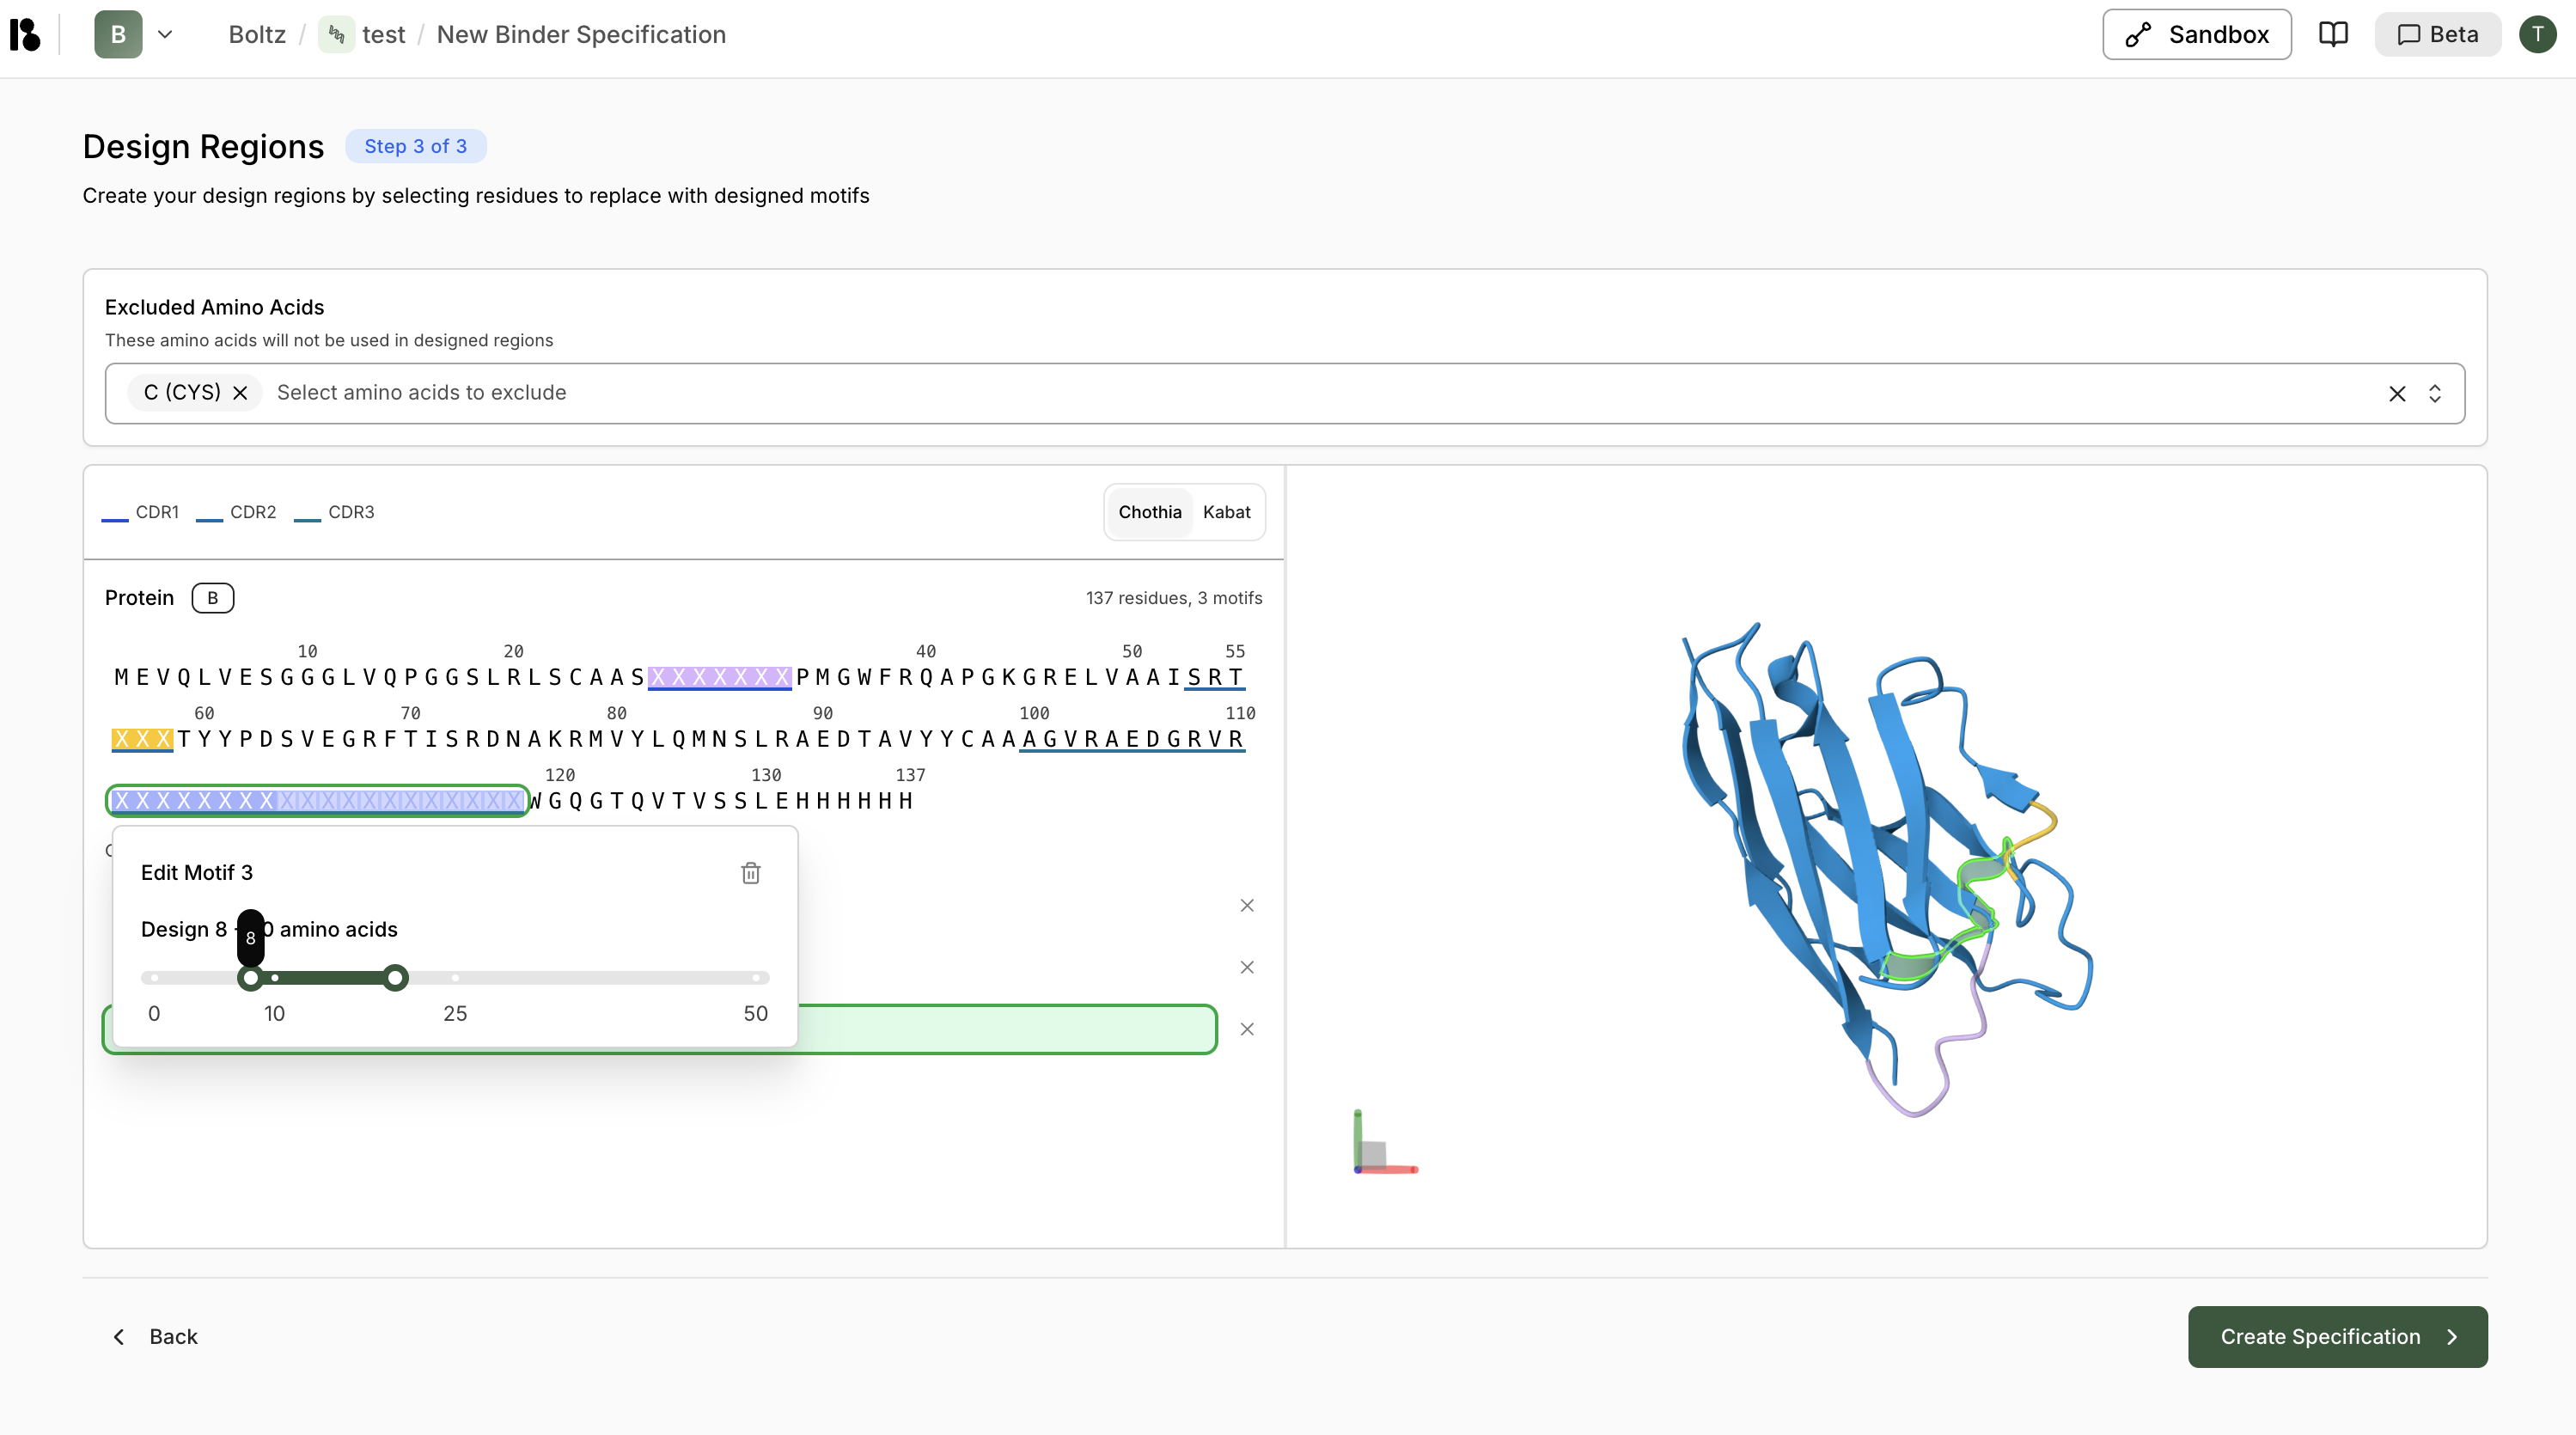
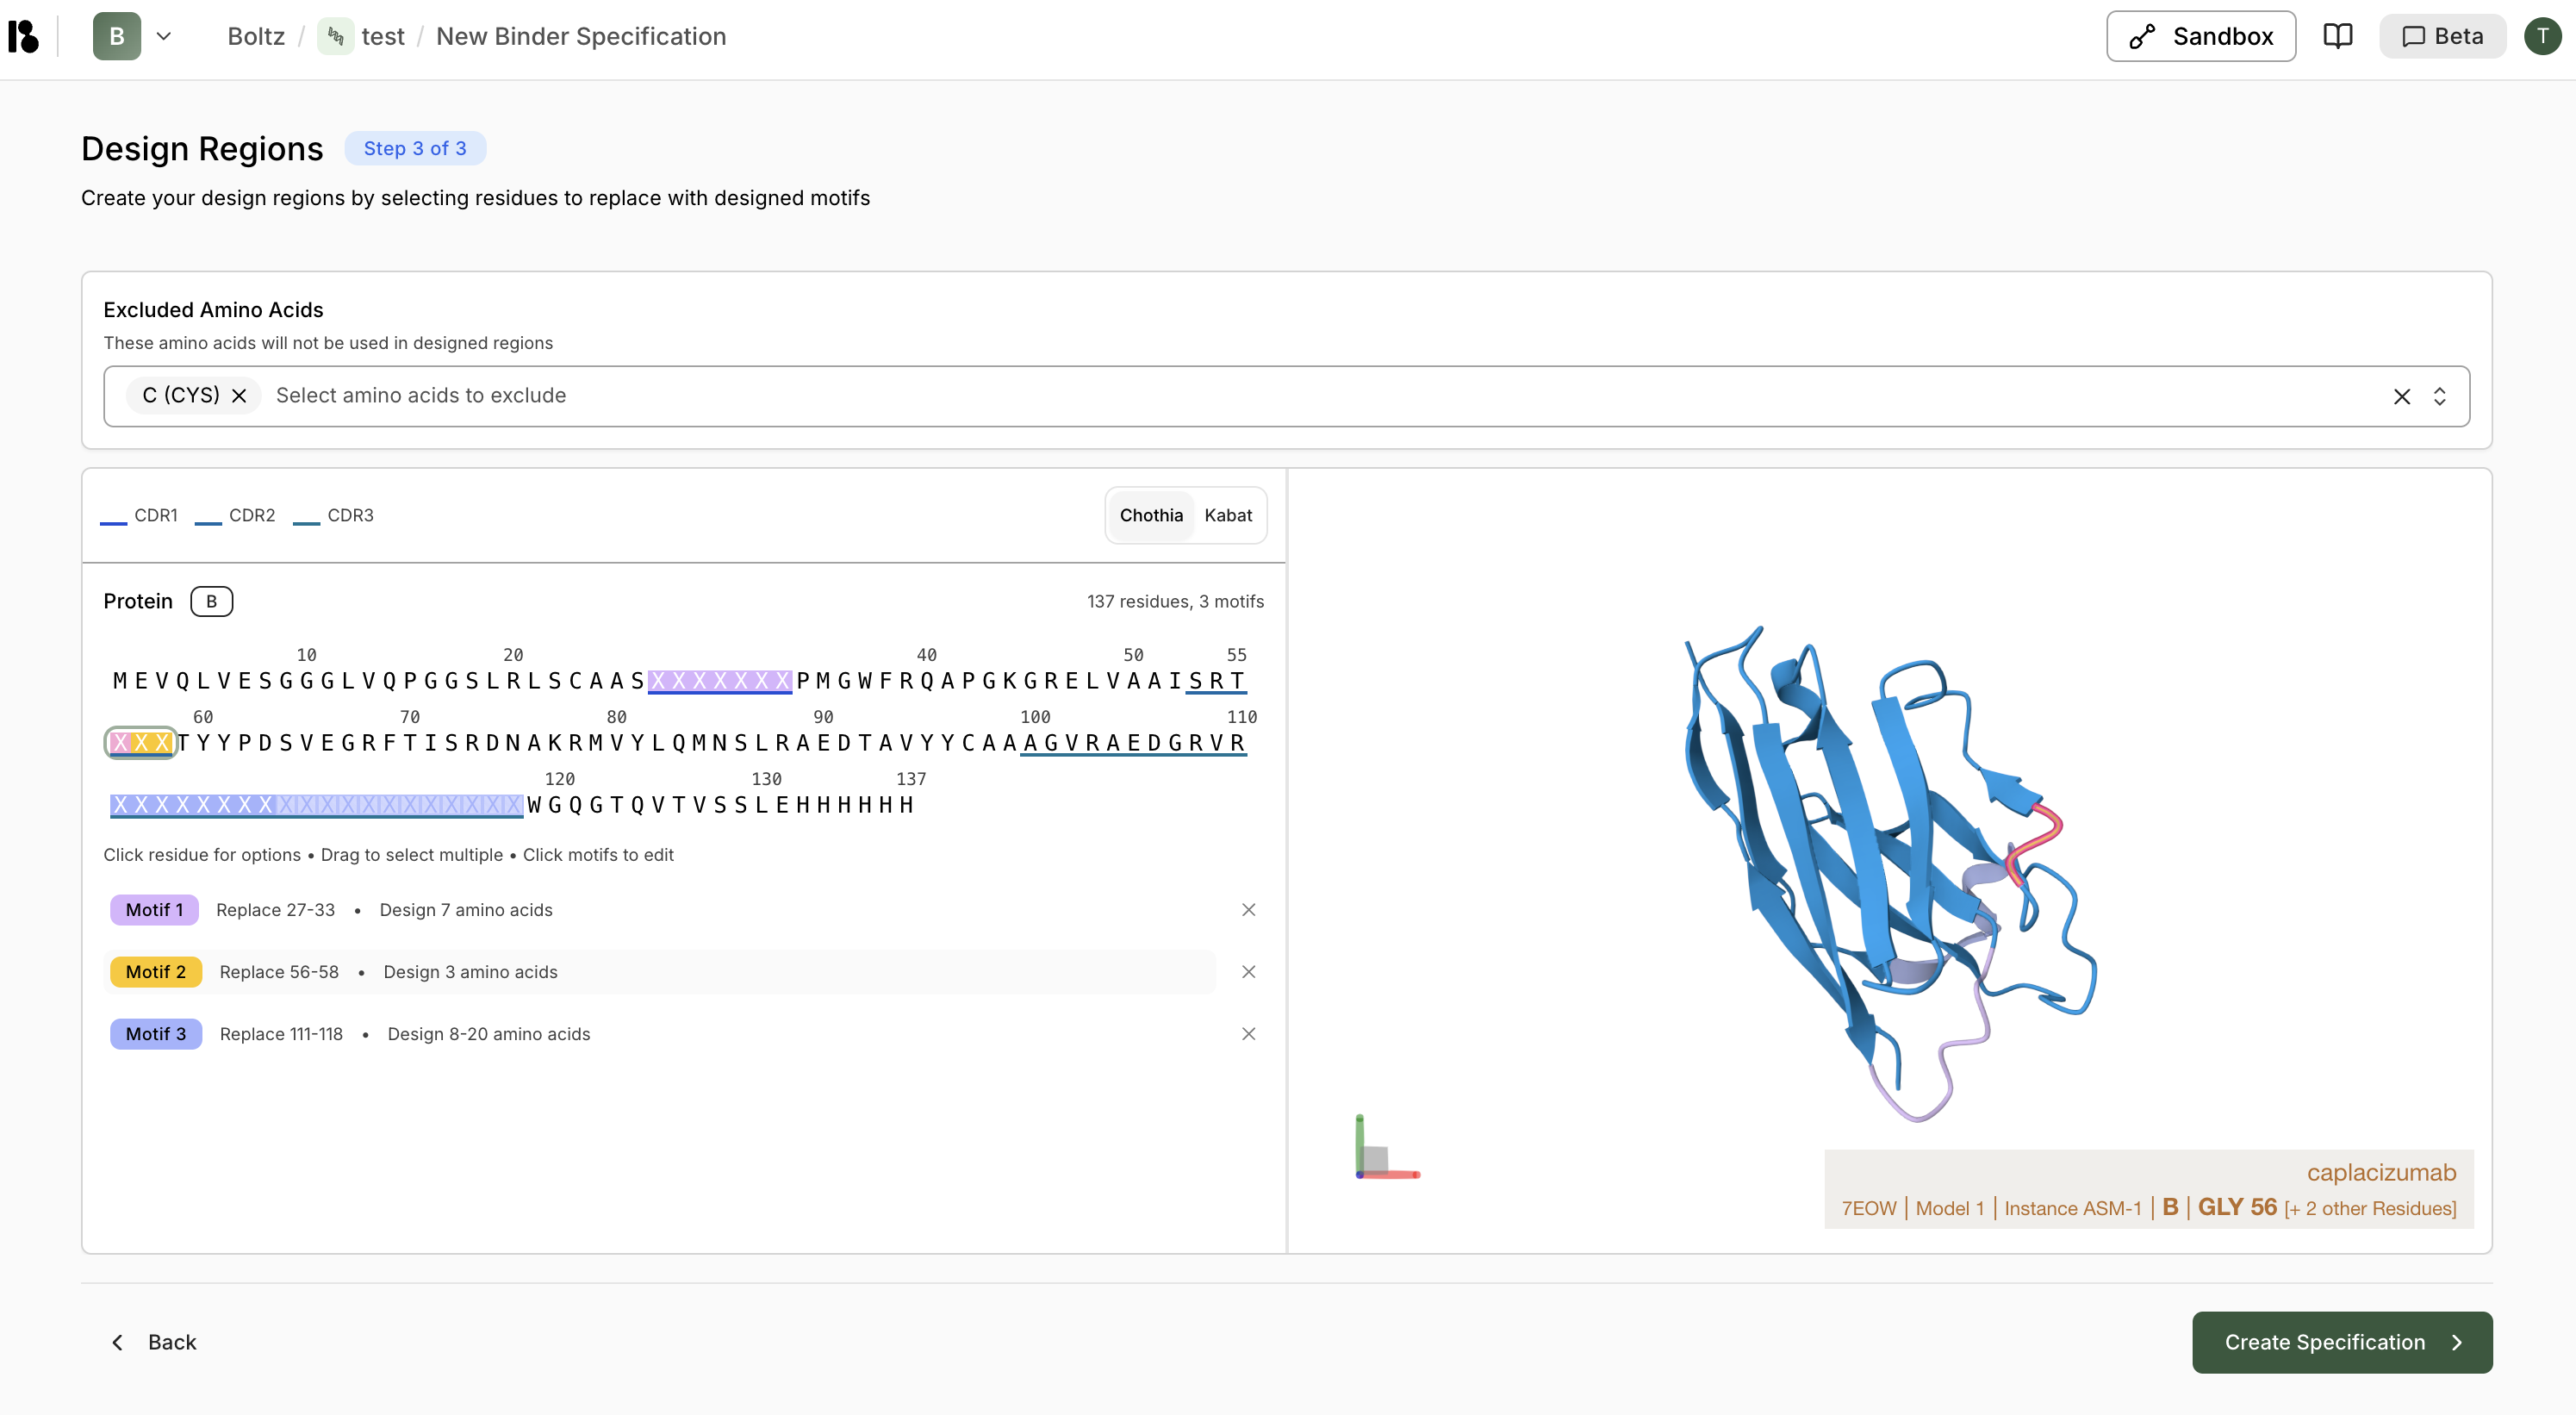
1. **Exclude amino acids** (e.g., Cysteine)
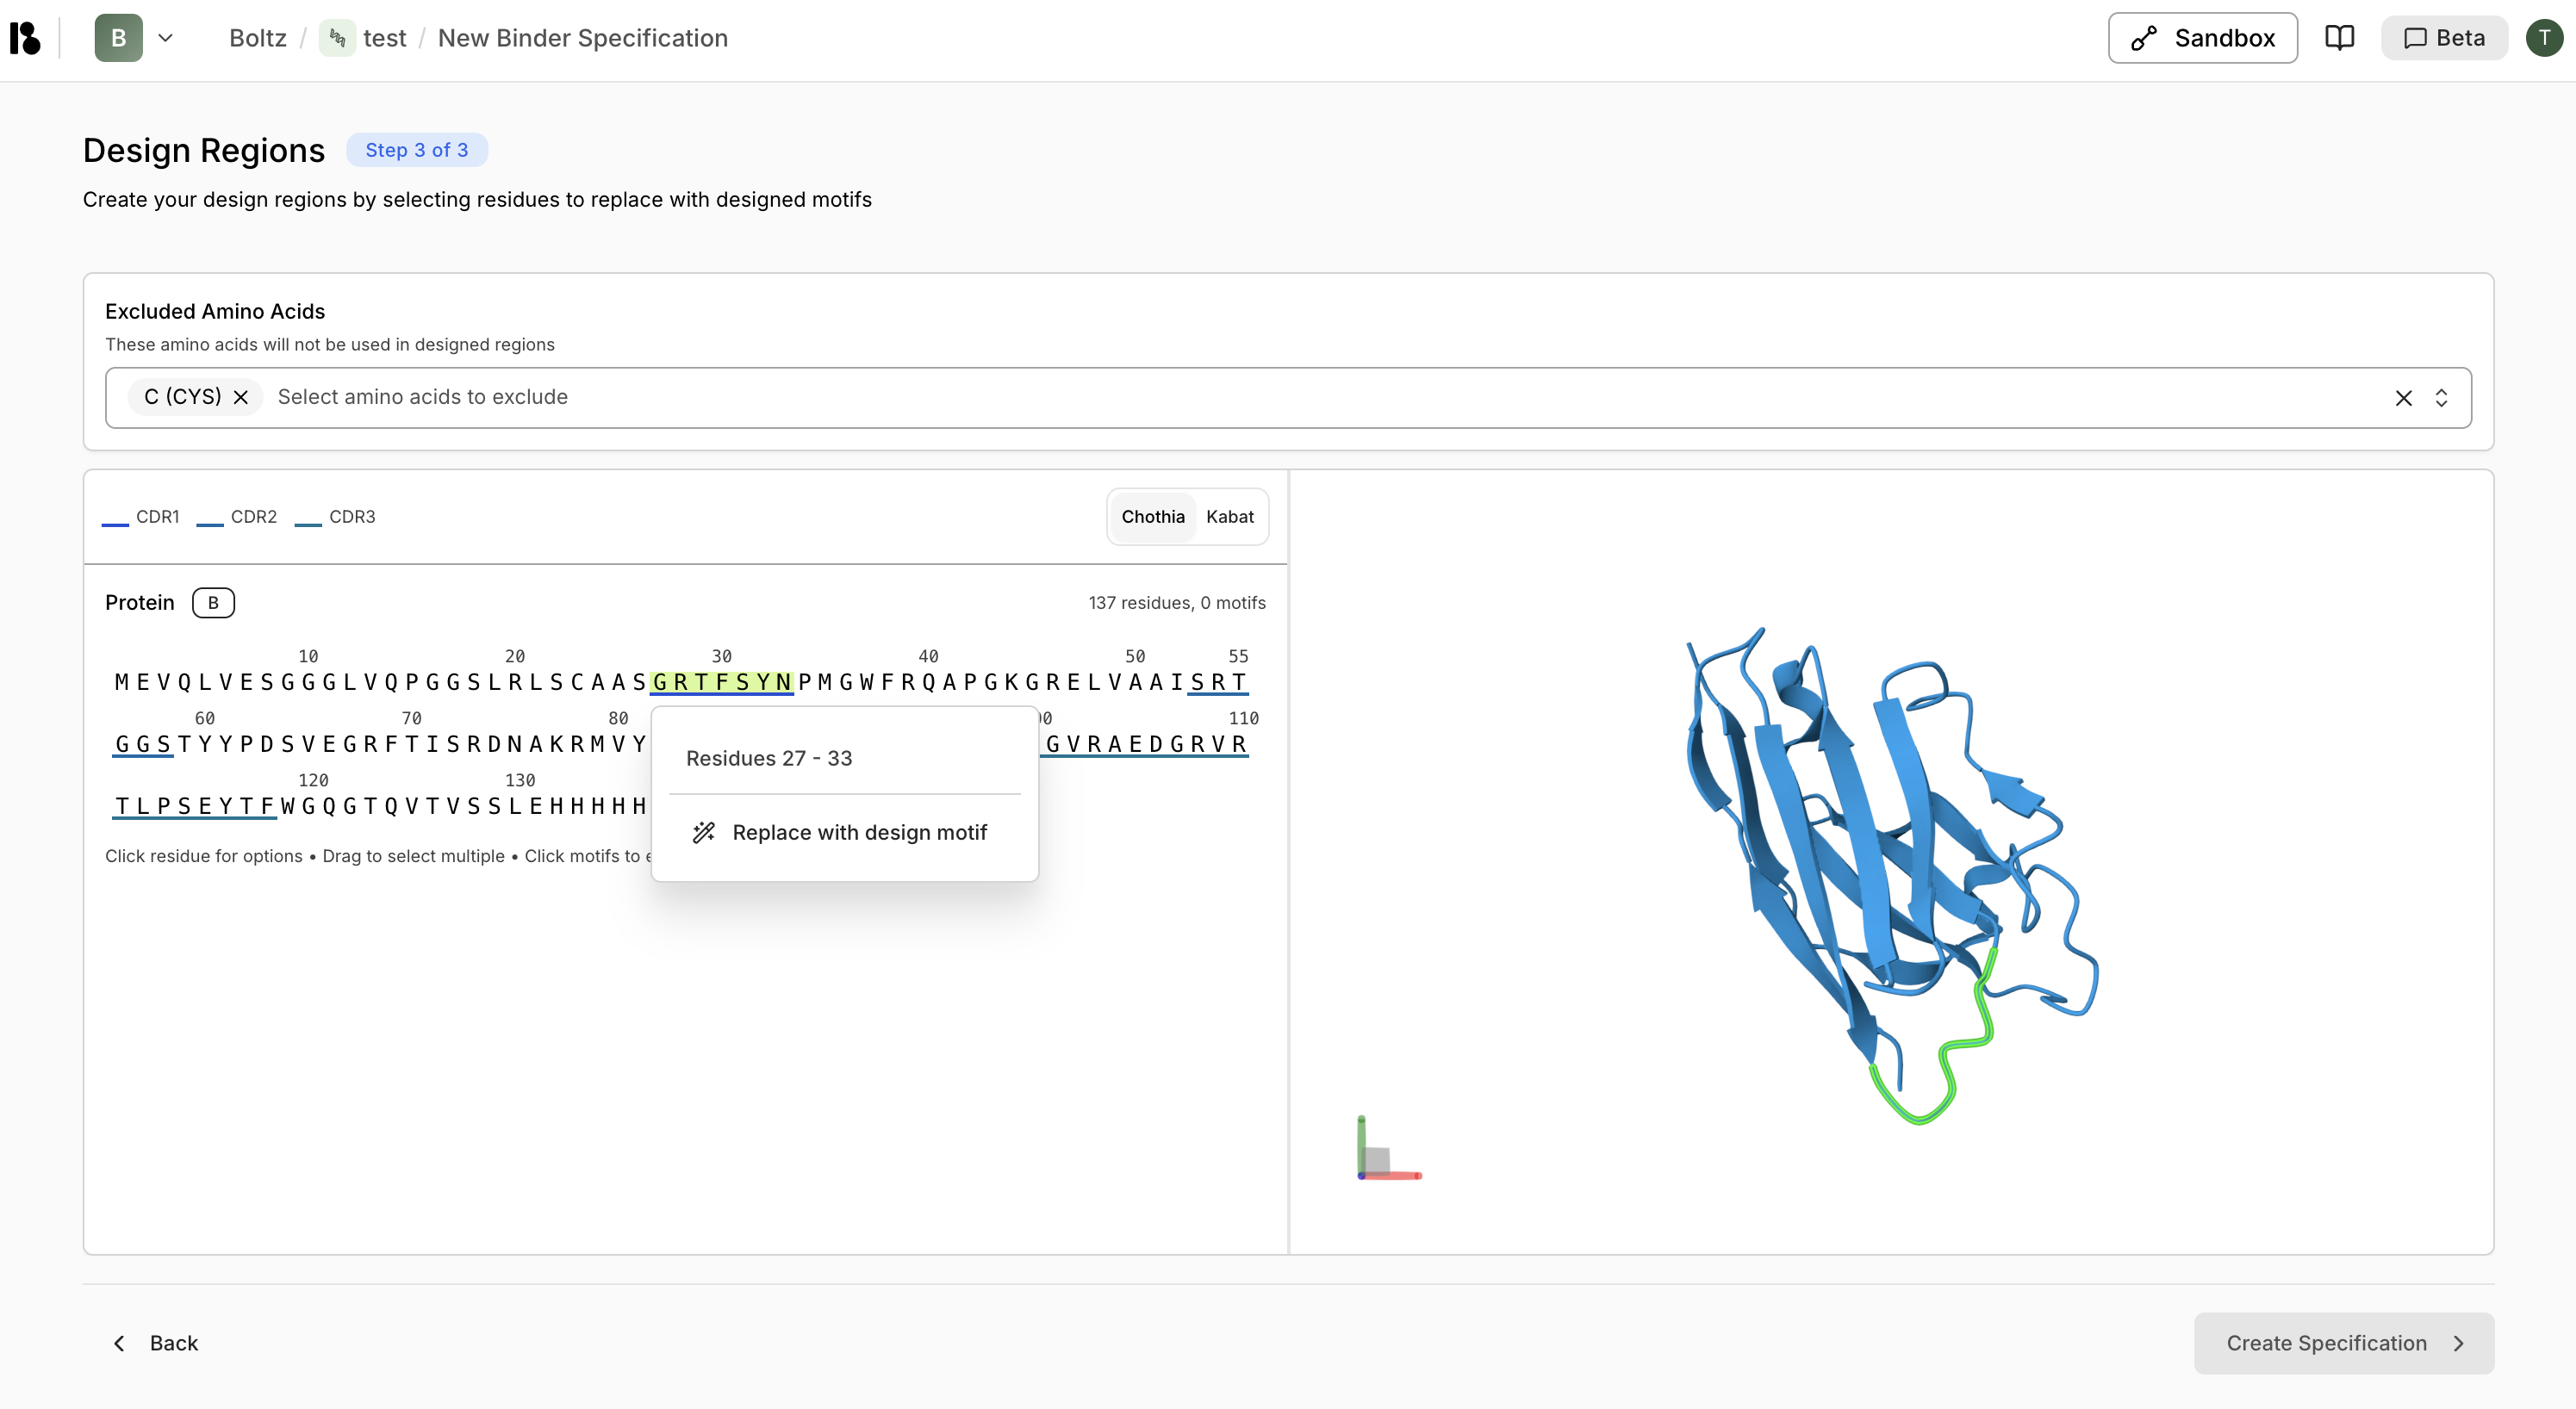
2. **Create design motifs:**
* Select CDR regions
* Right-click then **"Replace with design motif"**
* For CDR3, specify variable length (e.g., 10-25 residues)
3. Click **"> Create Specification"**
* All residues are selected by default.
* You can also manually select residues by clicking/dragging
* Recommended: ≤300 residues
### Configure Design
1. **Exclude amino acids** (e.g., Cysteine)
2. **Create design motifs:**
* Select CDR regions
* Right-click then **"Replace with design motif"**
* For CDR3, specify variable length (e.g., 10-25 residues)
3. Click **"> Create Specification"**
 ## Step 4: Create an Experiment
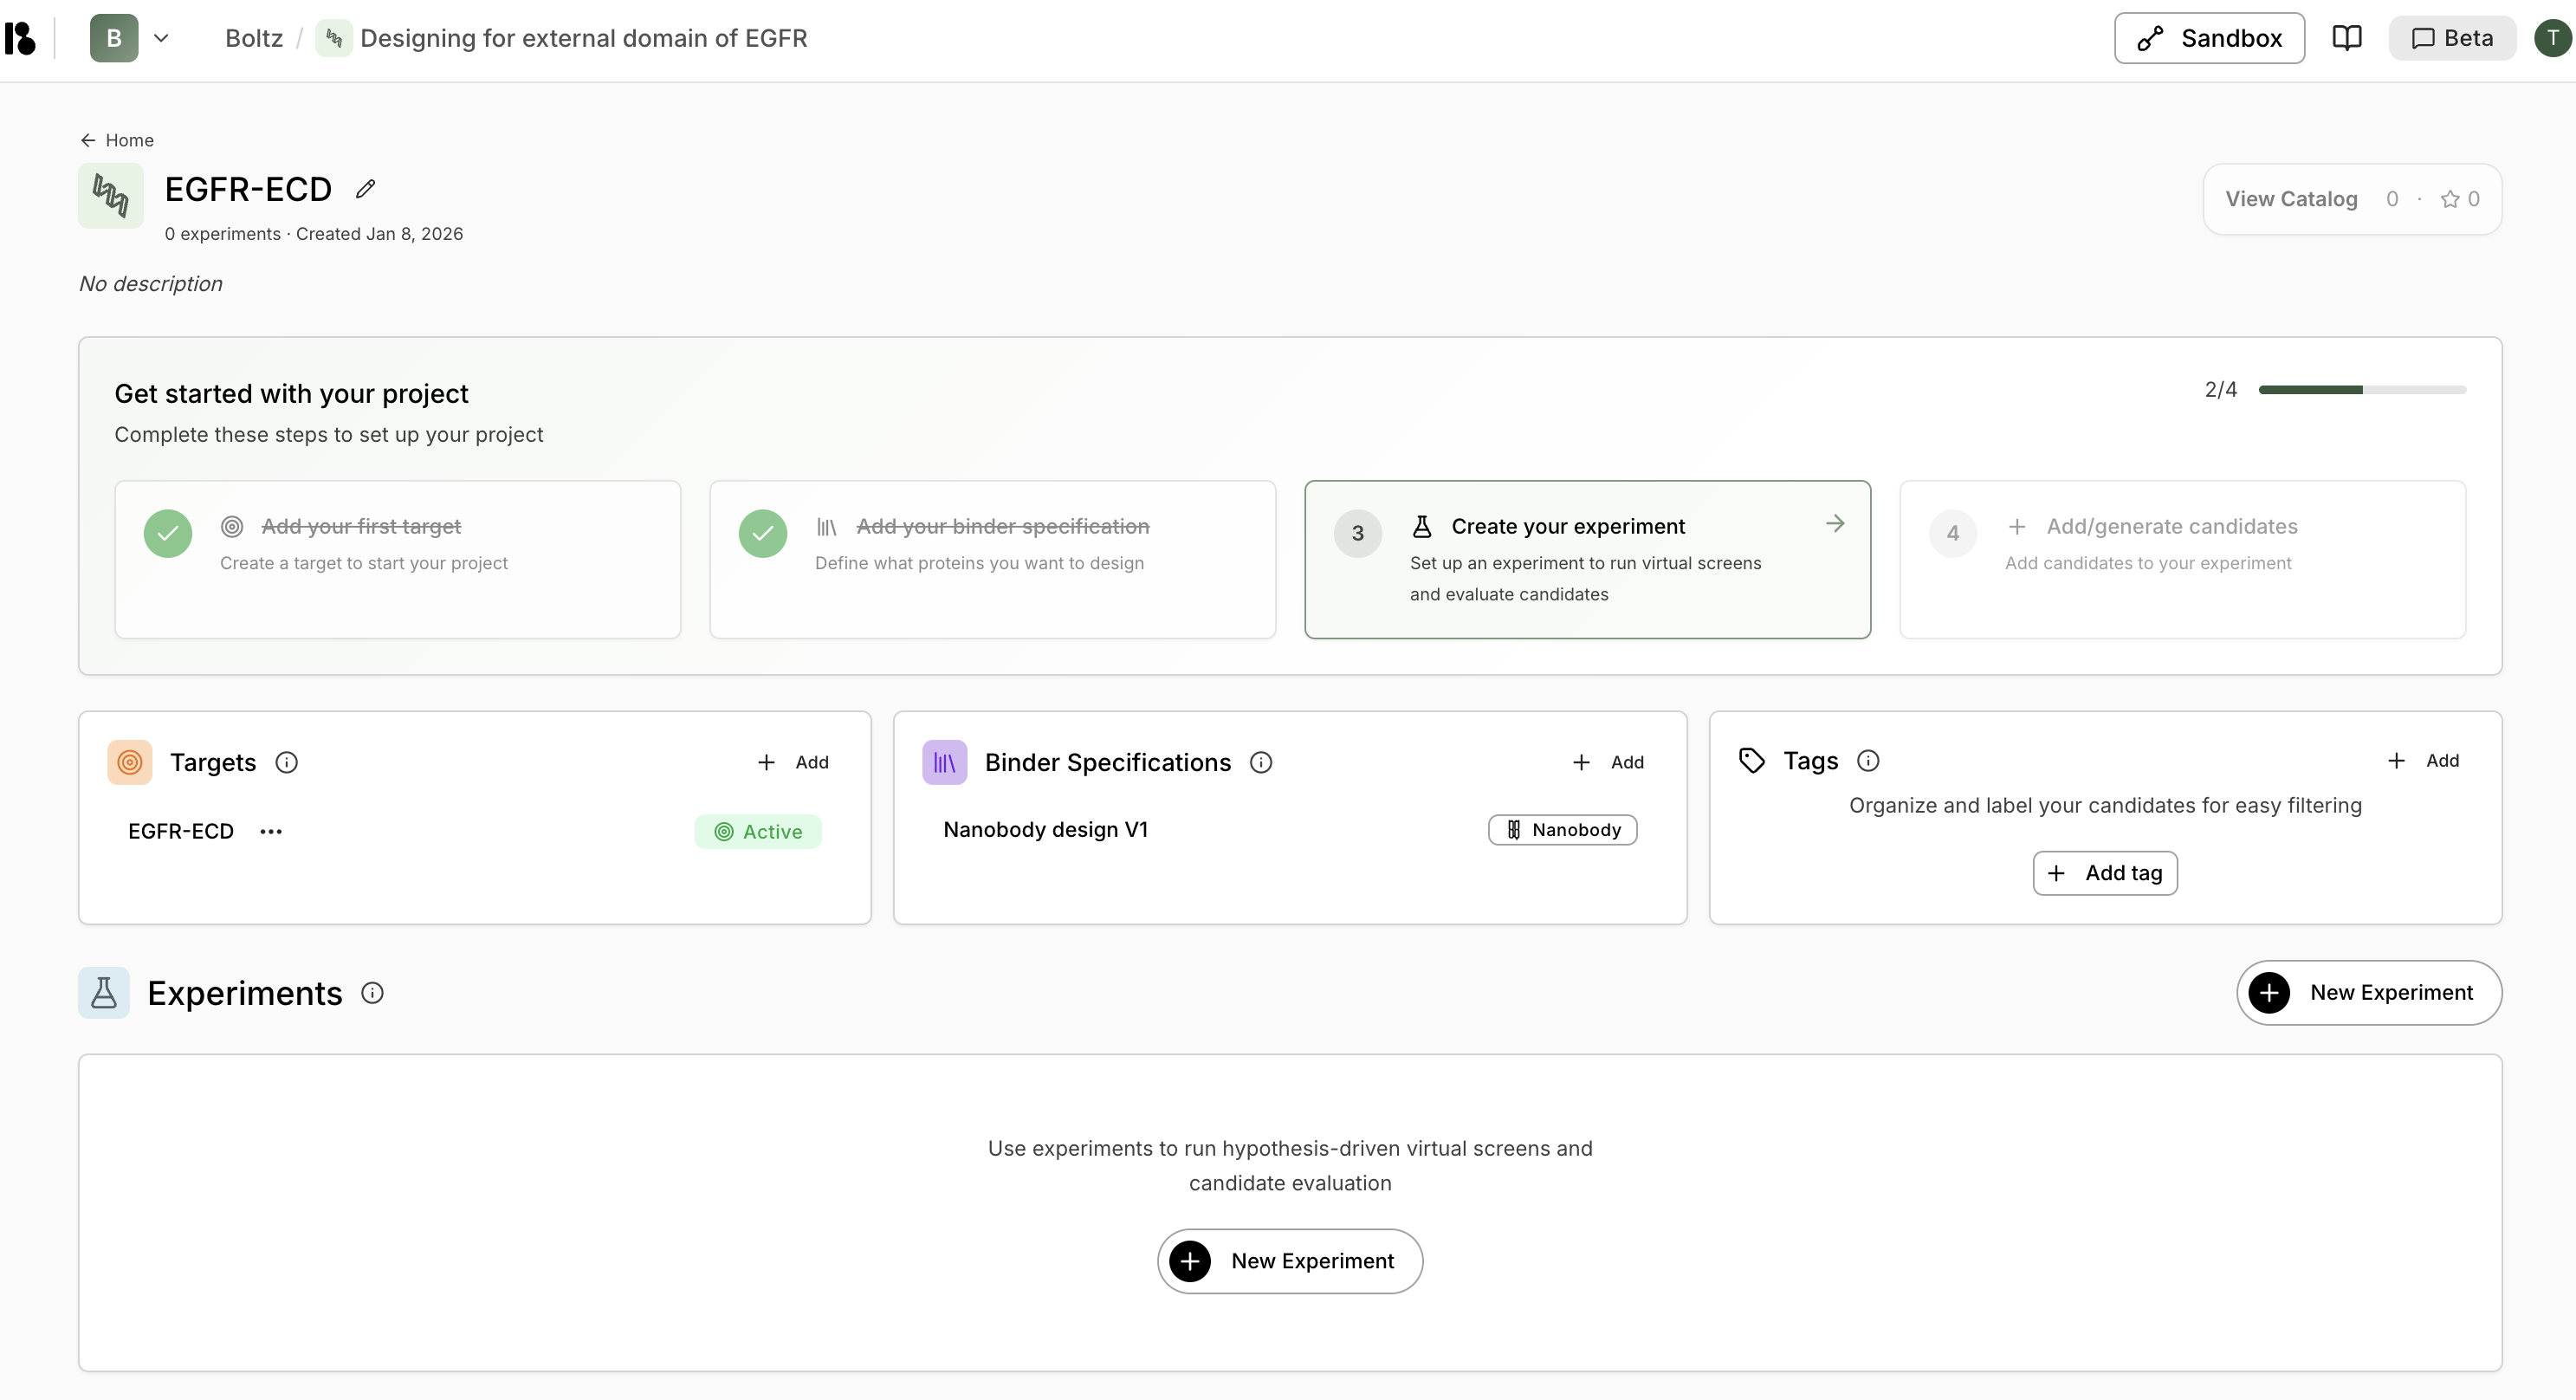
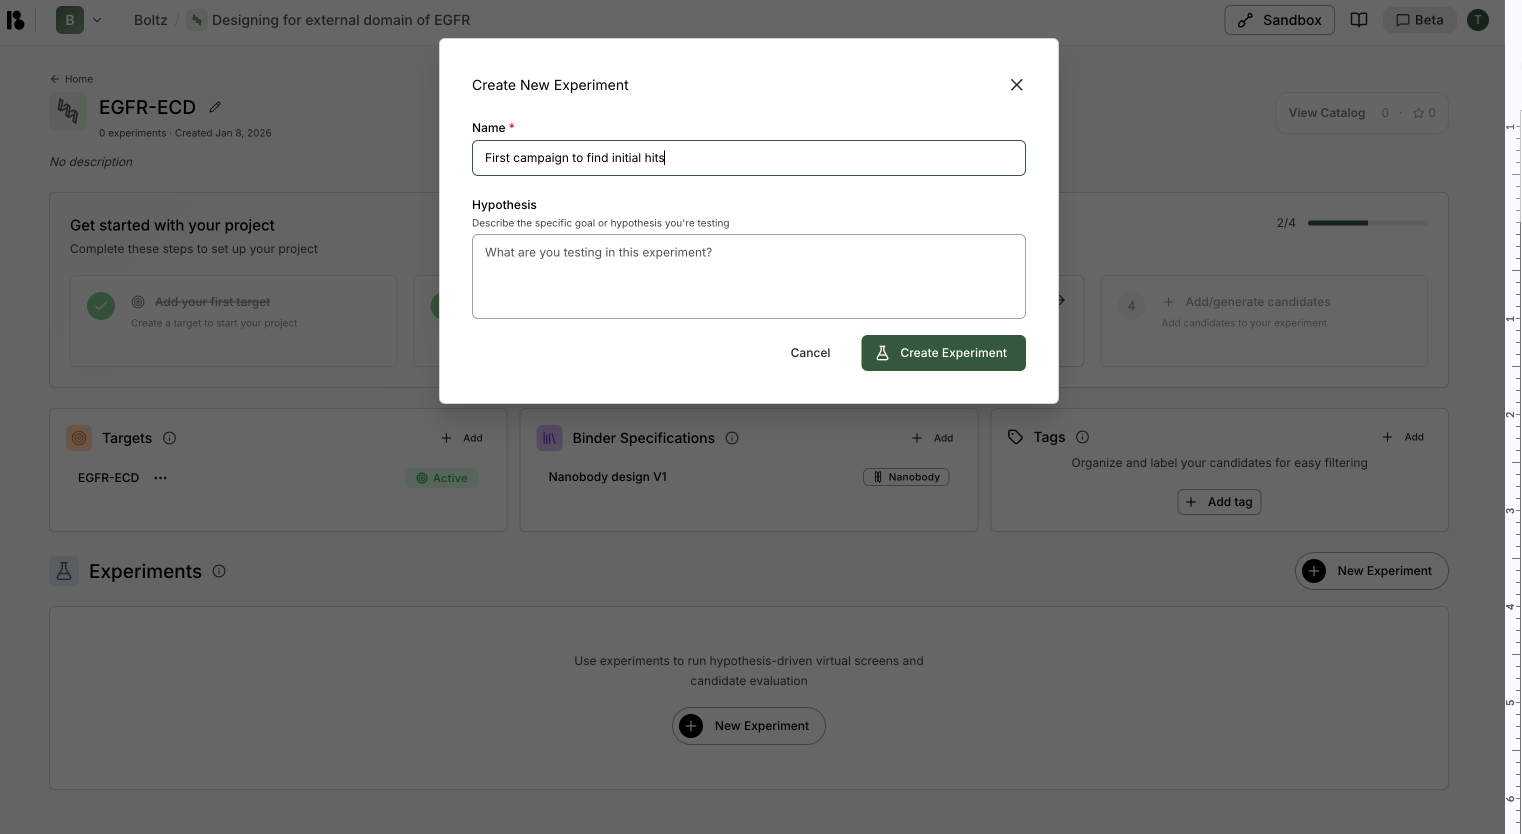
1. Click **"+ New Experiment"** in the Experiments section
2. Enter name (e.g., "First campaign to find initial hits")
3. Enter hypothesis (optional but recommended)
4. Click **"Create Experiment"**
## Step 4: Create an Experiment
1. Click **"+ New Experiment"** in the Experiments section
2. Enter name (e.g., "First campaign to find initial hits")
3. Enter hypothesis (optional but recommended)
4. Click **"Create Experiment"**
 ## Step 5: Run Virtual Screen
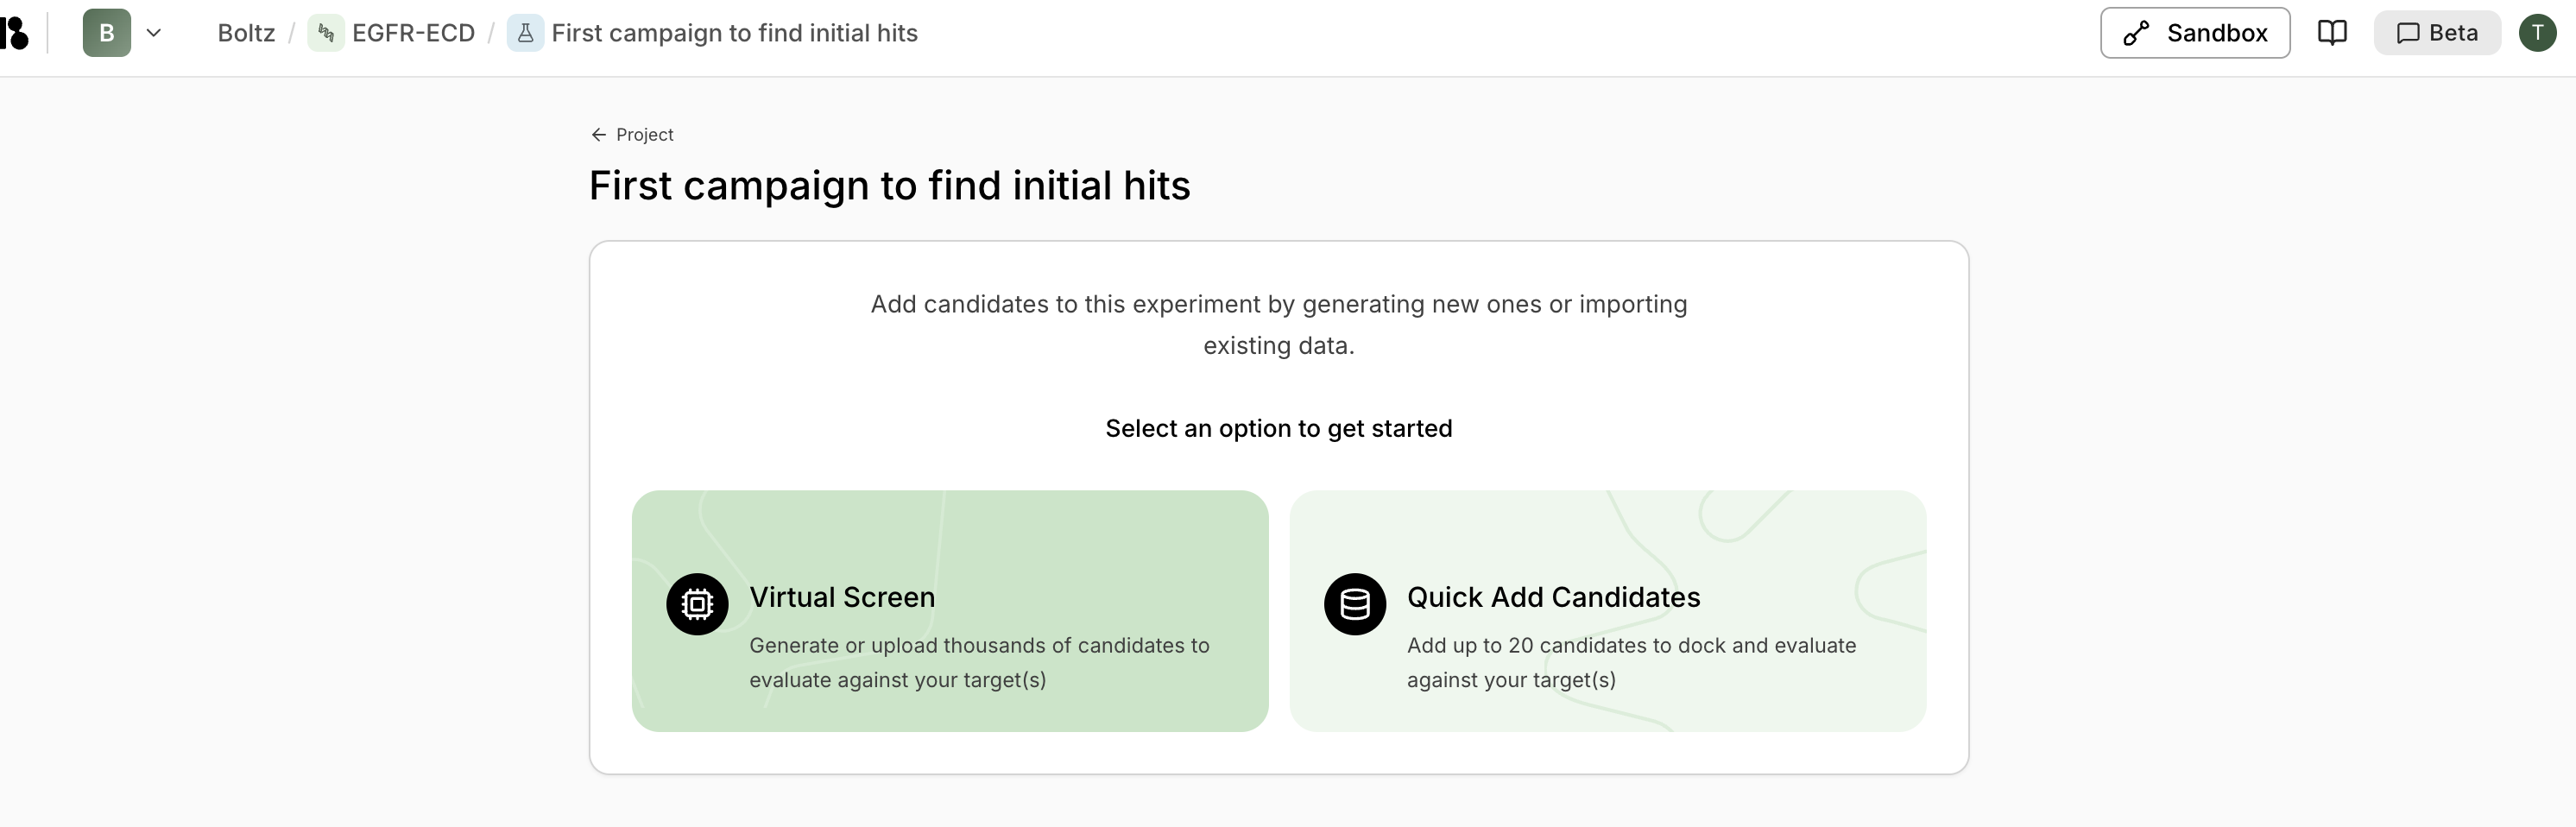
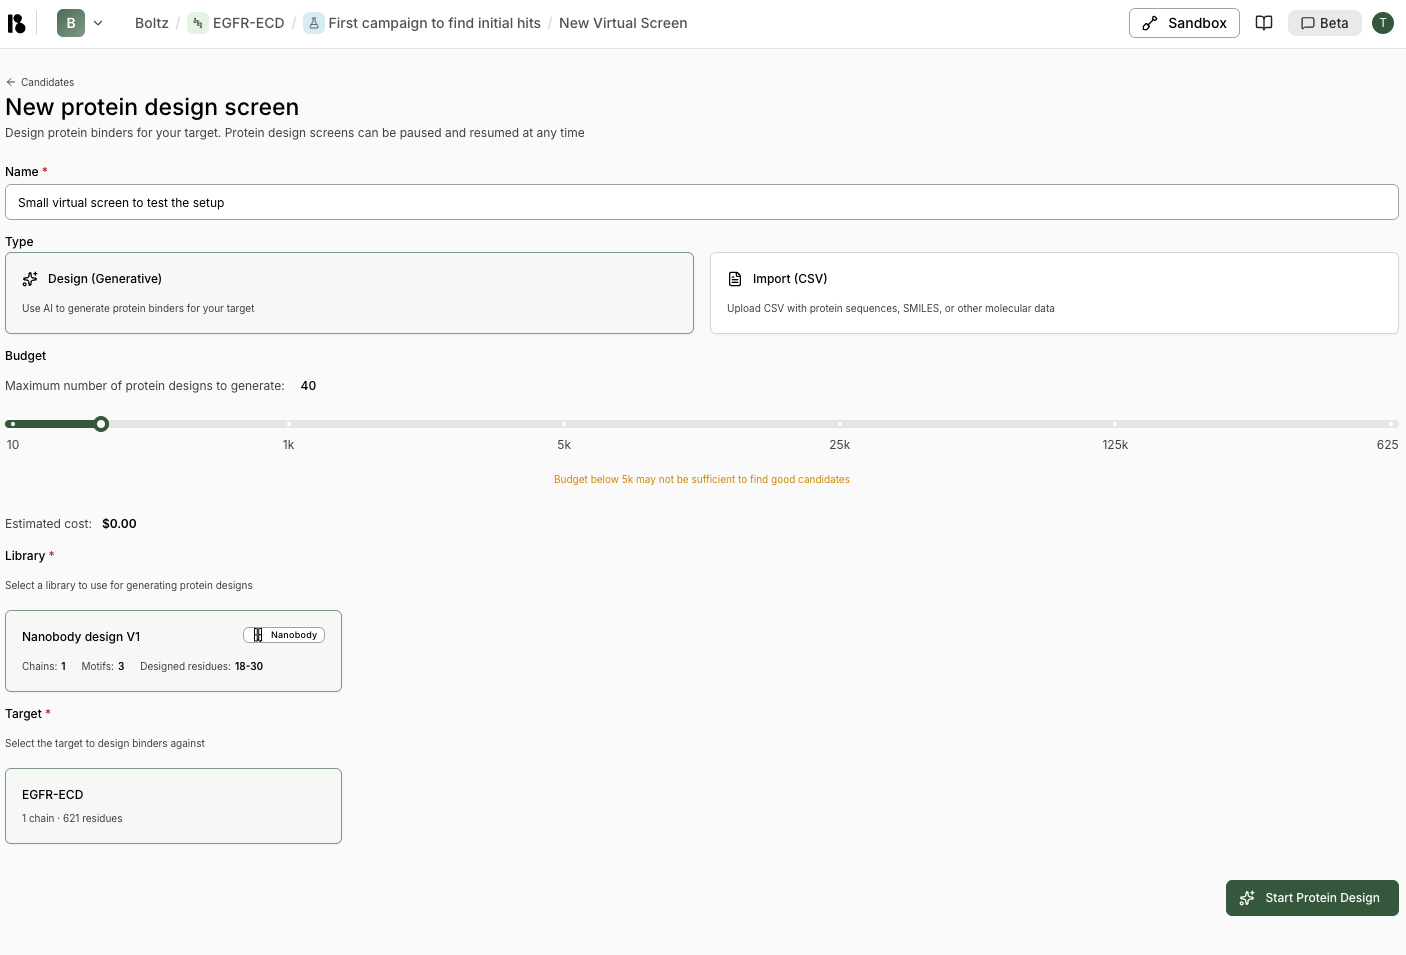
1. From the experiment, click **"New virtual screen"**
2. Enter screen name (e.g., "Small virtual screen to test the setup")
3. Select **"Design (Generative)"** type
4. Set budget:
* Start with **30-100** for a pilot
* Scale to **10k-100k** for production
5. Select your binder specification
6. Select your target
7. Select your experiment
8. Click **"Start Protein Design"**
## Step 5: Run Virtual Screen
1. From the experiment, click **"New virtual screen"**
2. Enter screen name (e.g., "Small virtual screen to test the setup")
3. Select **"Design (Generative)"** type
4. Set budget:
* Start with **30-100** for a pilot
* Scale to **10k-100k** for production
5. Select your binder specification
6. Select your target
7. Select your experiment
8. Click **"Start Protein Design"**
 ## Step 6: Monitor Progress
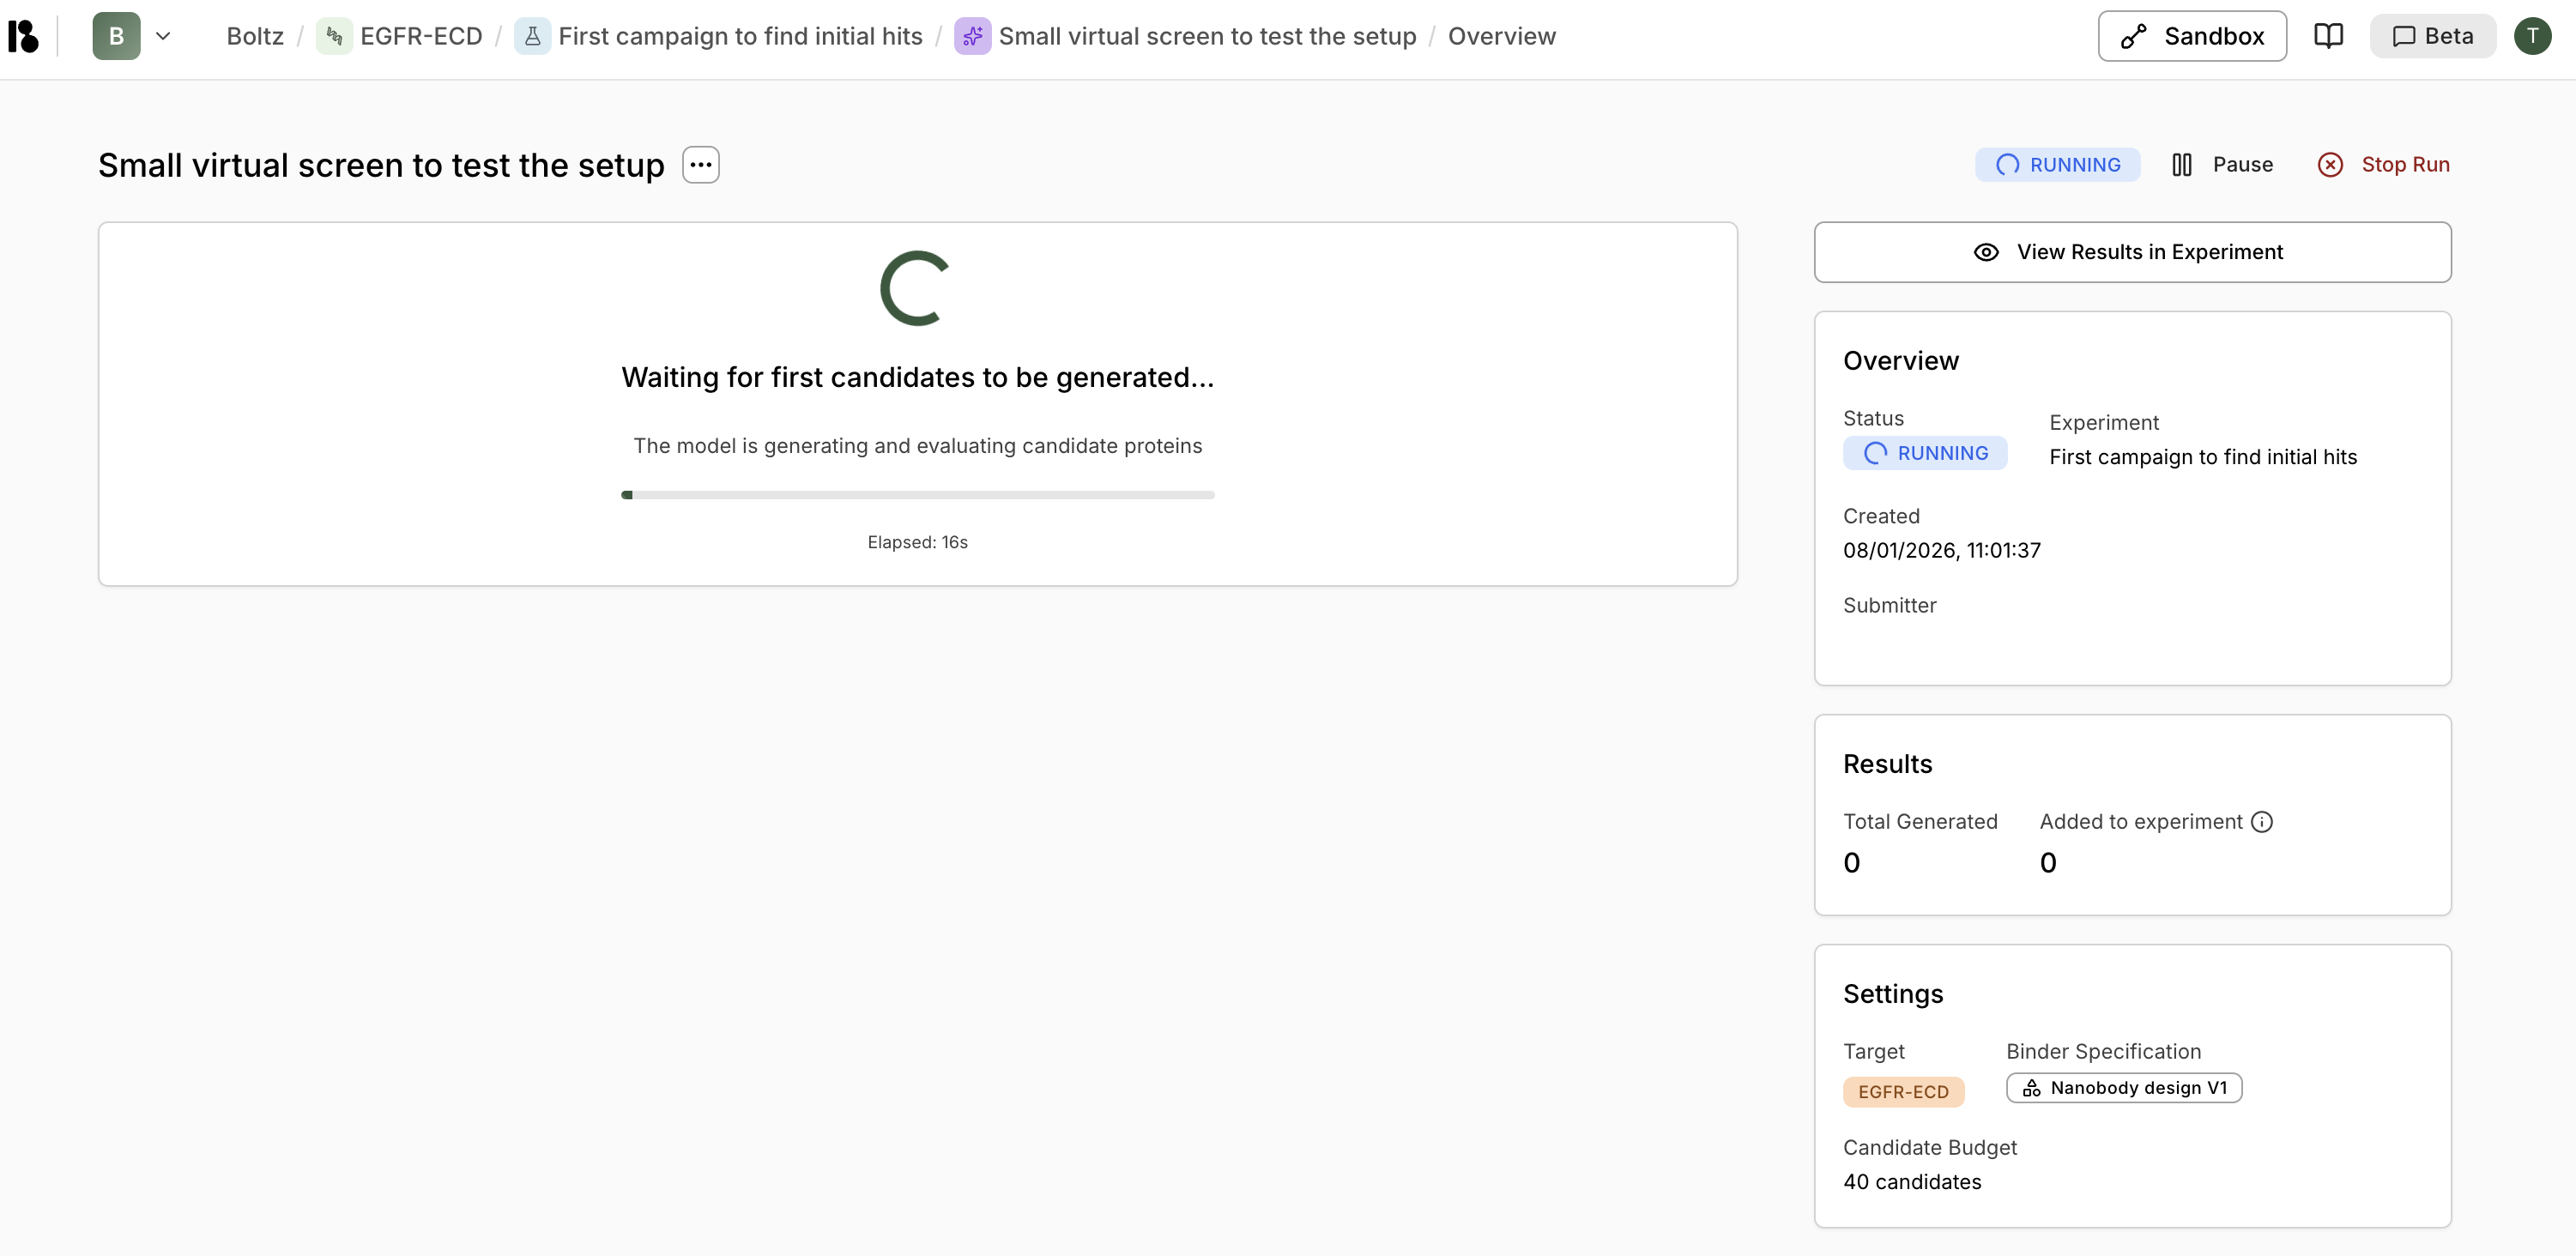 While running, you can:
* View progress and elapsed time
* Pause or stop the screen
* Click **"View Results in Experiment"** to see candidates as they're generated
## Step 7: Evaluate Results
Once completed:
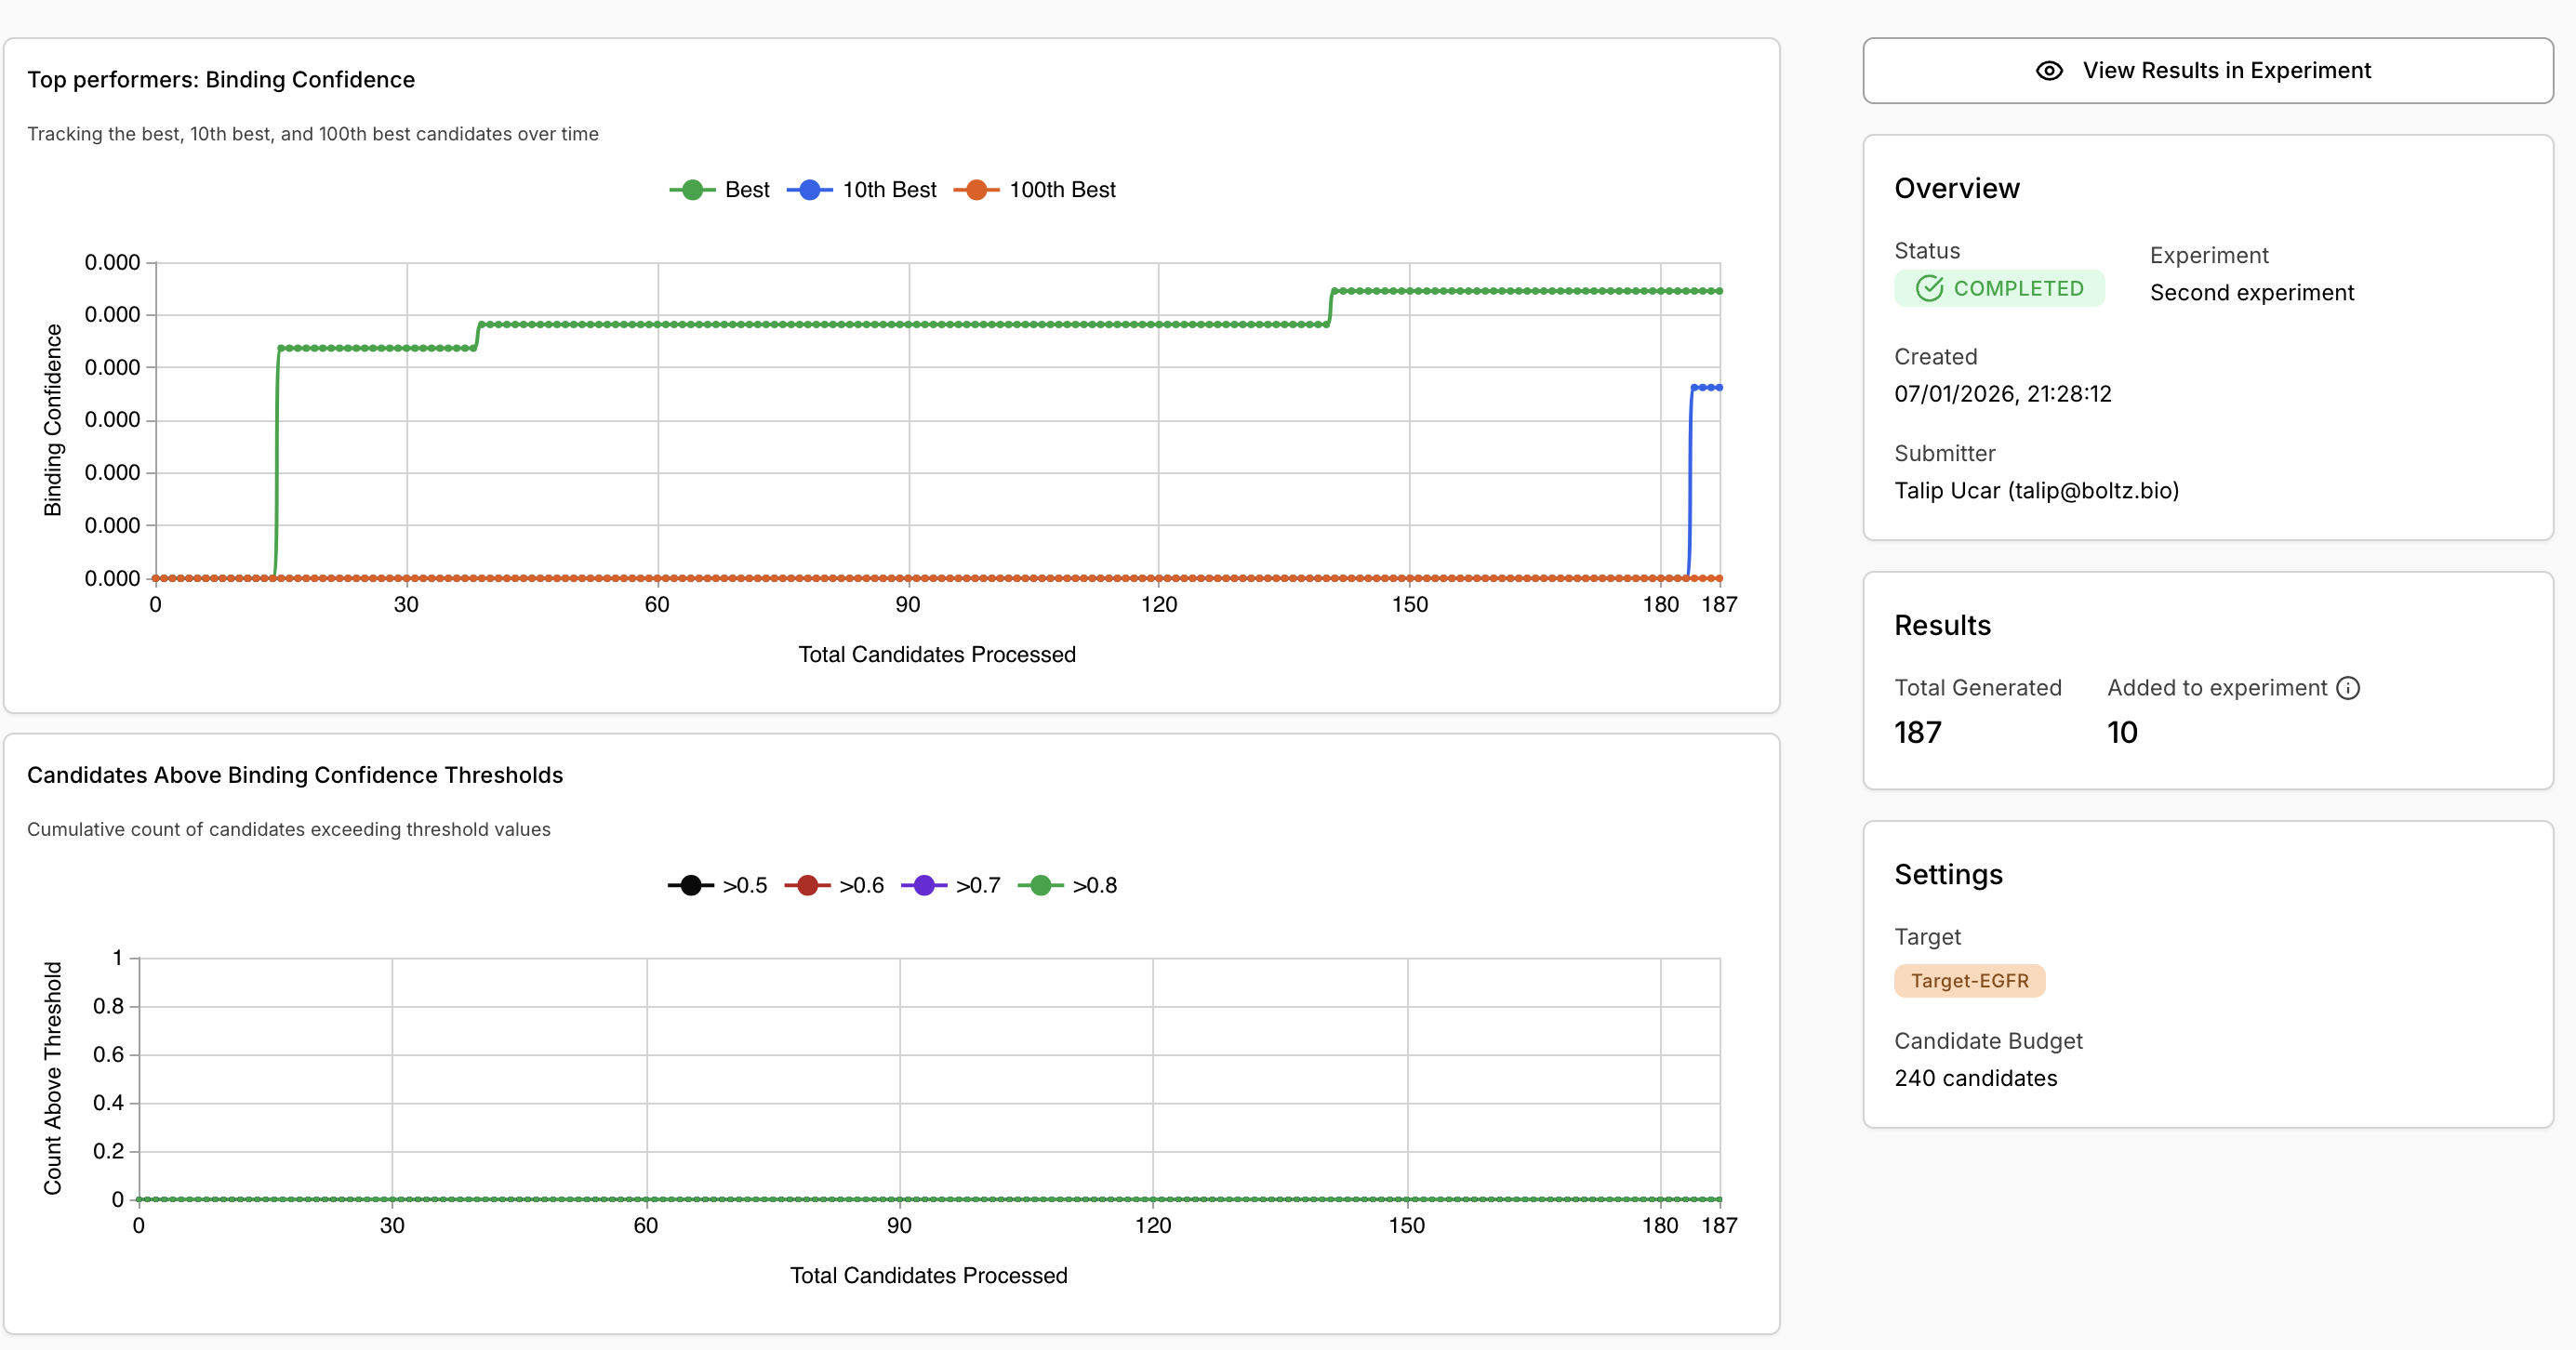
1. **Review metrics:**
* Top performers binding confidence graph
* Candidates above threshold counts
While running, you can:
* View progress and elapsed time
* Pause or stop the screen
* Click **"View Results in Experiment"** to see candidates as they're generated
## Step 7: Evaluate Results
Once completed:
1. **Review metrics:**
* Top performers binding confidence graph
* Candidates above threshold counts
 2. **View candidates:**
* Switch to **"Table"** tab
* Filter and select candidates
* Review 3D structures in the viewer
* Compare properties (ipTM, pLDDT, binding confidence)
2. **View candidates:**
* Switch to **"Table"** tab
* Filter and select candidates
* Review 3D structures in the viewer
* Compare properties (ipTM, pLDDT, binding confidence)
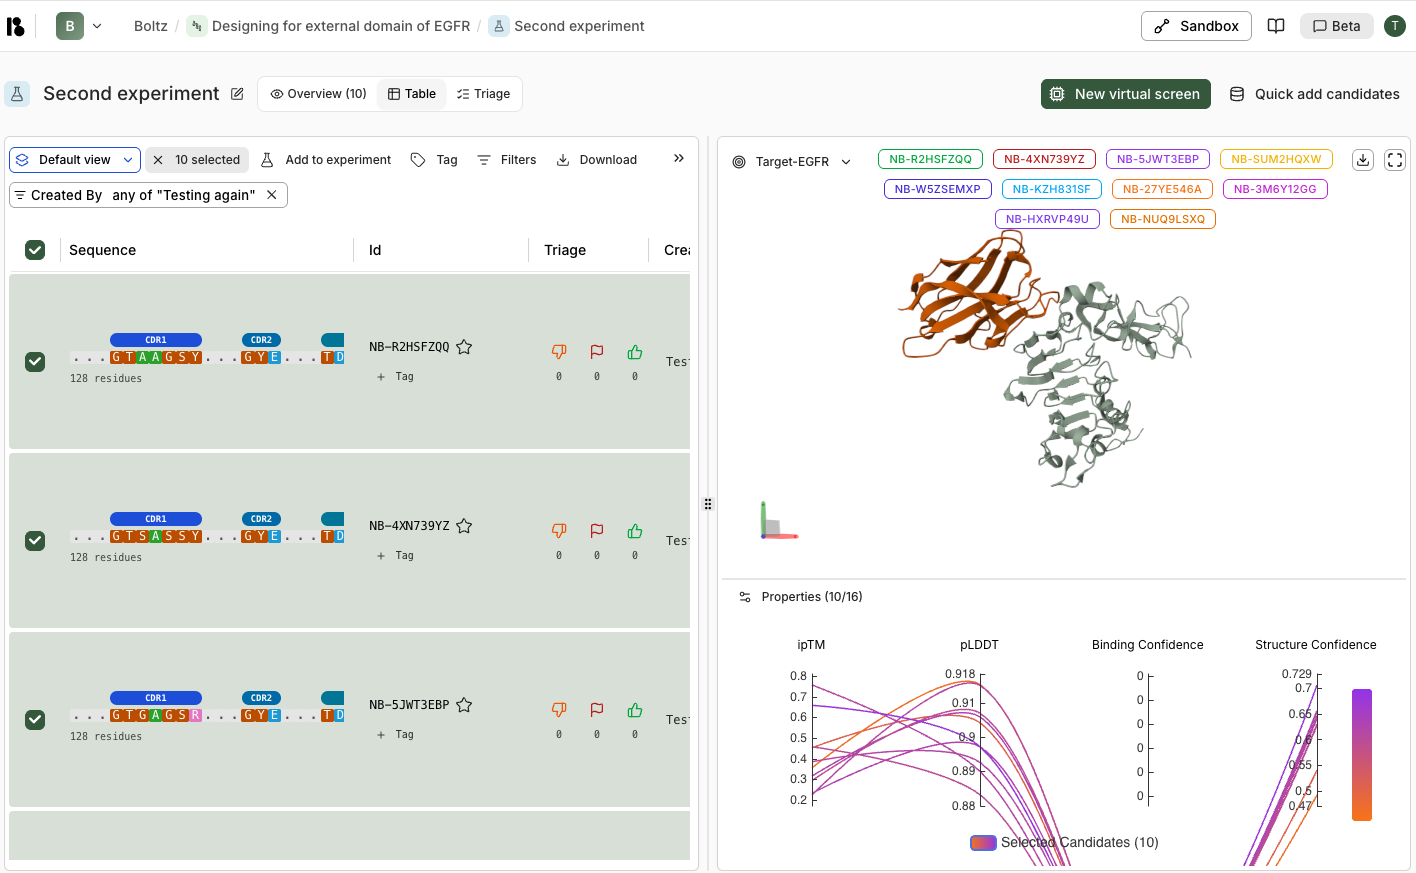 3. **Triage:**
* Use thumbs up/down and flags
* Tag promising candidates
* Export for experimental validation
Start with a small pilot (50-100 designs) to validate setup
Scale up to 10k-100k designs for production campaigns
Review top performers first, then explore diversity
Use tags to organize candidates by different criteria
Export promising candidates for experimental validation
3. **Triage:**
* Use thumbs up/down and flags
* Tag promising candidates
* Export for experimental validation
Start with a small pilot (50-100 designs) to validate setup
Scale up to 10k-100k designs for production campaigns
Review top performers first, then explore diversity
Use tags to organize candidates by different criteria
Export promising candidates for experimental validation