Overview
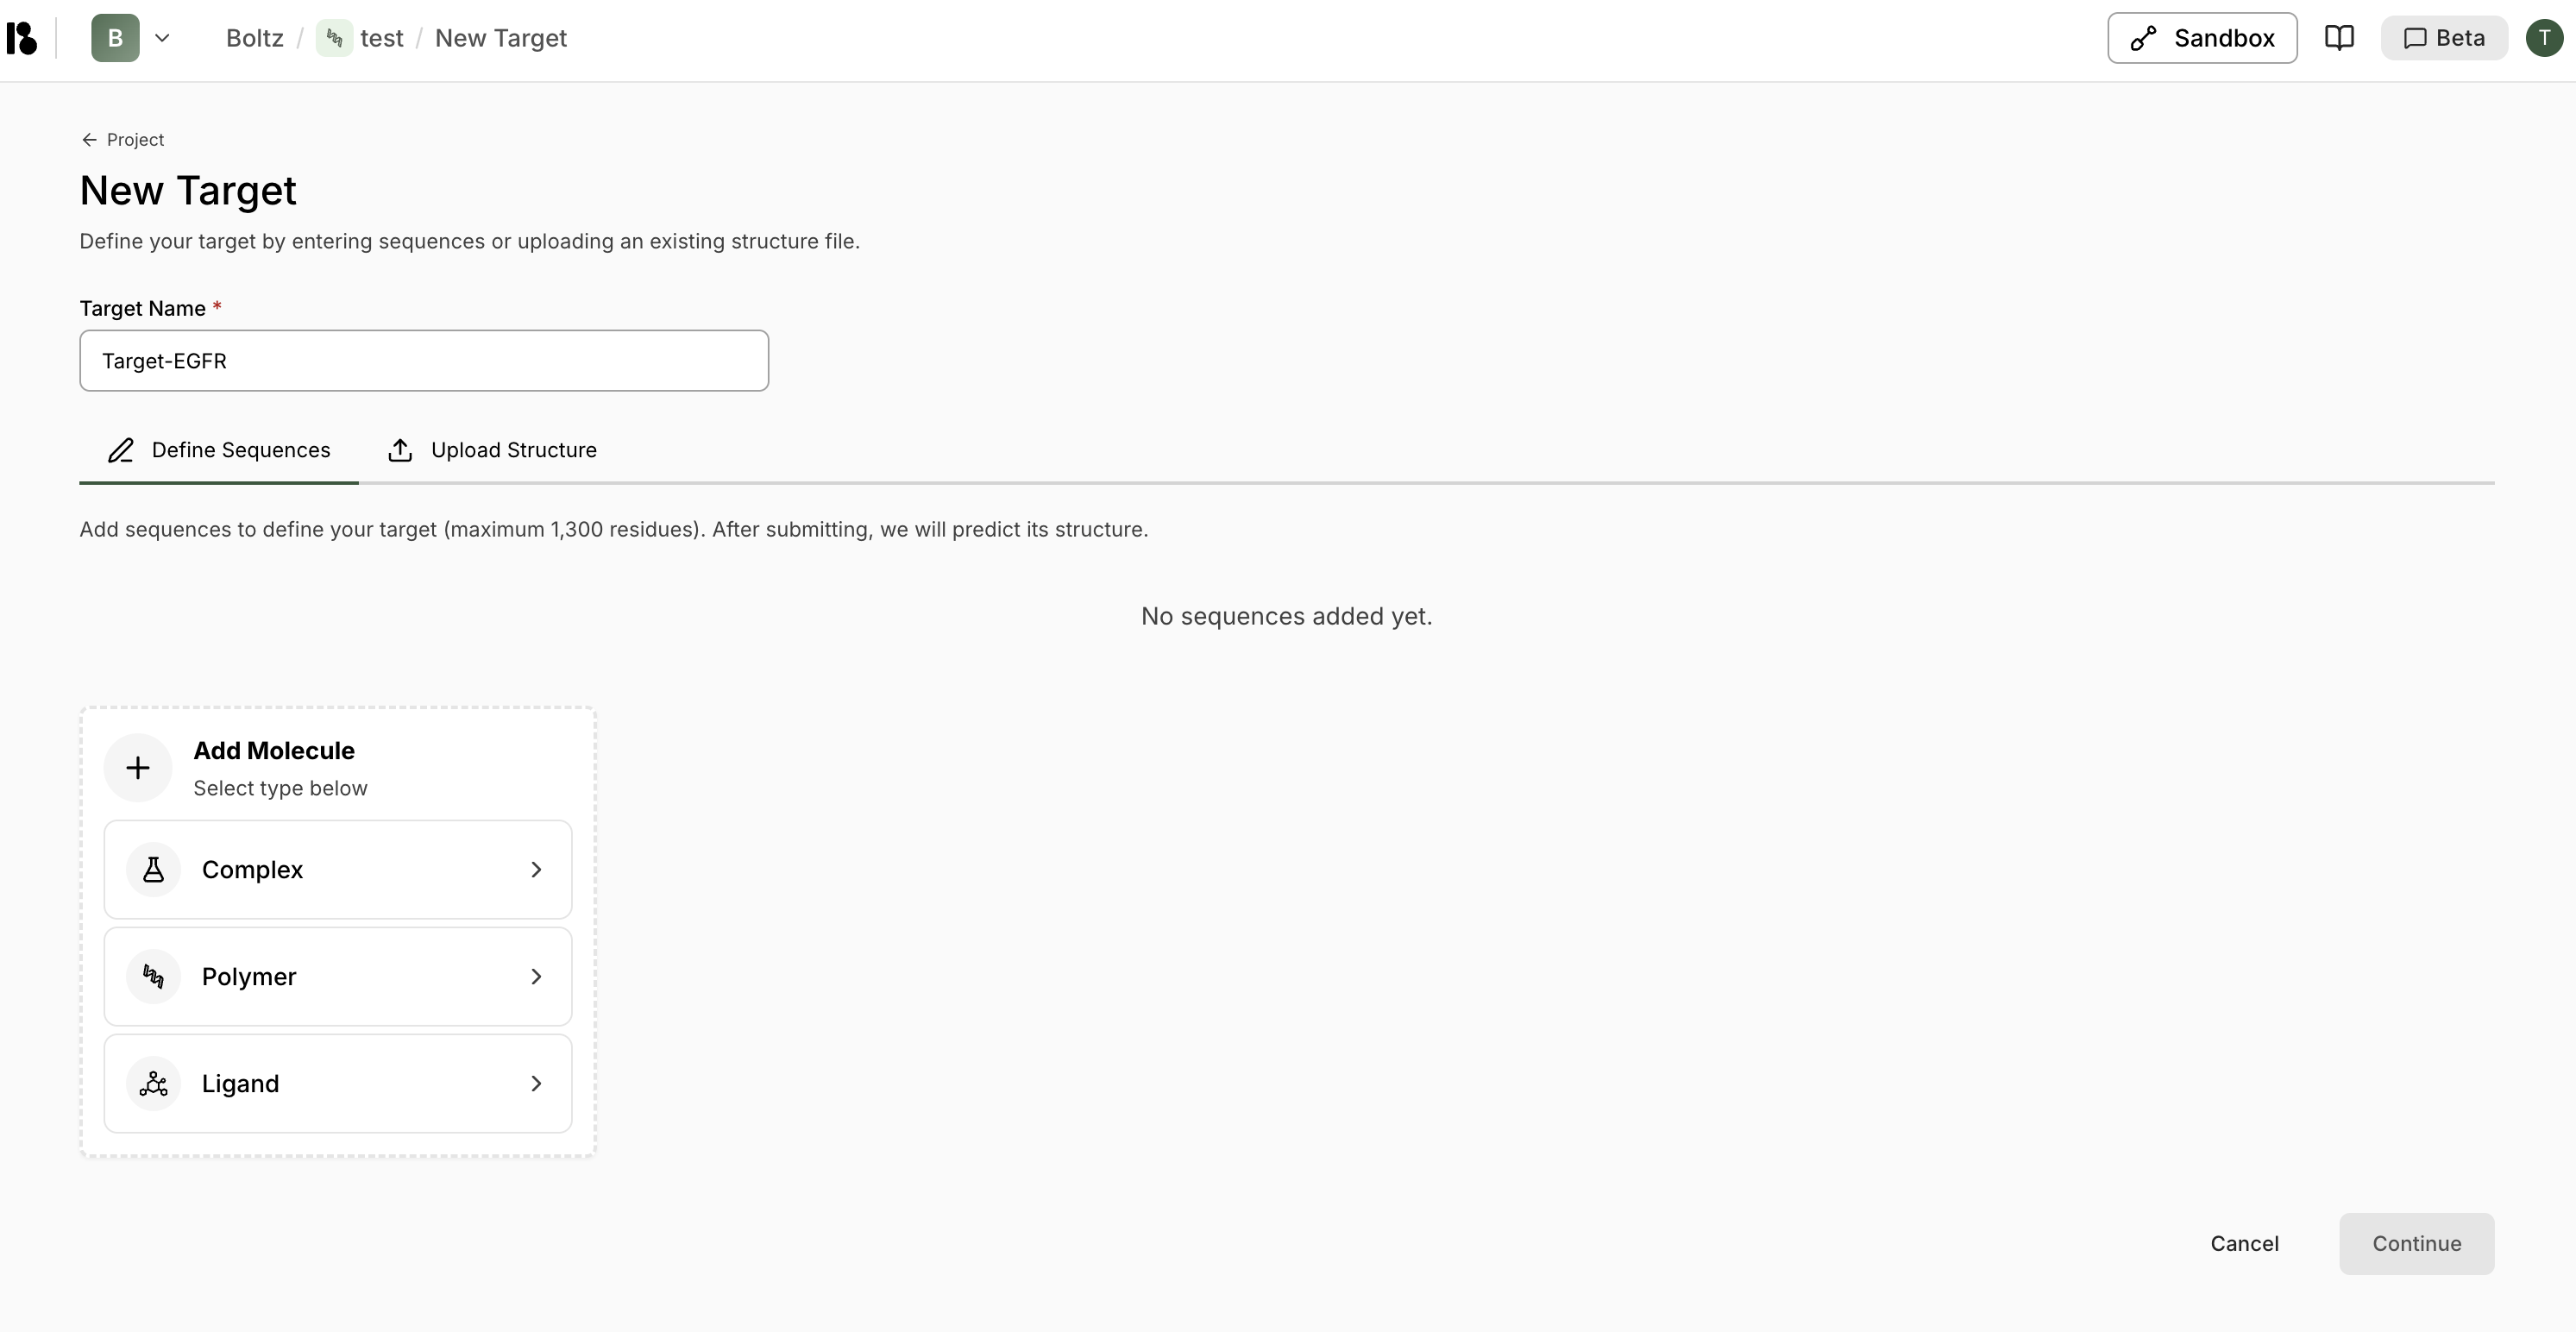
Targets are the protein structures you want to design binders against. You can define targets by entering sequences or uploading existing structure files.Creating a New Target
- From your project dashboard, click ”+ Add target” in the Targets section.
- Enter a Target Name (required).
-
Choose how to define your target:
- Define Sequences
- Upload Structure
Click ”+ Polymer” then “Protein from Sequence”Paste or enter your protein sequence (maximum 1,300 residues)Click “Import”After submitting, Boltz will predict the structure automatically - Click “Continue” to proceed to target initialization.
Target Initialization
After creating a target, you’ll go through a 4-step initialization workflow:Step 1: Verify Unbound Structure

Step 2: Select Crop
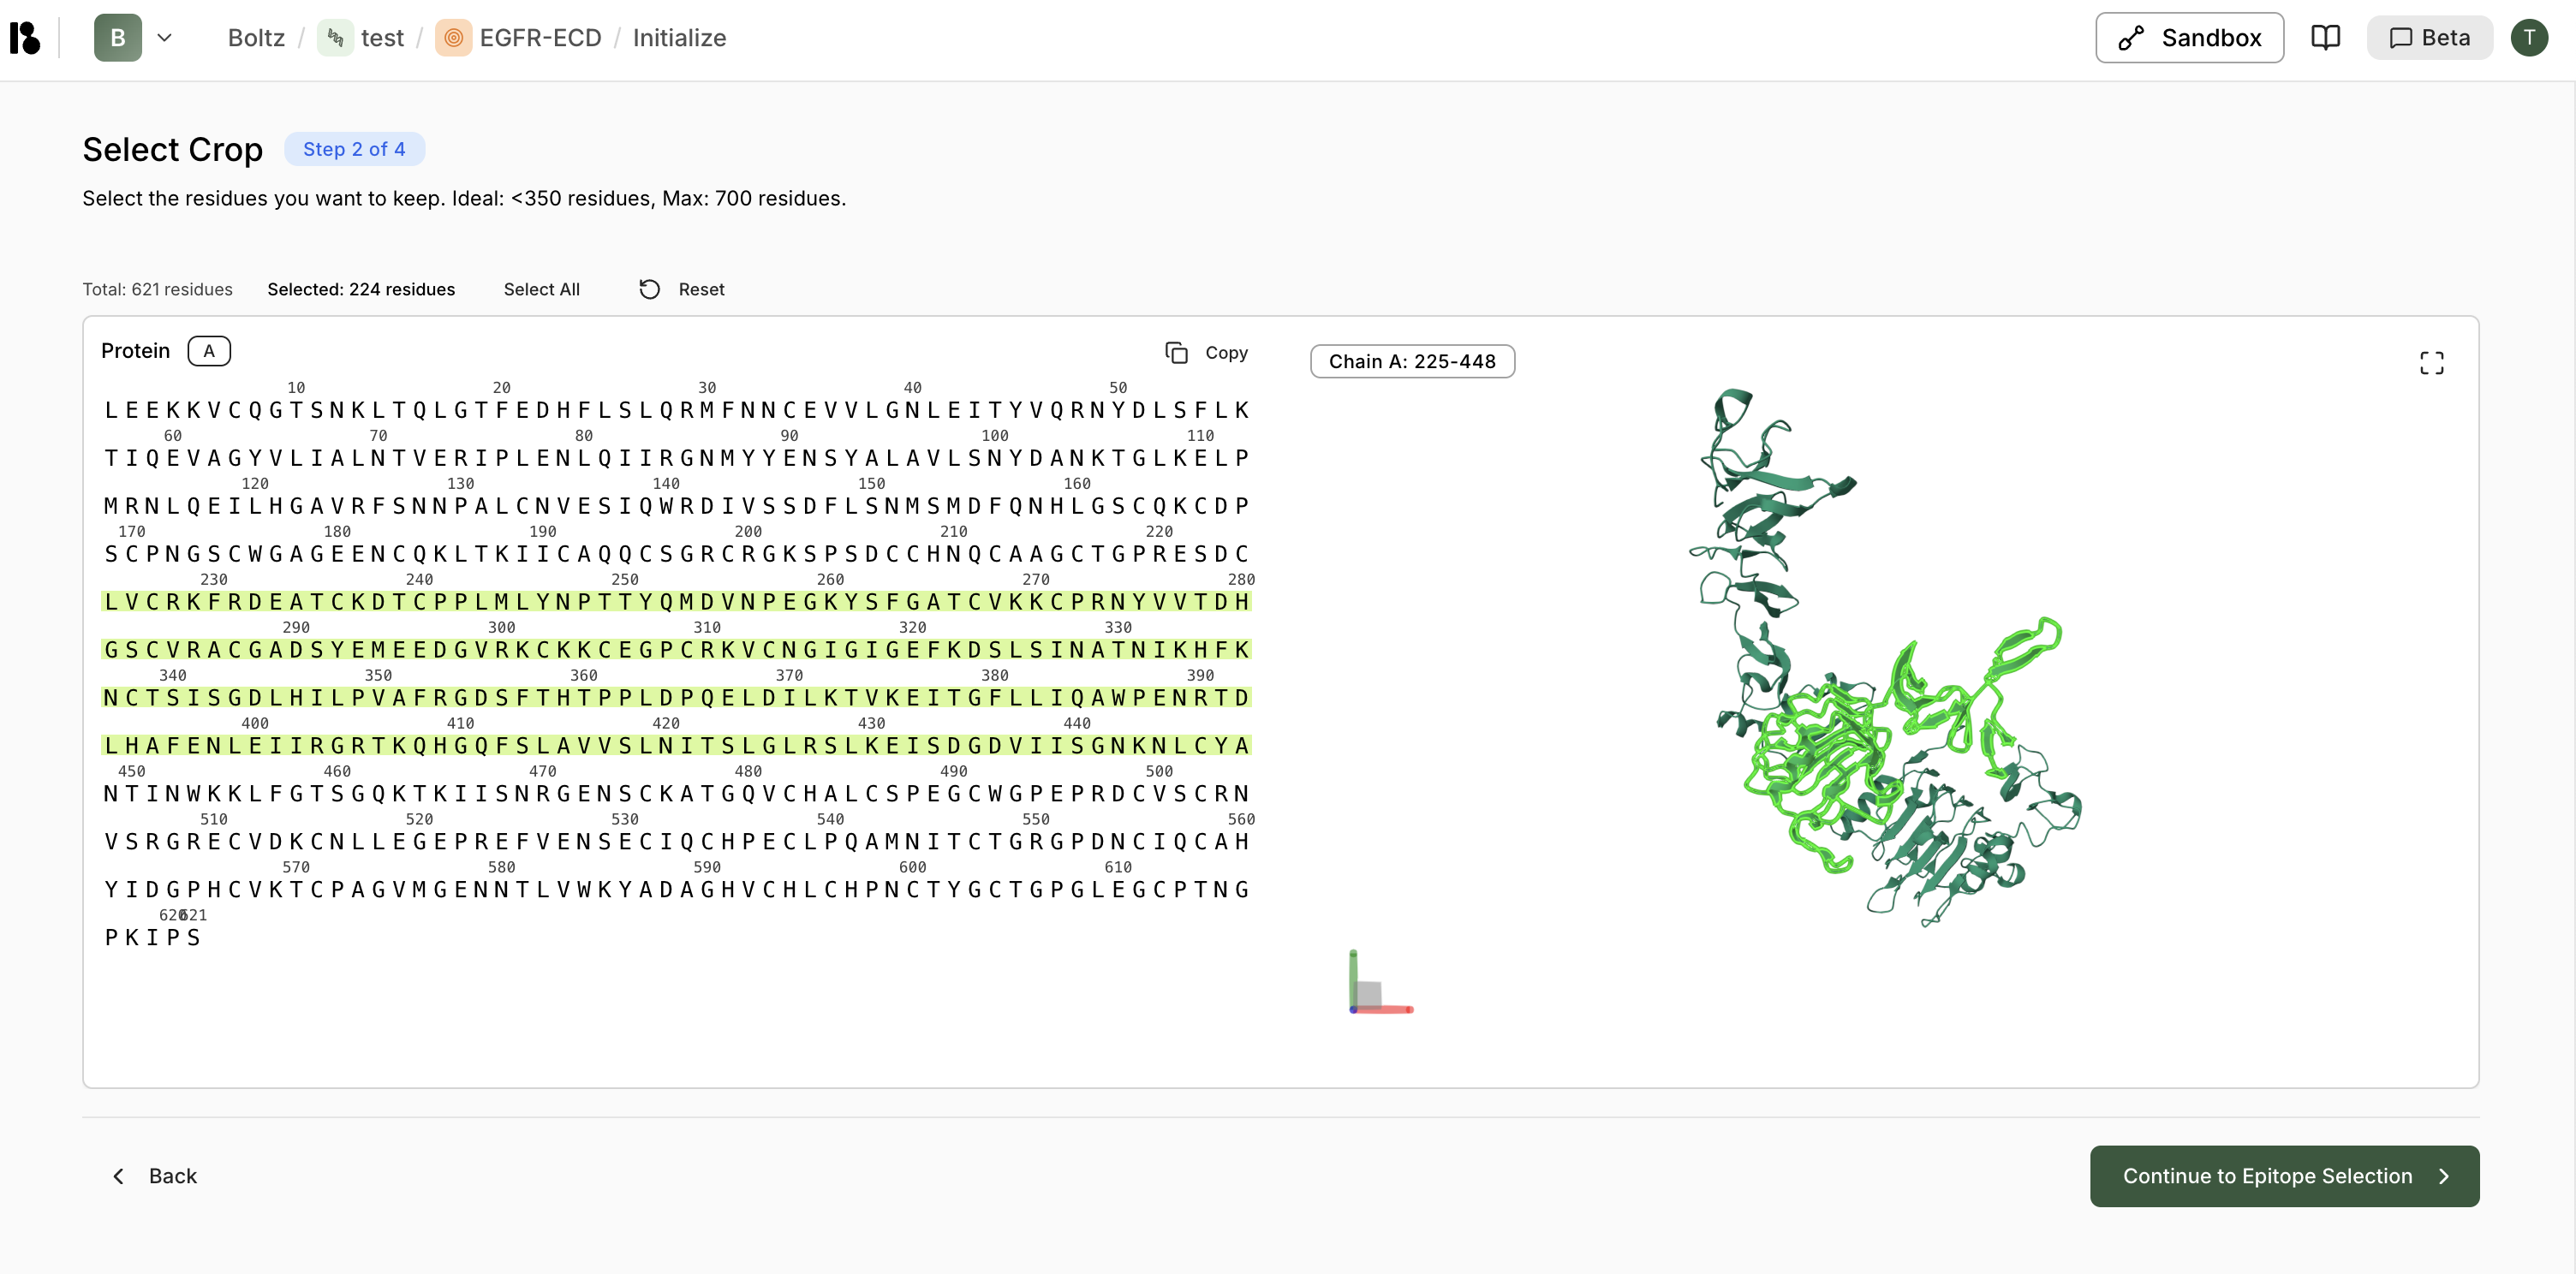
- Use the sequence viewer to select residue ranges
- The 3D structure updates in real-time to show the cropped region
- Click “Select All” to include all residues, or manually select ranges
Step 3: Select Epitope (Optional)
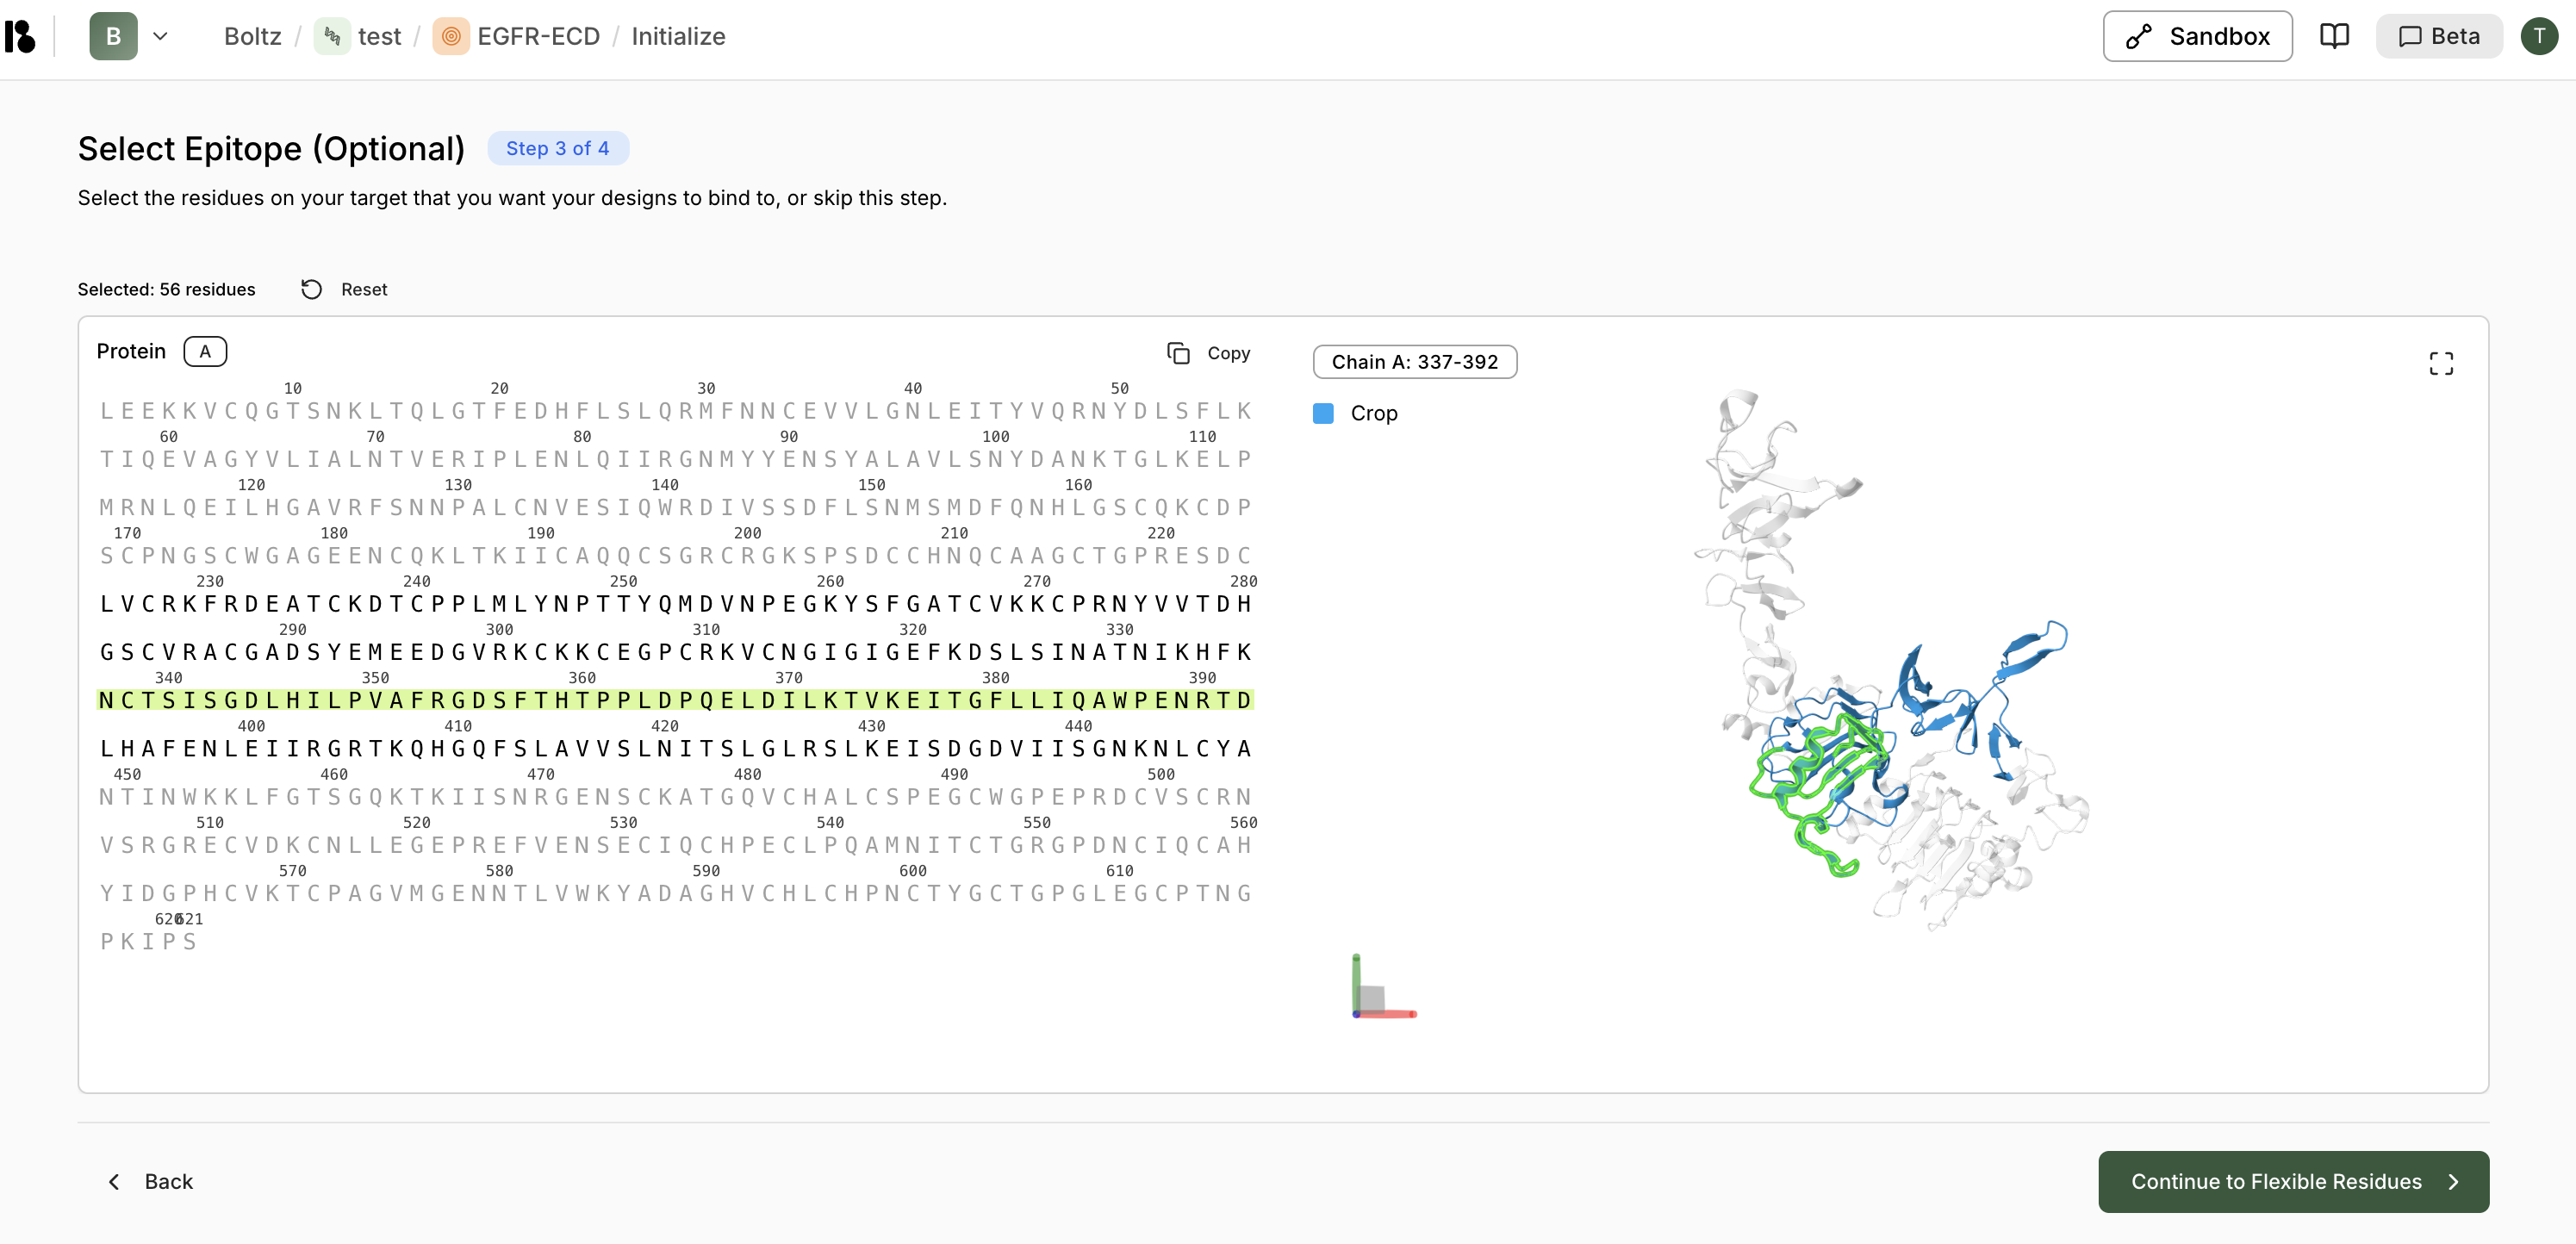
- This step is optional—skip if you don’t want to specify an epitope
- Selected residues are highlighted in green in both sequence and 3D views
- Click “Reset” to clear selections
Step 4: Select Flexible Residues (Optional)
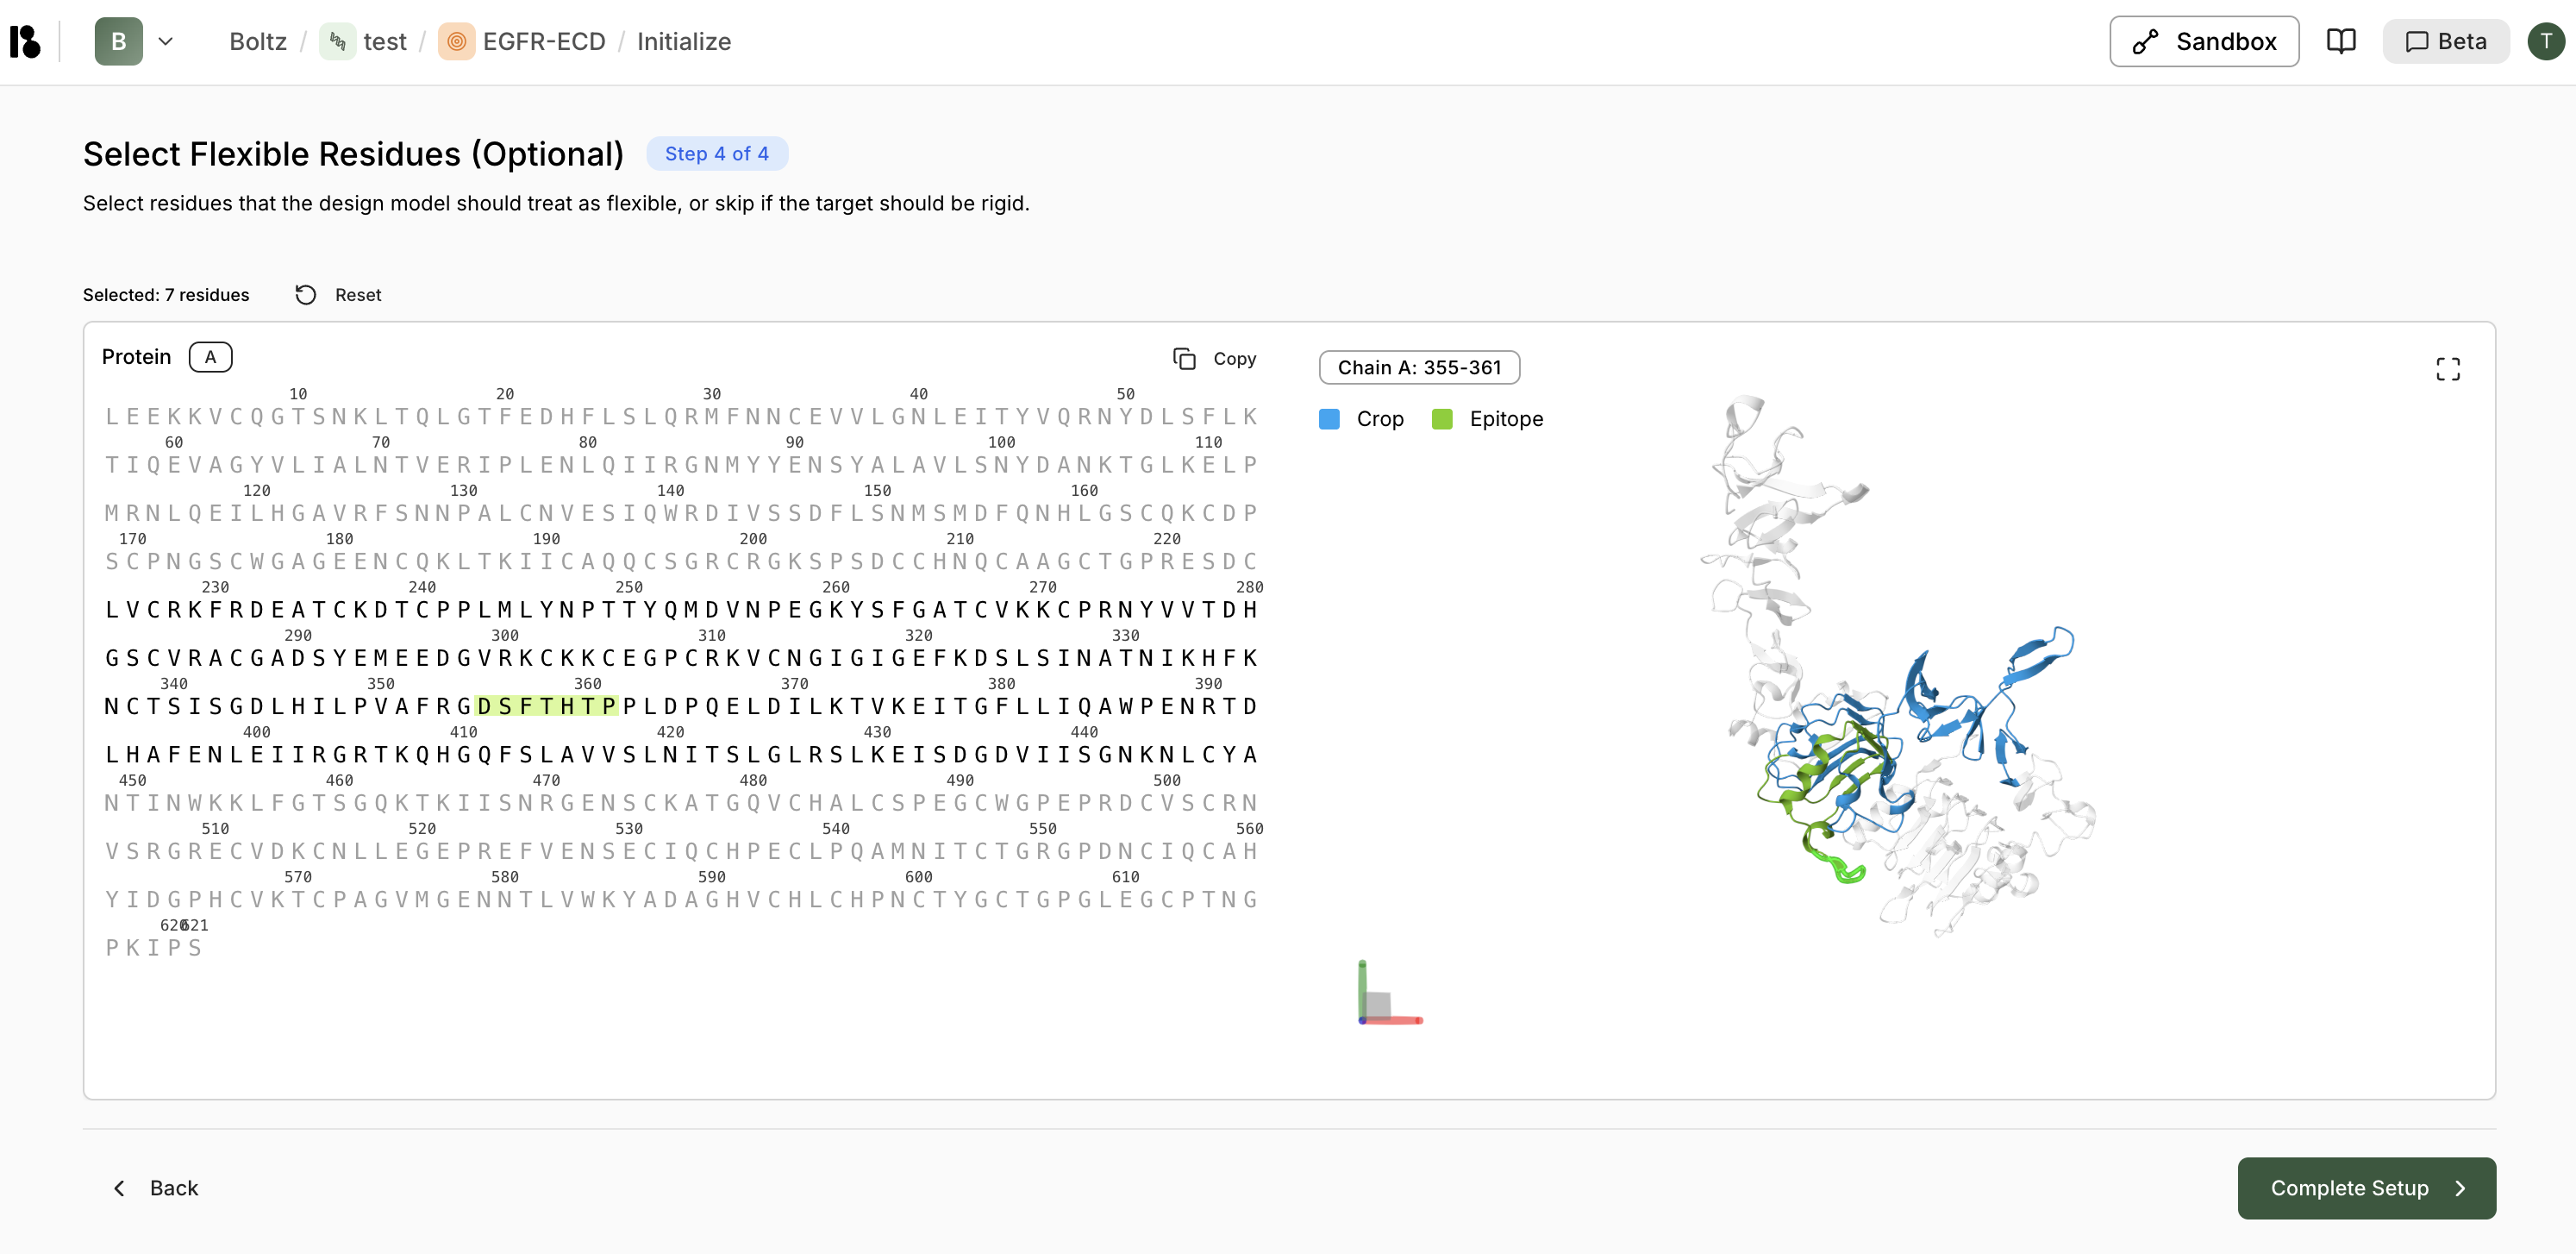
- This step is optional—skip if the target should be treated as rigid
- Flexible residues allow for conformational changes during binding
- Selected residues are highlighted in green
After Target Creation
Once your target is created, you’ll see options to:- Discover New Binders - Create a binder specification for your virtual screen
- Upload candidates from CSV - Evaluate known candidates using AI
- Skip for now - Add the binder specification later